👤🎯 Lead Management
The Lead Management module in C360 helps you track and manage potential customers from their first interaction until conversion.
To access it:
➡️ Go to Sales → Lead from the left-hand menu.
📊 Leads Overview
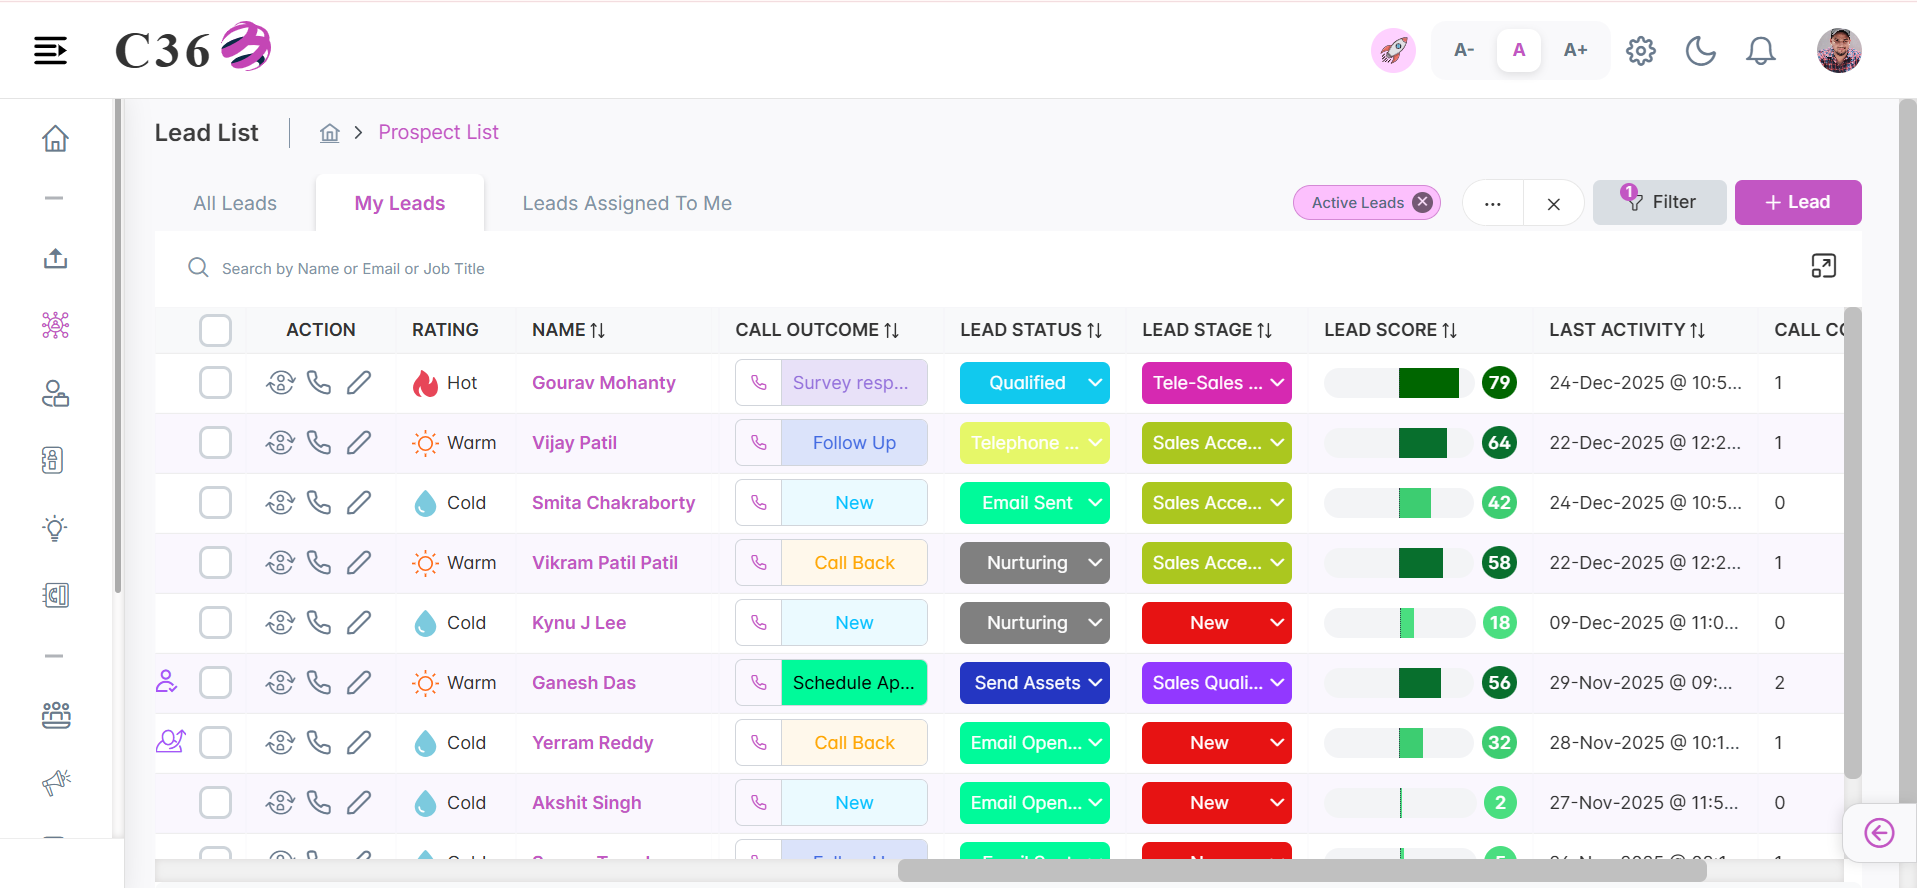
The Lead List displays all existing leads with quick actions and key details.
Columns in the List
| Column | Description |
|---|---|
| Action | Inline edit, convert, or cancel options |
| Name | Lead’s name |
| Company | Associated company |
| Phone | Contact number |
| Title | Job title |
| Email address | |
| Industry | Industry type |
| Call Outcome | Result of the most recent call |
| Status | Current status |
| Lead Rating | Quality indicator |
| Lead Stage | Stage in the funnel |
| Lead Score | Engagement-based potential value |
| Last Activity | Most recent interaction date |
- You can sort columns in ascending and descending order
- Click on the maximize icon beside the search bar to expand the list to fullscreen.
- You can view upto 200 records at a time in the list view by selecting the Number from pagination dropdown.
- You can't revert the lead back from archive to active once it is archived.
- You can't perform any action on the archived lead except download.
🔄 Lead Lifecycle
Below is the typical journey of a lead in the system:
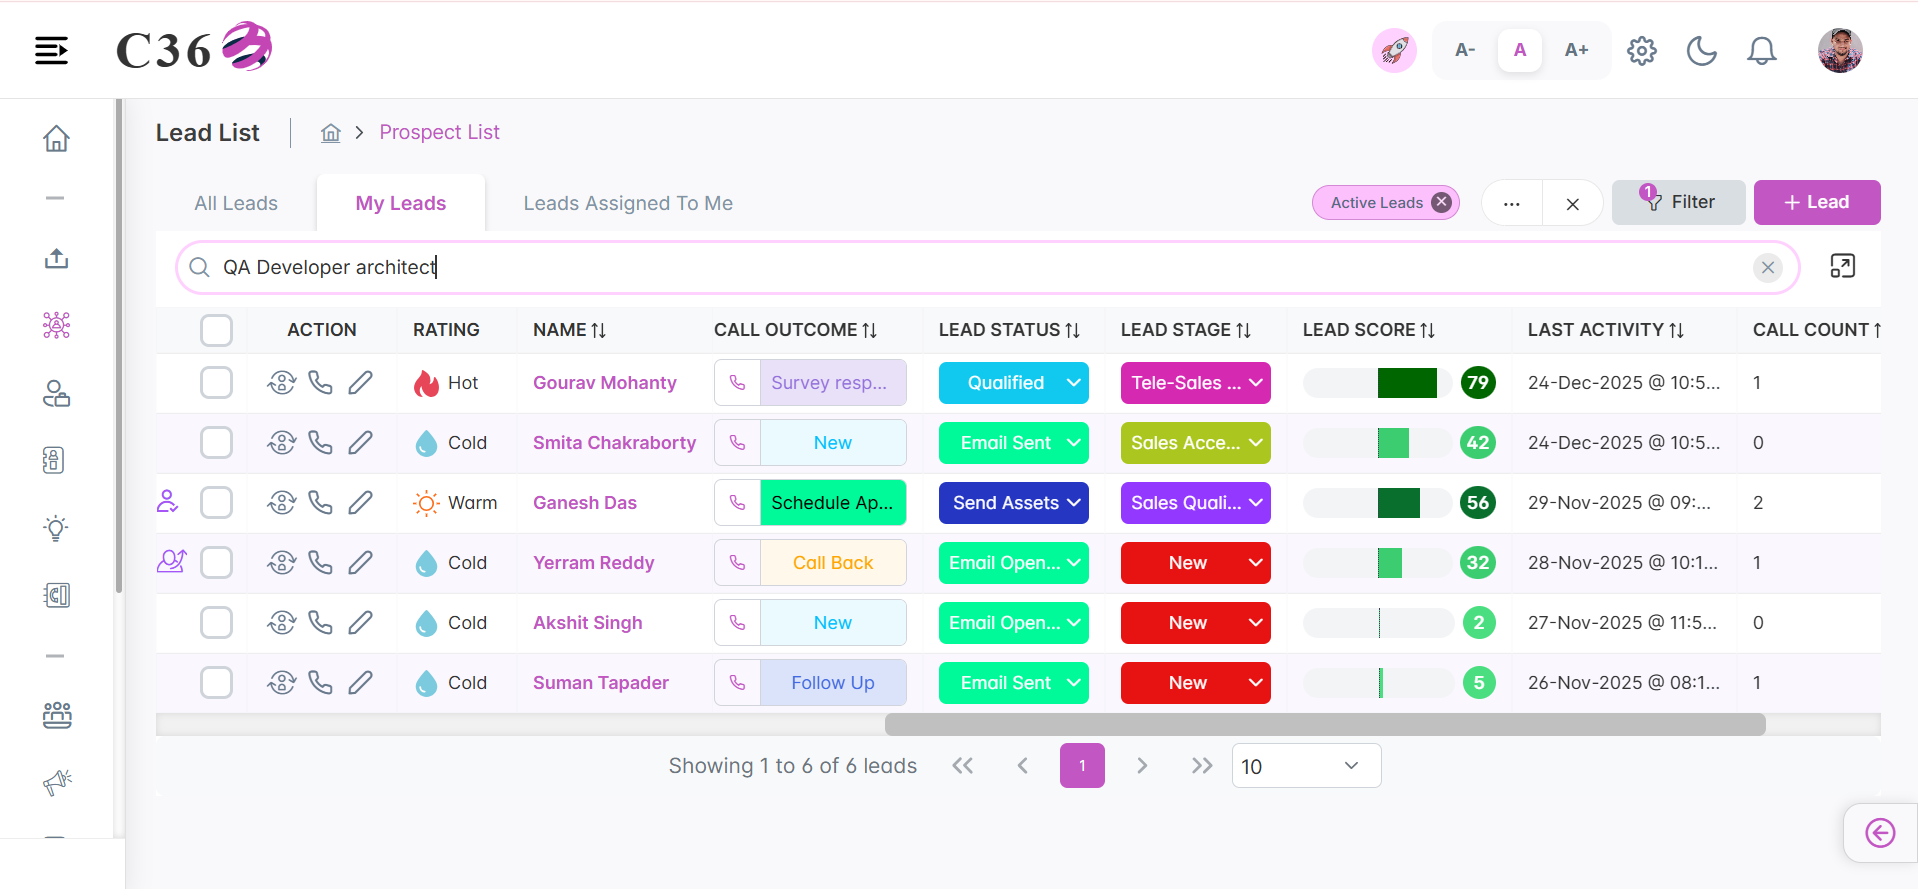
🔍 Searching for Leads
- Enter keywords in fields such as Name, Title, Email, Phone, Company Phone.
- Press Enter or click the Search icon to run the search.
🎛️ Filtering Leads
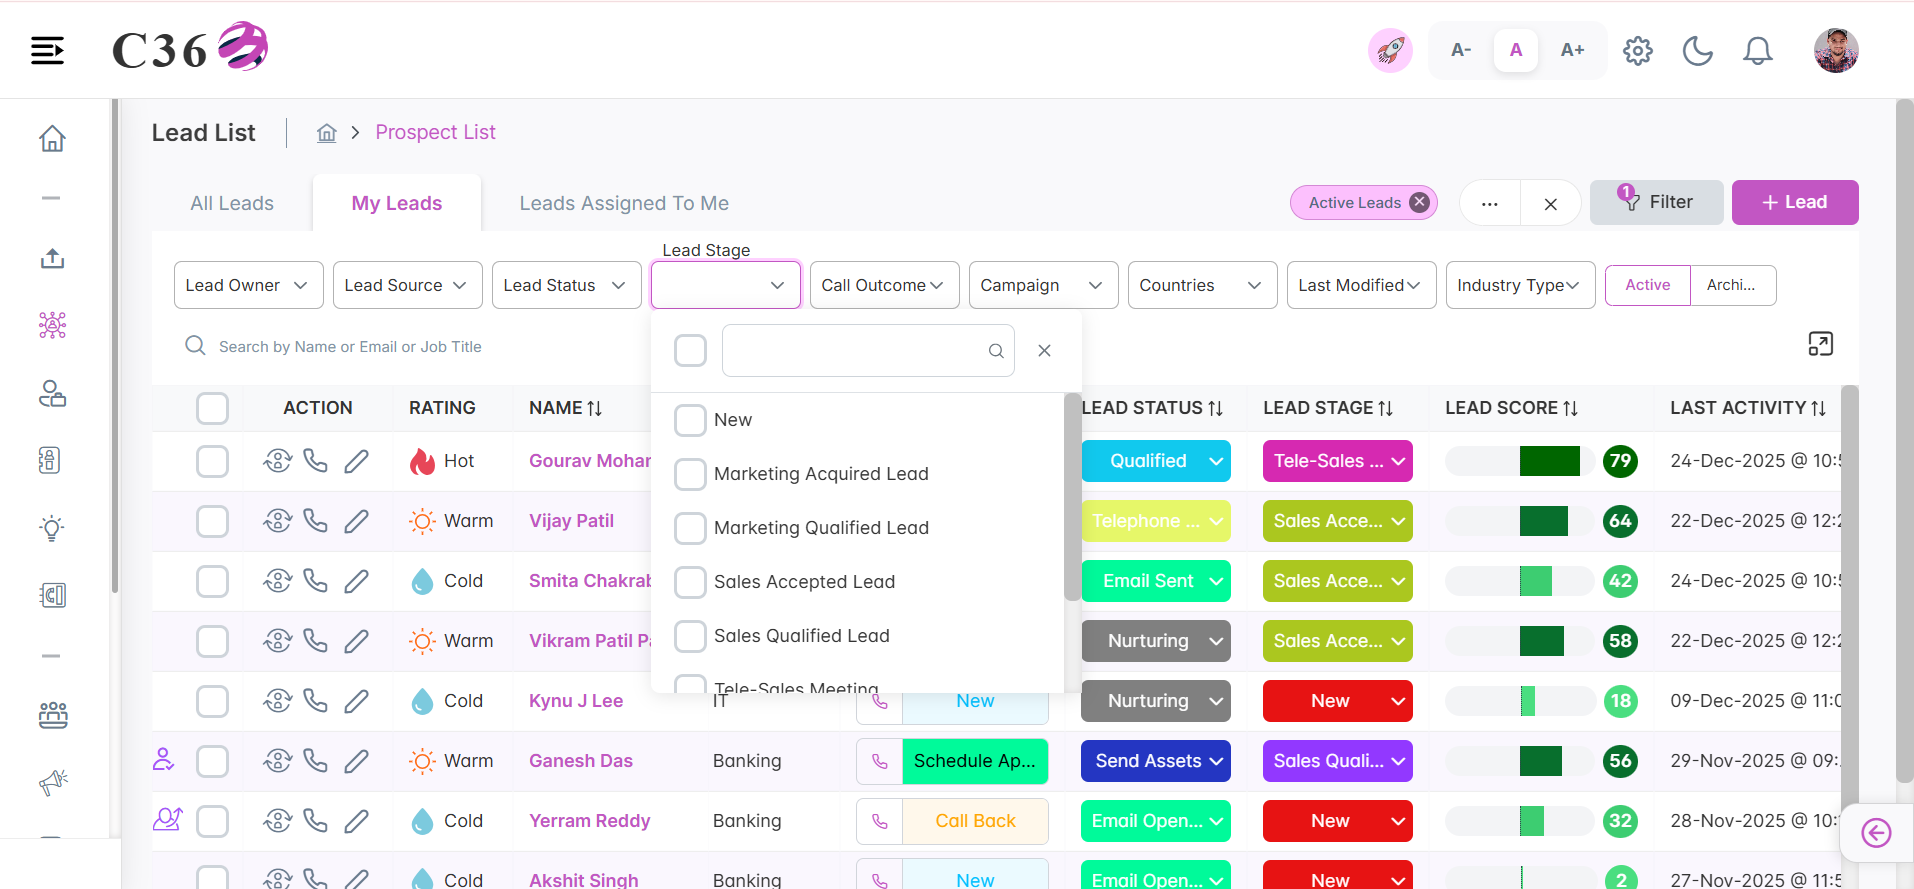
You can filter leads by:
Click to view available filters
- Lead Source → Where the lead originated. - Lead Status → Current working status. - Lead Stage → Lifecycle stage. - Call Outcome → Logged call results. - Country → Geographic location of the lead. - Last Modified Date → When the lead was last updated. - Industry → Business vertical.
Other filter options include:
- Viewing Active or Archived Leads using the toggle switch.
- All Leads/ My Leads / Leads Assigned To Me
- All Leads: Created By me/Assigned to me/Created By below users.
- My Leads: Created By me
- Leads Assigned To Me: The Lead which was assigned to me by someone.
📊 Lead Statuses
Leads move through two parallel journeys:
- Marketing Statuses → Engagement-driven states (emails, forms, assets, events)
- Sales Statuses → Qualification and conversion pipeline
📈 Marketing Flow
🏷️ Sales Flow
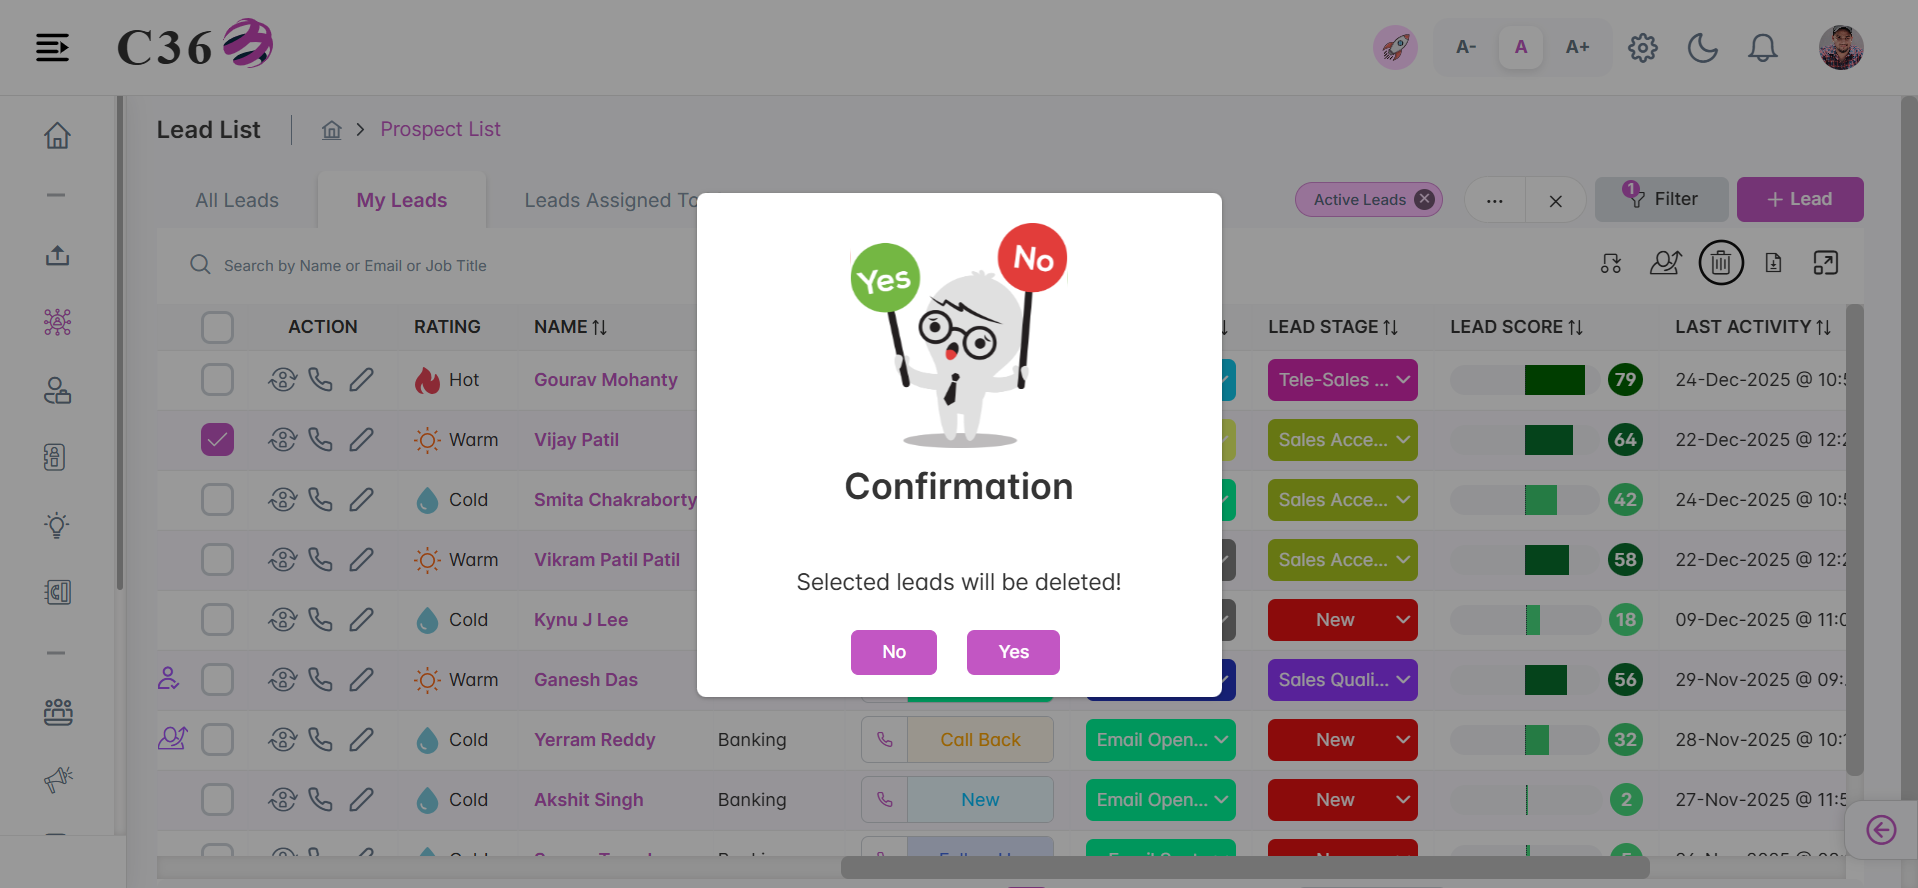
🗑️ Deleting Leads
- Select the checkbox(es) beside the leads you want to delete.
- Click the Delete icon .
- Click on Yes from the confirmation pop up if you want to delete.
⬇️ Downloading Leads
- Select the checkbox(es) beside the leads you want to download.
- Click the Download icon to export them as a spreadsheet.
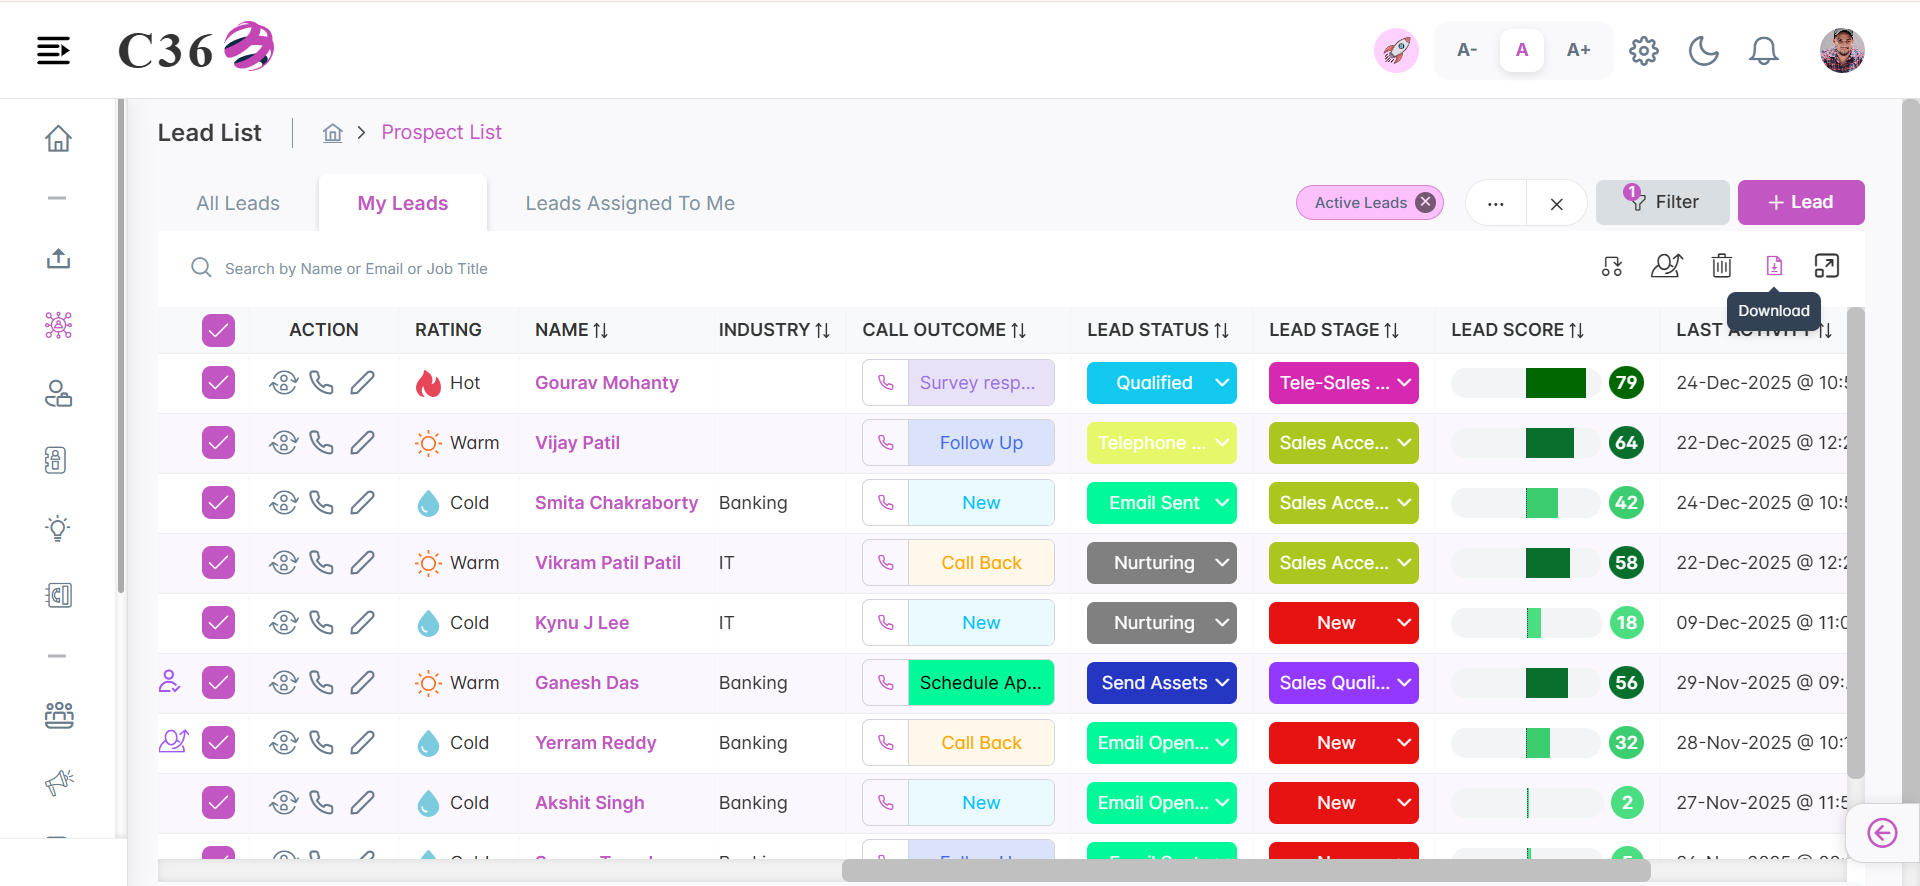
- You can download upto 1000 leads at a time.
👁️ Viewing Lead Details
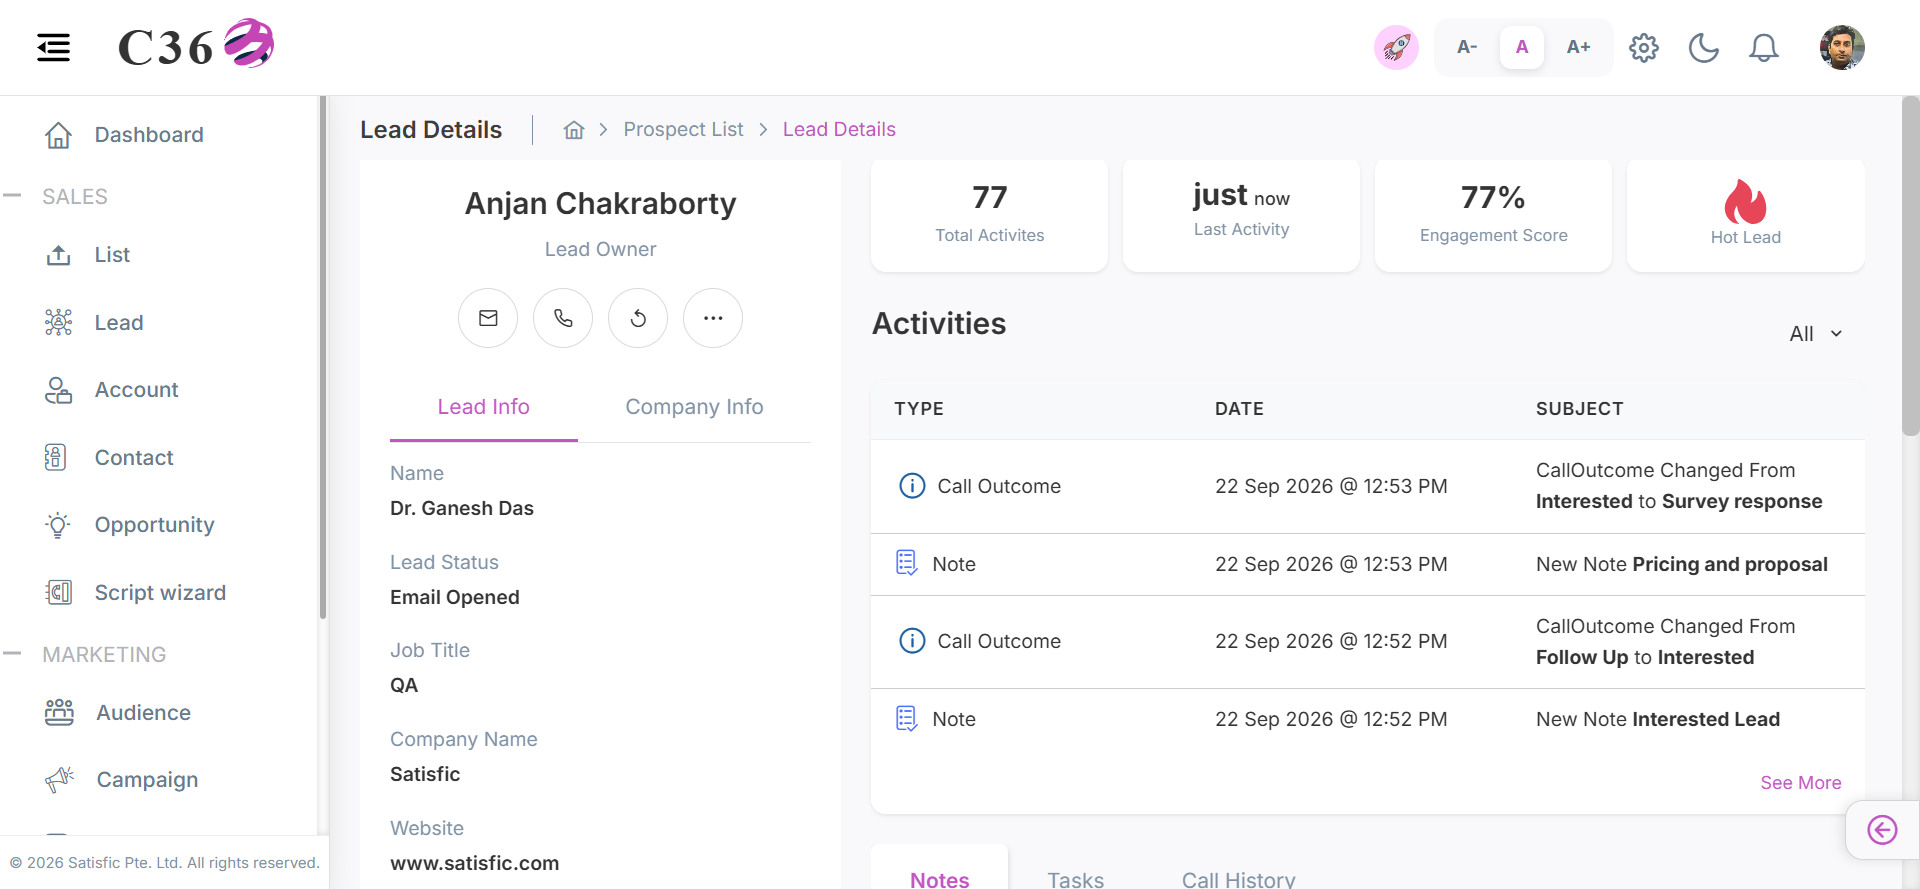
Click a lead’s name to open the Lead Detail page. From here you can:
- Edit lead information
- Convert into a Contact (and optionally an Opportunity)
- Change the Owner
- Assign to a User or Group
- View related Notes, Tasks, and Call History
- Can track the Lead Activity.
- Click on See More to view All Activities and can filter the activities based on activity type.
🔄 Converting Leads
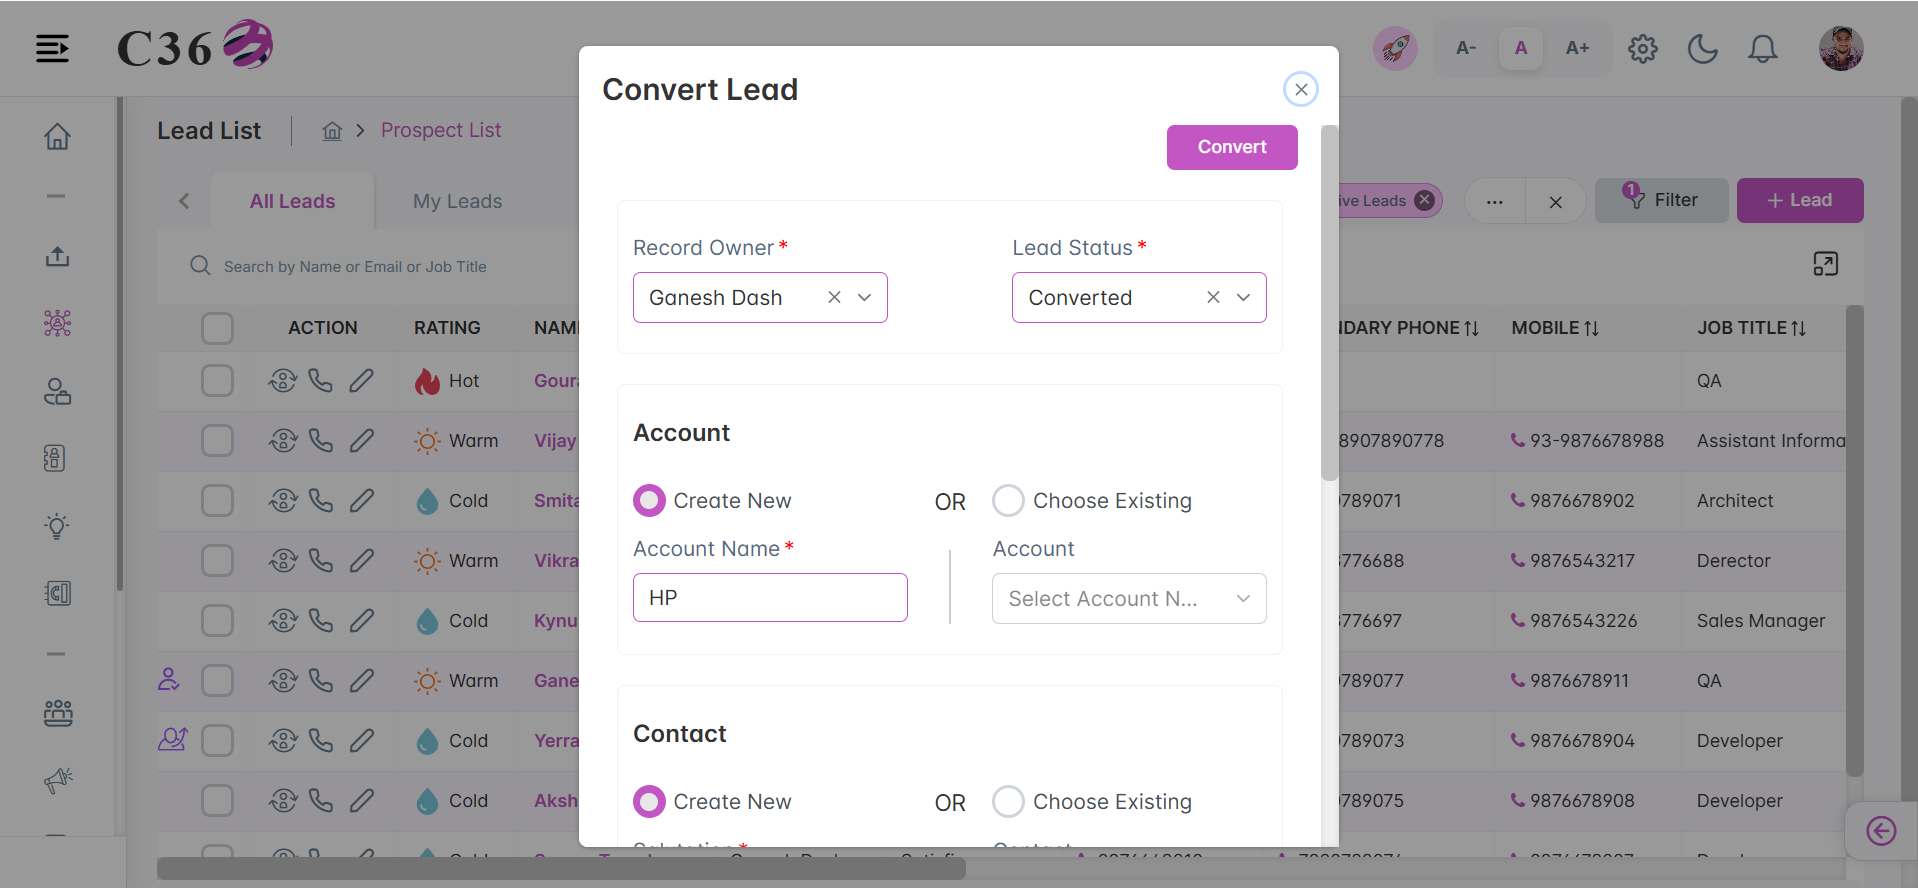
When a lead is qualified:
- Click Convert to Contact.
- Review or edit pre-filled details.
- Choose:
- Create a New Contact
- Link to an Existing Contact
- Optionally create an Opportunity
If you skip the opportunity step, only a contact will be created.
🧙 Call Script Wizard
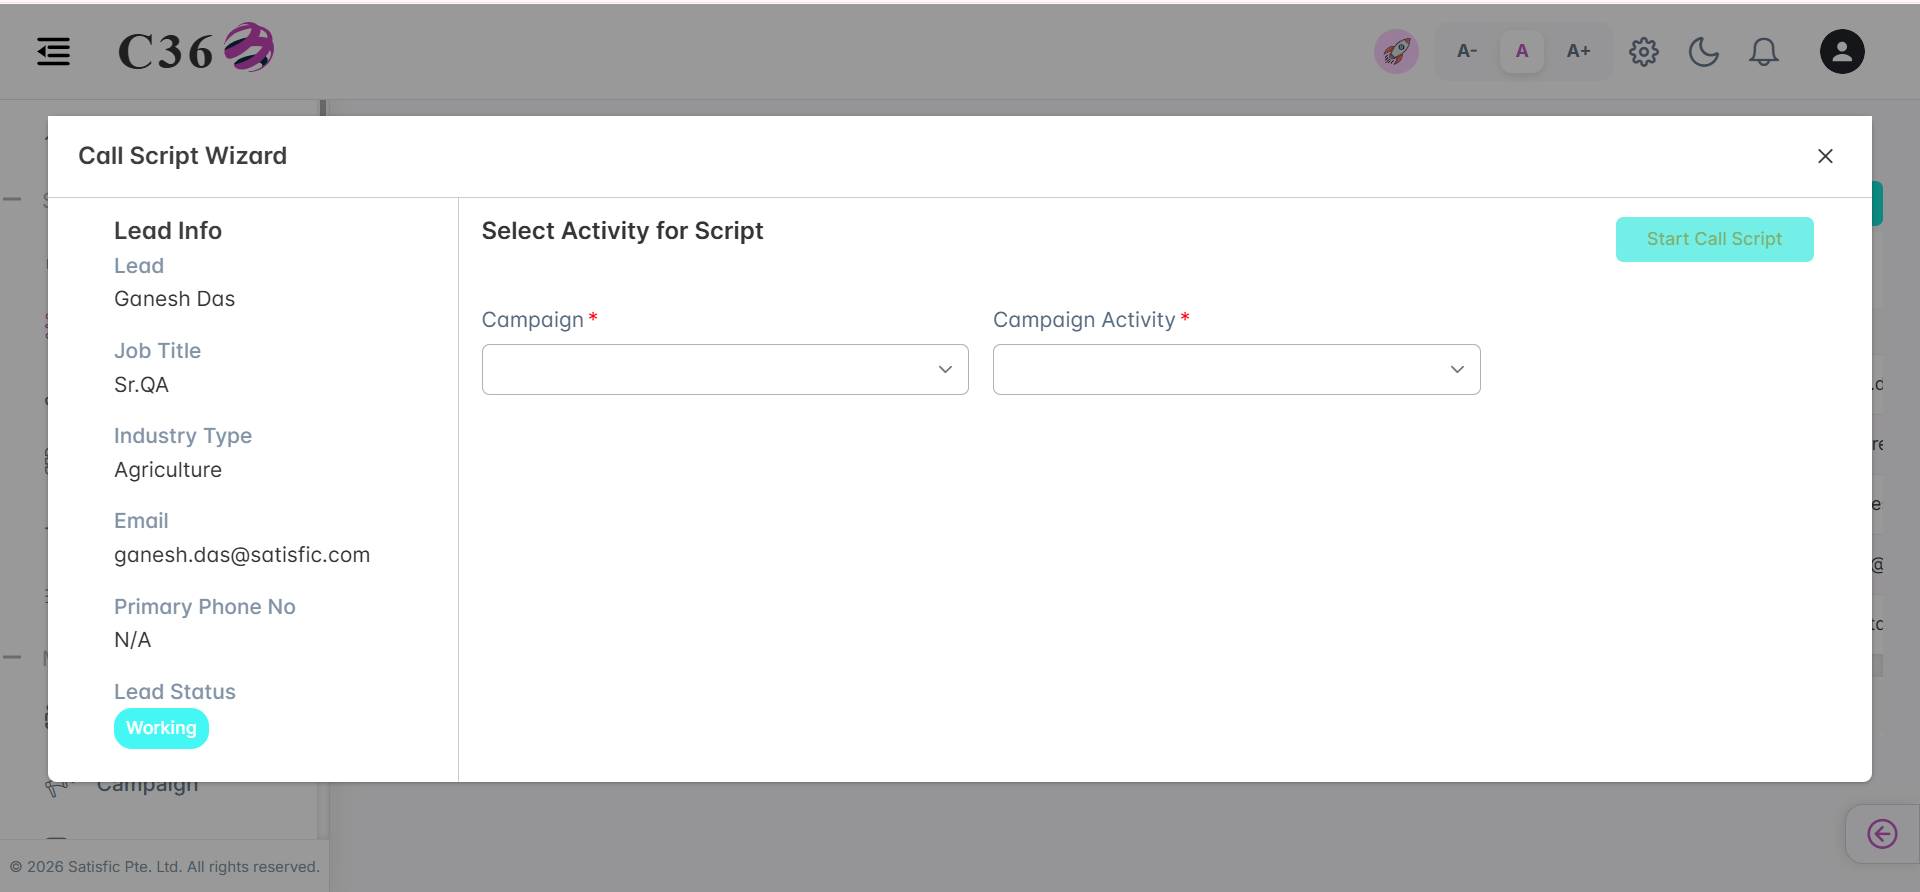
The Call Script Wizard guides sales representatives through a structured conversation with a lead. It ensures consistency and helps capture key information during calls.
🏃 How to Run a Script
- Open the Lead List page.
- Click on the "Call Script" Icon under the "Action" Column for the desired lead.
- Select the Campaign and its activity and click on Start Call Script.
- Follow the on-screen prompts to ask questions and record responses.
- Additionally you can note the live conversation .
- Can capture the BANT(Budget,authority,timeline,need) along with competitor to qualify a prospect.
- Can change the Status , stage and call outcome as per the conversation.
- all above actions you can able to see in the lead note list along with call summary once call script got executed and saved successfully.
- Click Save to save the call outcome and notes.
- You can schedule appointment by selecting the "schedule appointment" option from call outcome dropdown at the end step.
- You can follow up the lead and add task / assign to a lead by selecting the "follow up" option from call outcome dropdown at the end step.
- You can send assets to the lead by selecting the "send assets" option from call outcome dropdown at the end step.
🔄 Script Execution Flow
You can find the desired lead for script execution by filtering through campaign and campaign activity. Follow the steps mentioned below:
- Click on the Filter button
- Click on the campaign dropdown.
- Select the campaign to find the related lead .
Click to view more effortless way to find lead associated with a campaign activity
- Click on the campaign activity dropdown and select the activity if you want to find the related lead for an activity.
📞 Call Outcome Management
You can manage the call outcome for a lead by following the steps below:
- Go to Lead List → Click on the "Call Outcome" icon for the lead you want to dial out.
- Select the Phone Number and change the Call Outcome from the dropdown .
- Add Notes based on call conversation and click on Save Call Outcome to update the call outcome for the lead.
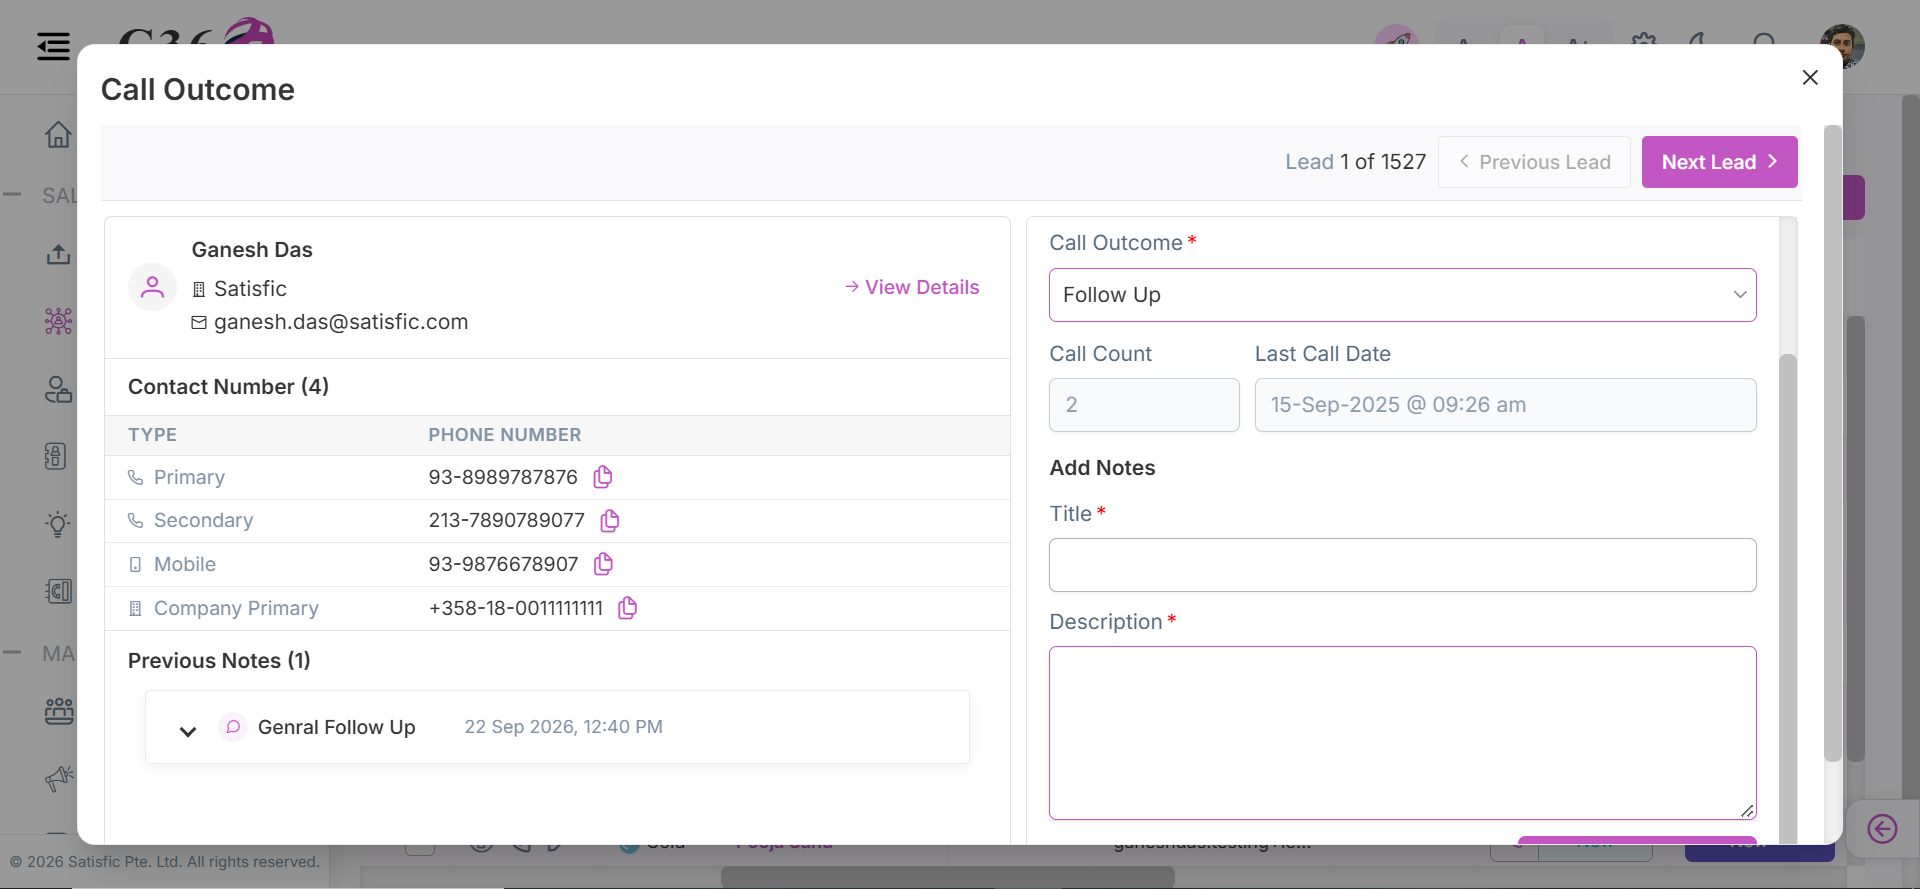
Click To See Additional Actions For Call Outcome Management
- Can view the numbers asscoiciated with the lead.
- Can Switch to the next lead by clicking on the "Next Lead" icon from the action column for calling actiity .
- Can copy the numbers associated with the lead.
- Can navigate to the lead details page by clicking on the "Lead Details" link .
🕘 Calling History
You can view the calling history for a lead by following the steps below:
- Go to Lead Details → Click on the "Call History" tab to view the calling history for the lead.
- You can view the the following calling details for that lead:
- Last Call Date and Time
- Total Call Made
- Latest Call Outcome
- Numbers Available
- Call Attempts
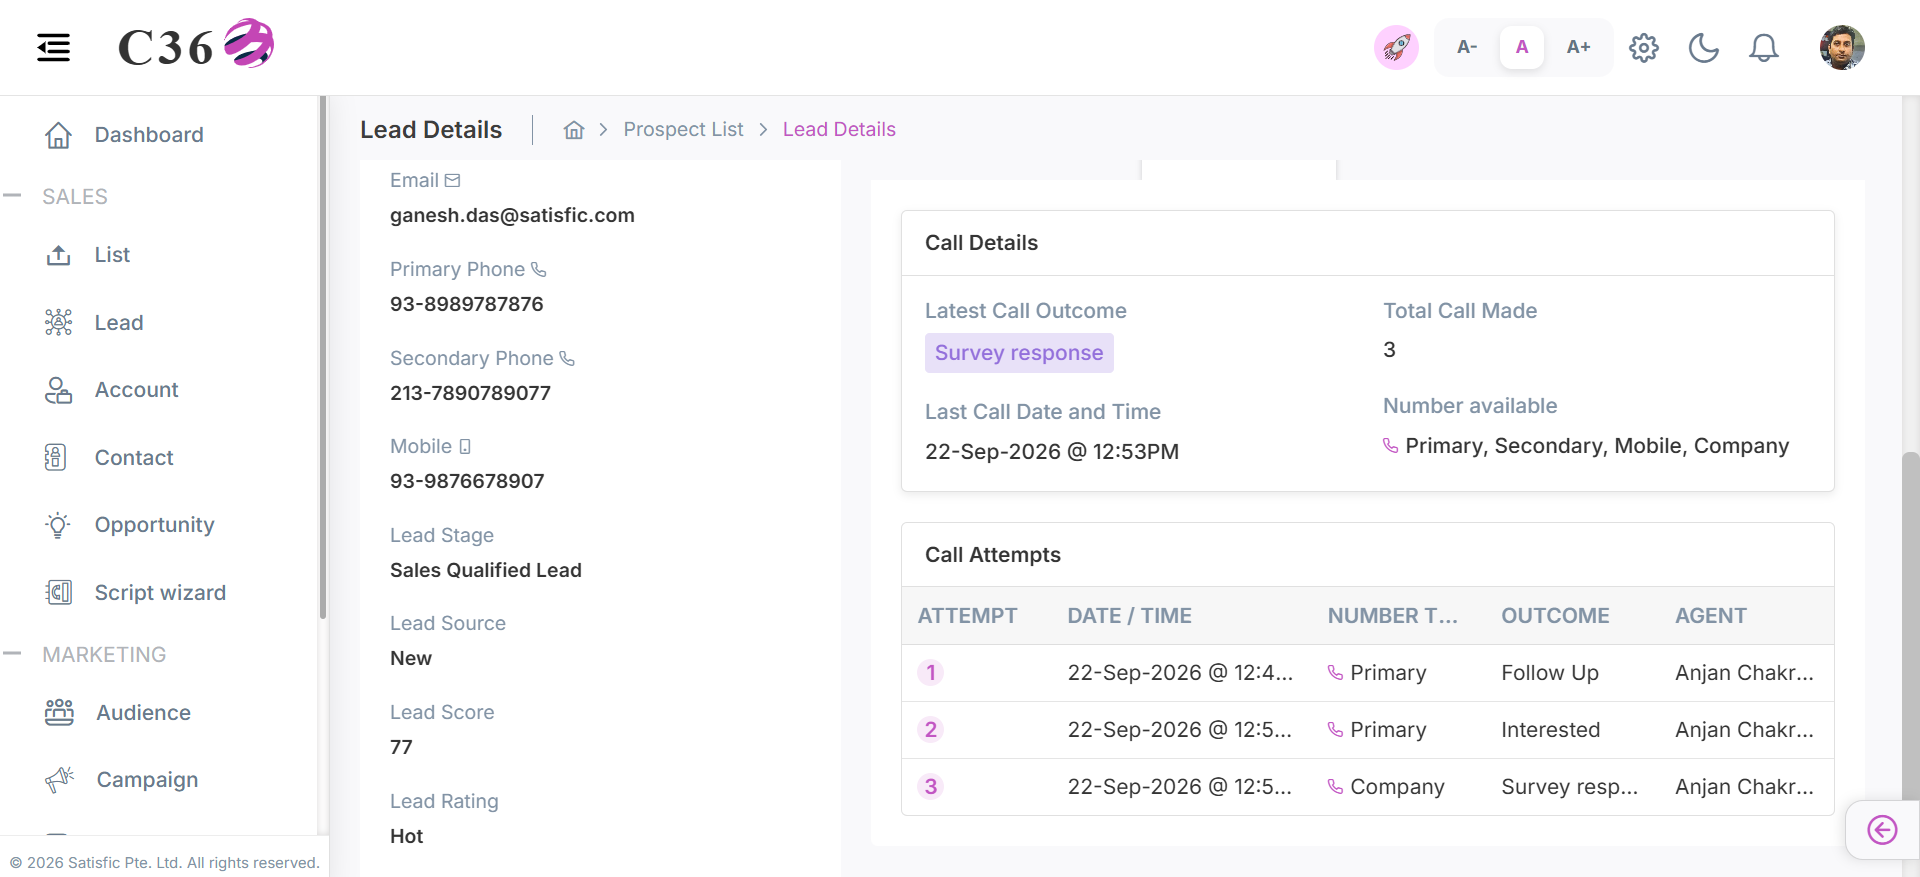
- You can see only the latest call details .
👥 Custom Campaign Audience
You can create a Campaign audience List for your campaign by filtering leads based on specific criteria. This allows you to target the right leads for your marketing efforts.
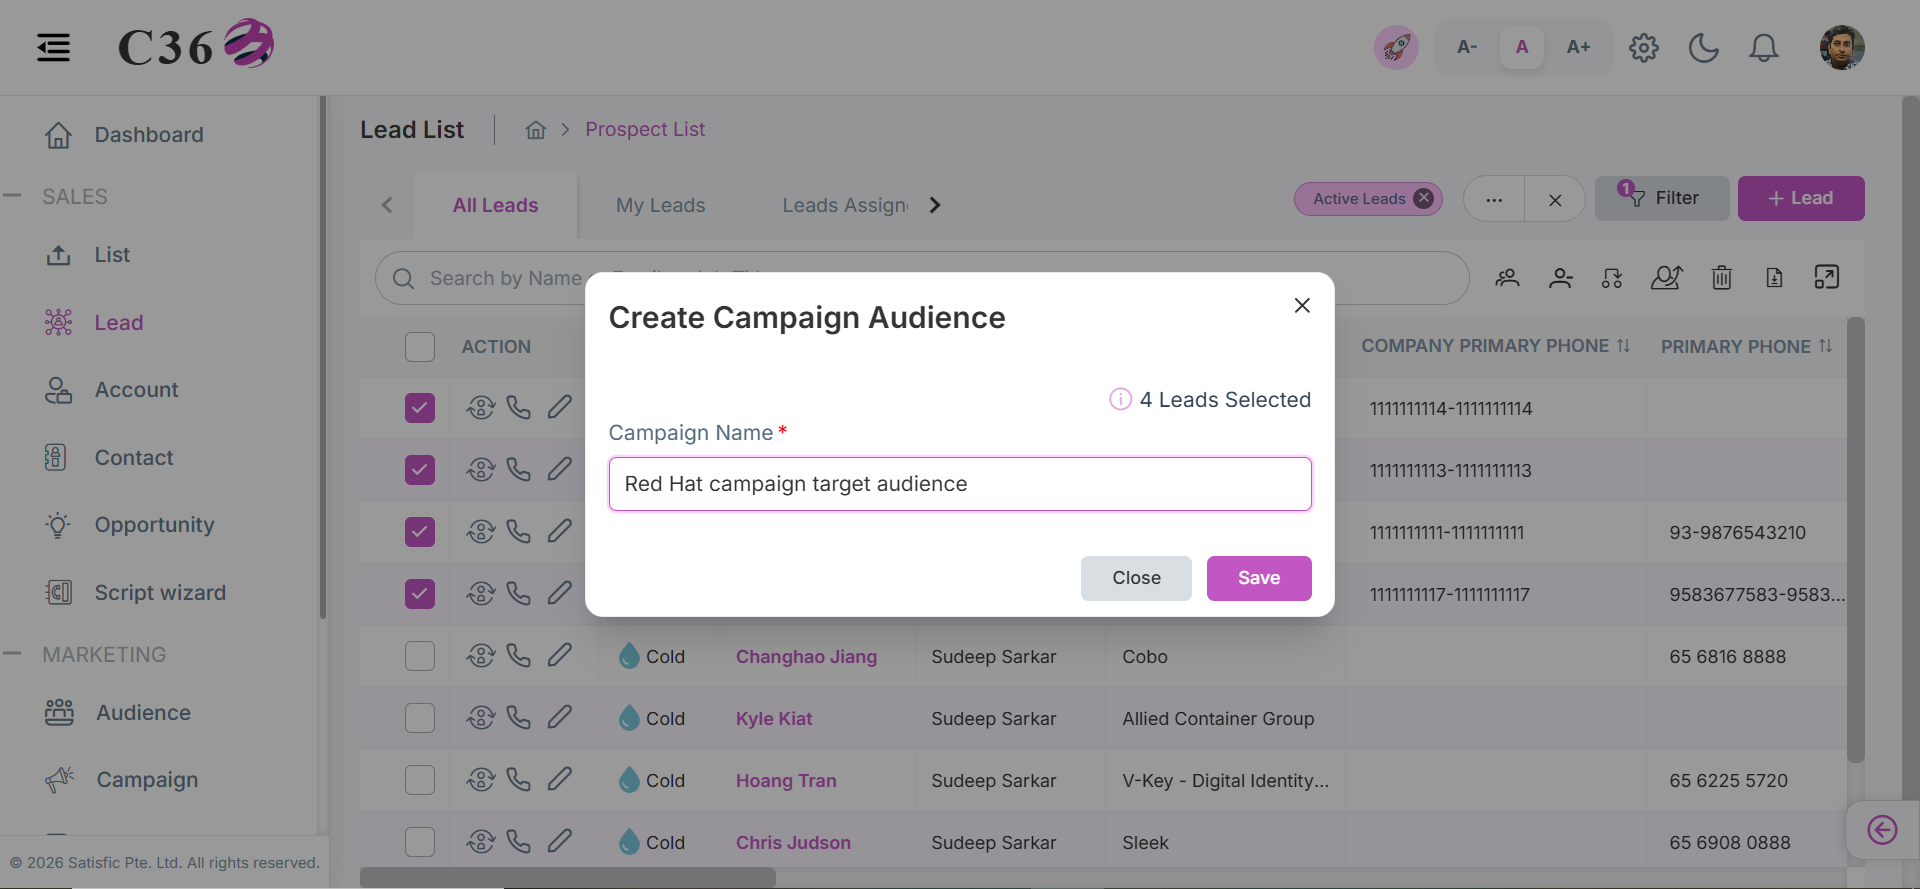
- Select the "Lead" You want to add to the campaign audience.
- Click on the "Add to Campaign Audience" icon from the action column.
- Give the campaign audience list name and click on "Save" to create the campaign audience list.
👥↔️ Assigning / Changing Lead Owner
- Assign Lead
- Change Owner
- Select leads from the list.
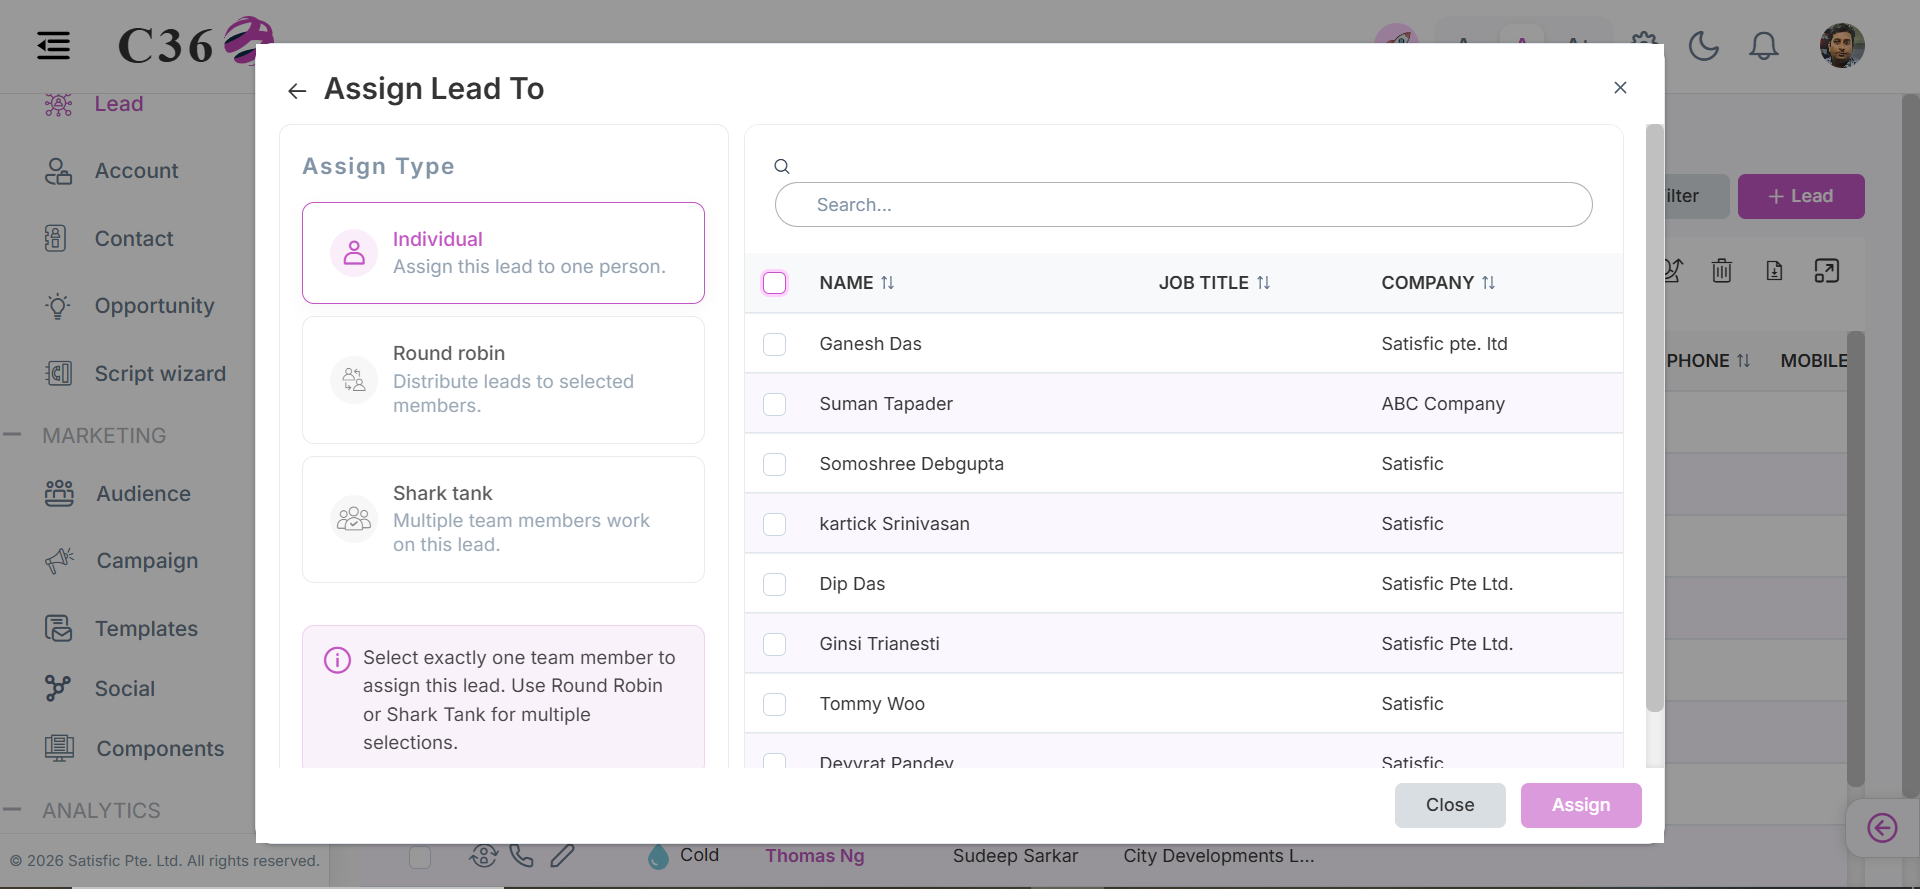
- Click Assign To → choose a user → click Assign.
👤 Individual Assign
Assign a selected lead manually to a specific user.
- Only one team member can be selected for individual assignment. Please select a single member. For multiple selections, choose Round Robin or Shark Tank.
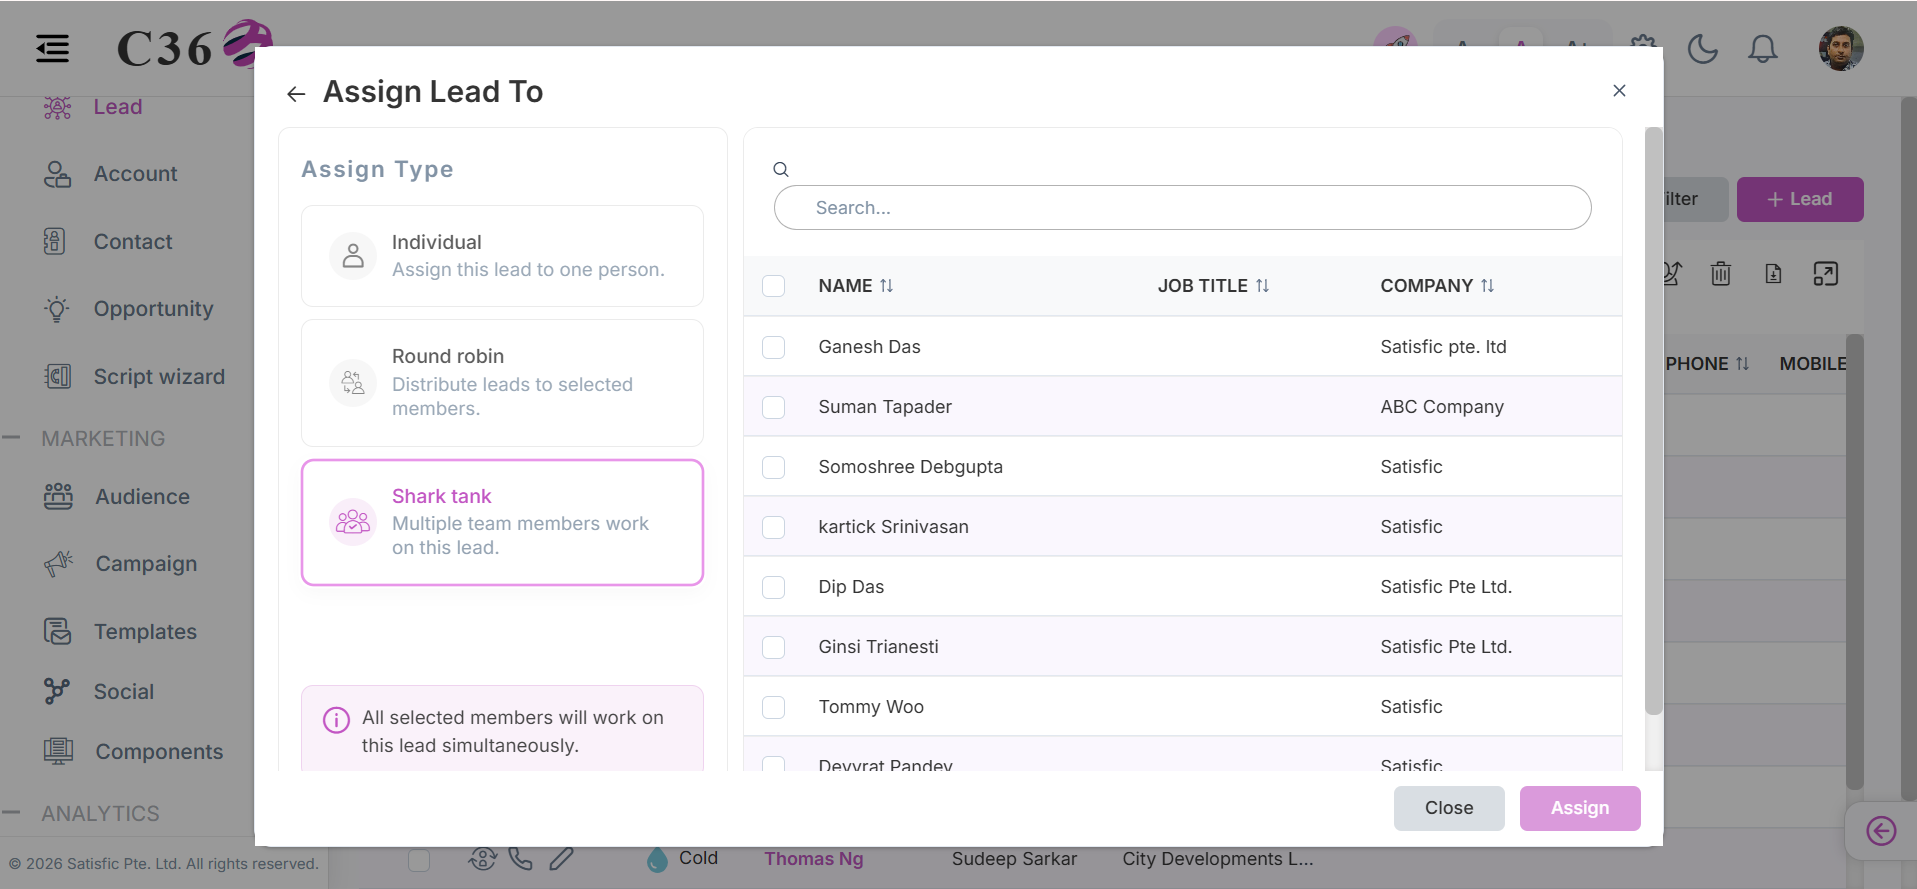
🦈 Shark Tank
Distribute leads among selected users based on the Shark Tank assignment approach.
- Shark Tank: A lead is simultaneously offered to multiple eligible users, and the first user to accept the lead becomes the assignee.
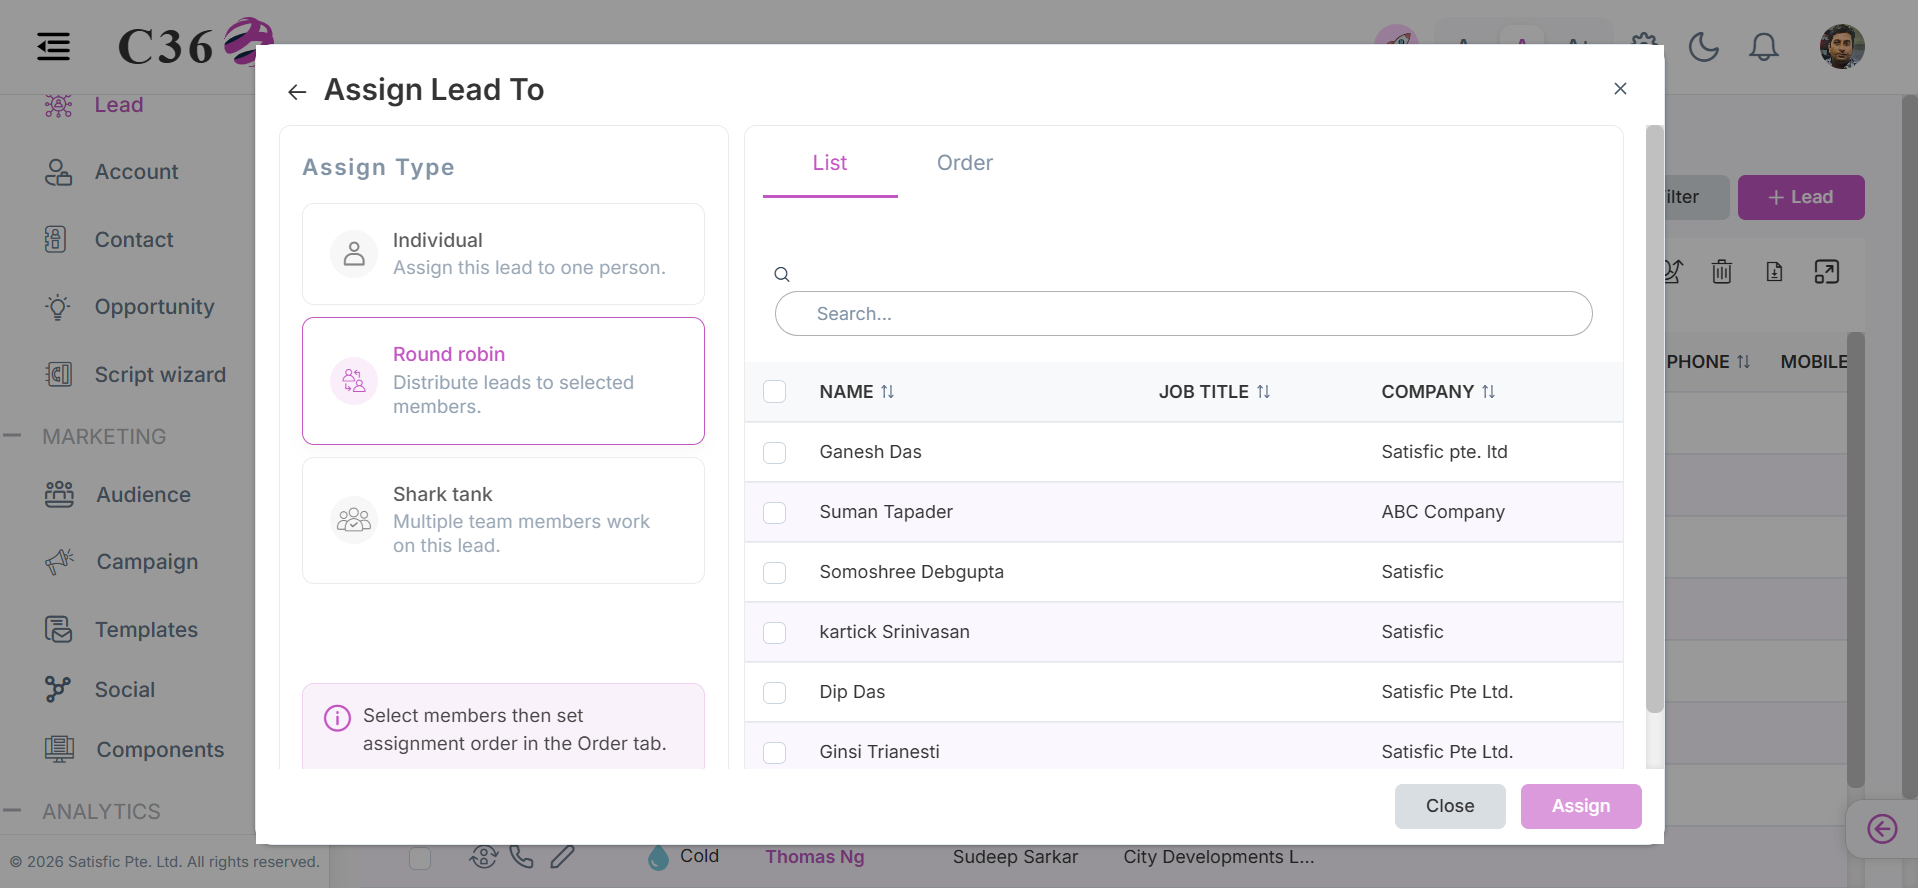
👤🔄 Round Robin
Automatically distribute leads sequentially among the selected users to ensure an even assignment.
Round Robin Assign List
- Select the users to whom leads will be assigned in a round-robin manner.
Round Robin Assign Order
- Set the order of users for lead assignment. The system will assign leads to users in the specified sequence.
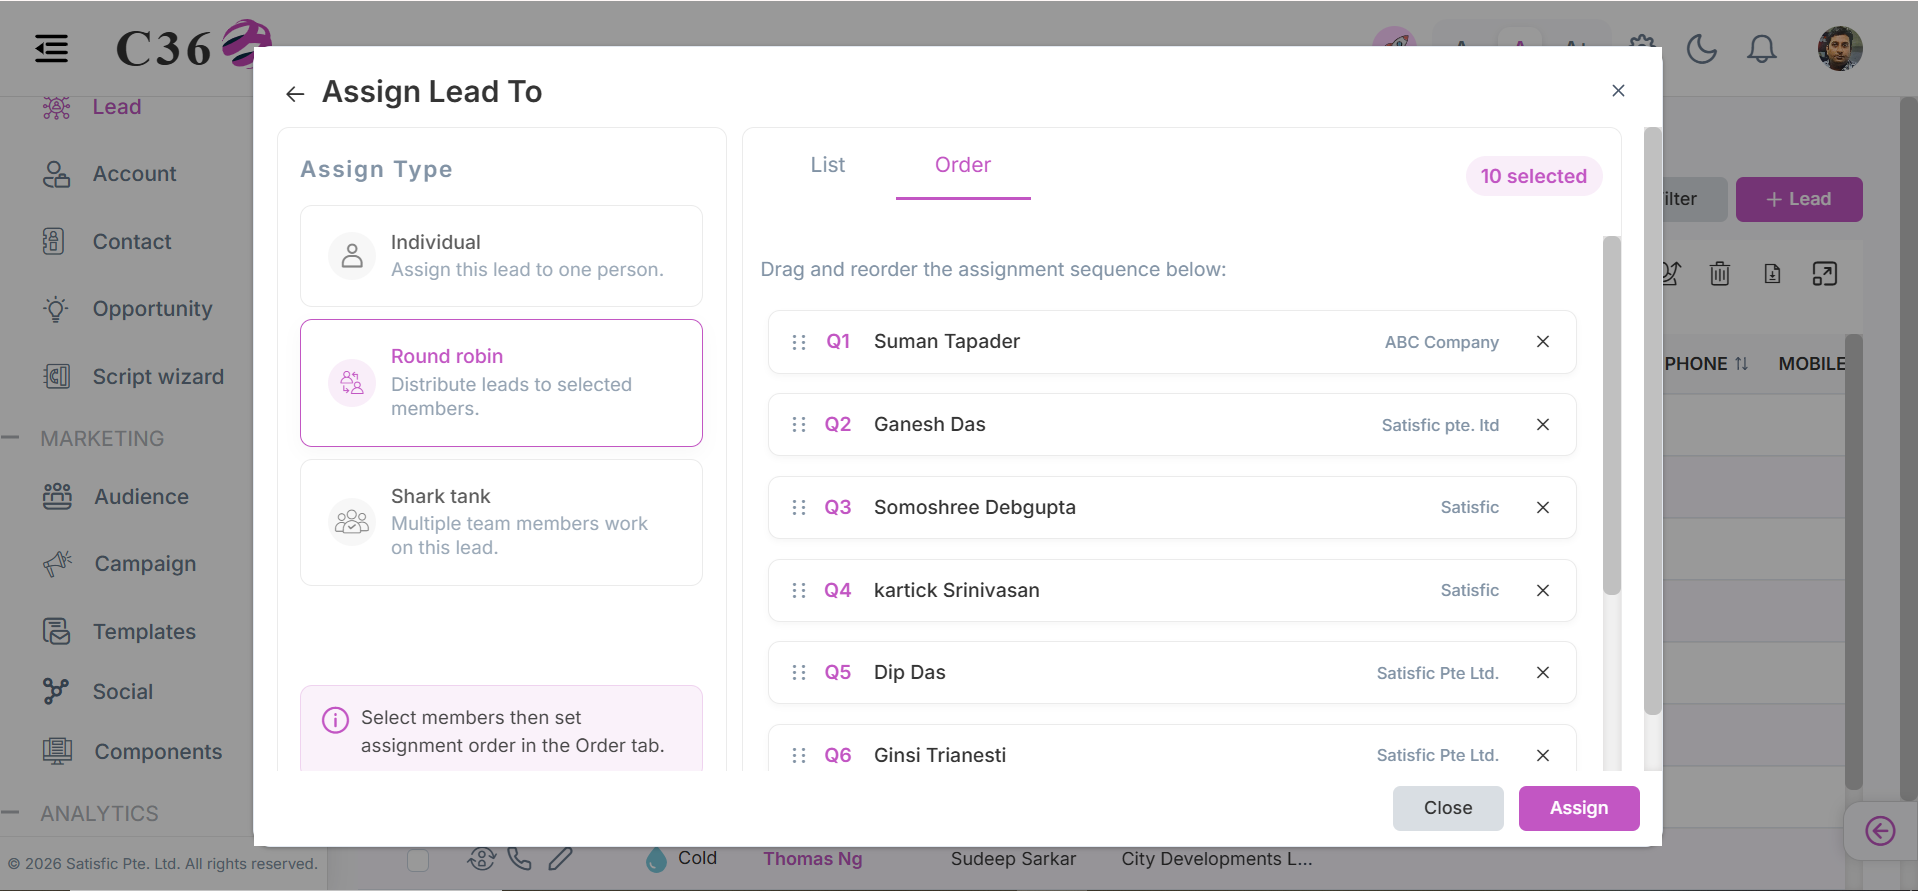
- Round Robin: Leads are automatically distributed among eligible users in a sequential rotation to maintain a balanced workload.
- You can assign upto 500 leads at a time.
- Select leads from the list.
- Click Change Owner → select user → click Confirm.
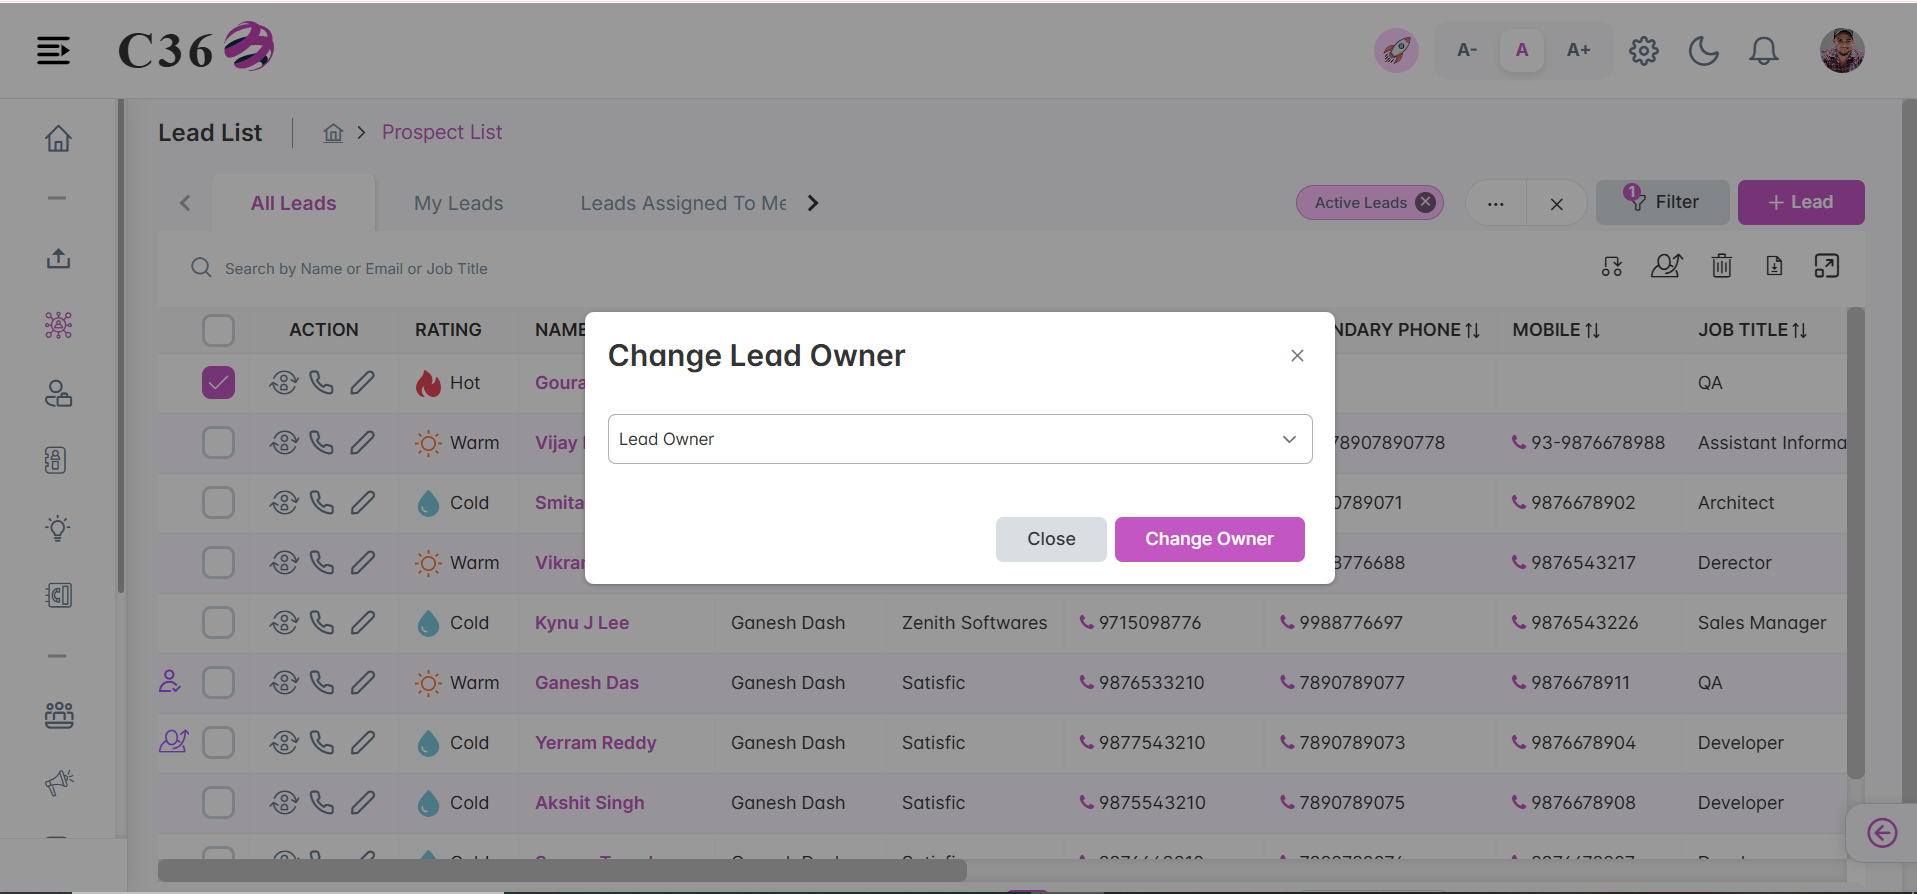
- You can transfer ownership of upto 500 leads at a time.
↩️👤 Revoke Lead assignment
You can revoke the assigned lead from the user and make the lead available for reassignment.
- Select the assigned lead you have assigned using individual assignment or round robin or shark tank format from the lead list.
- Click on the Revoke icon from the action column.
- Check the staticstics of the revoked lead process and confirm the revoke.
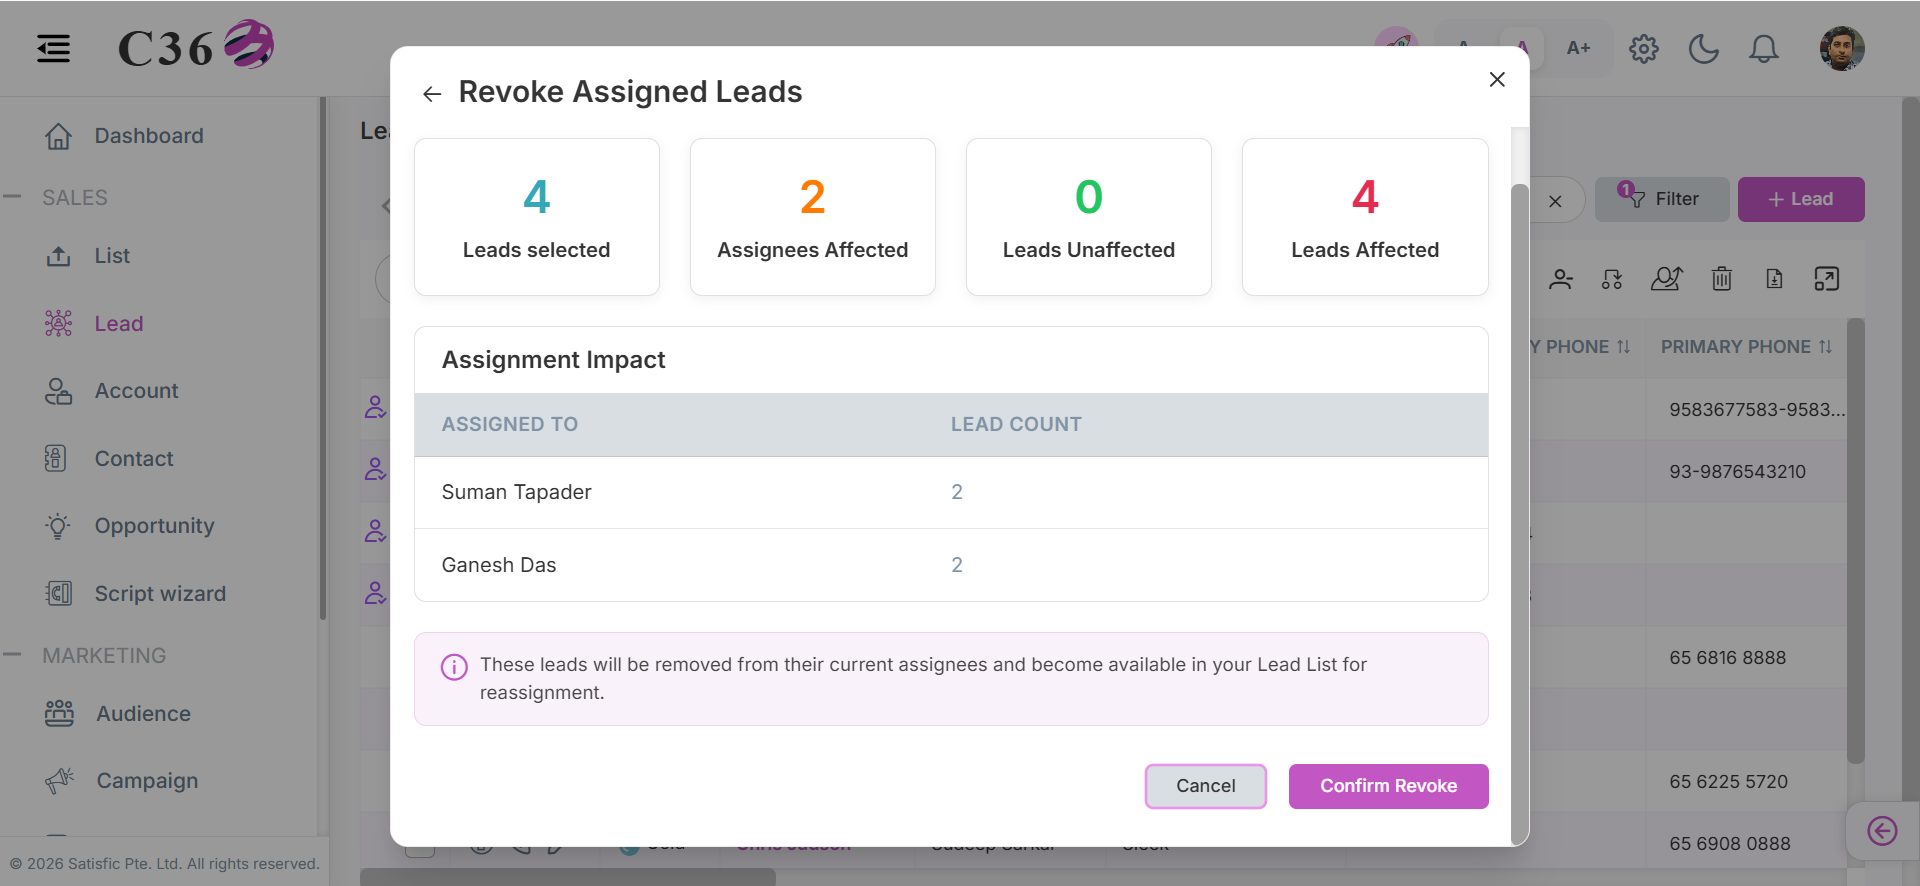
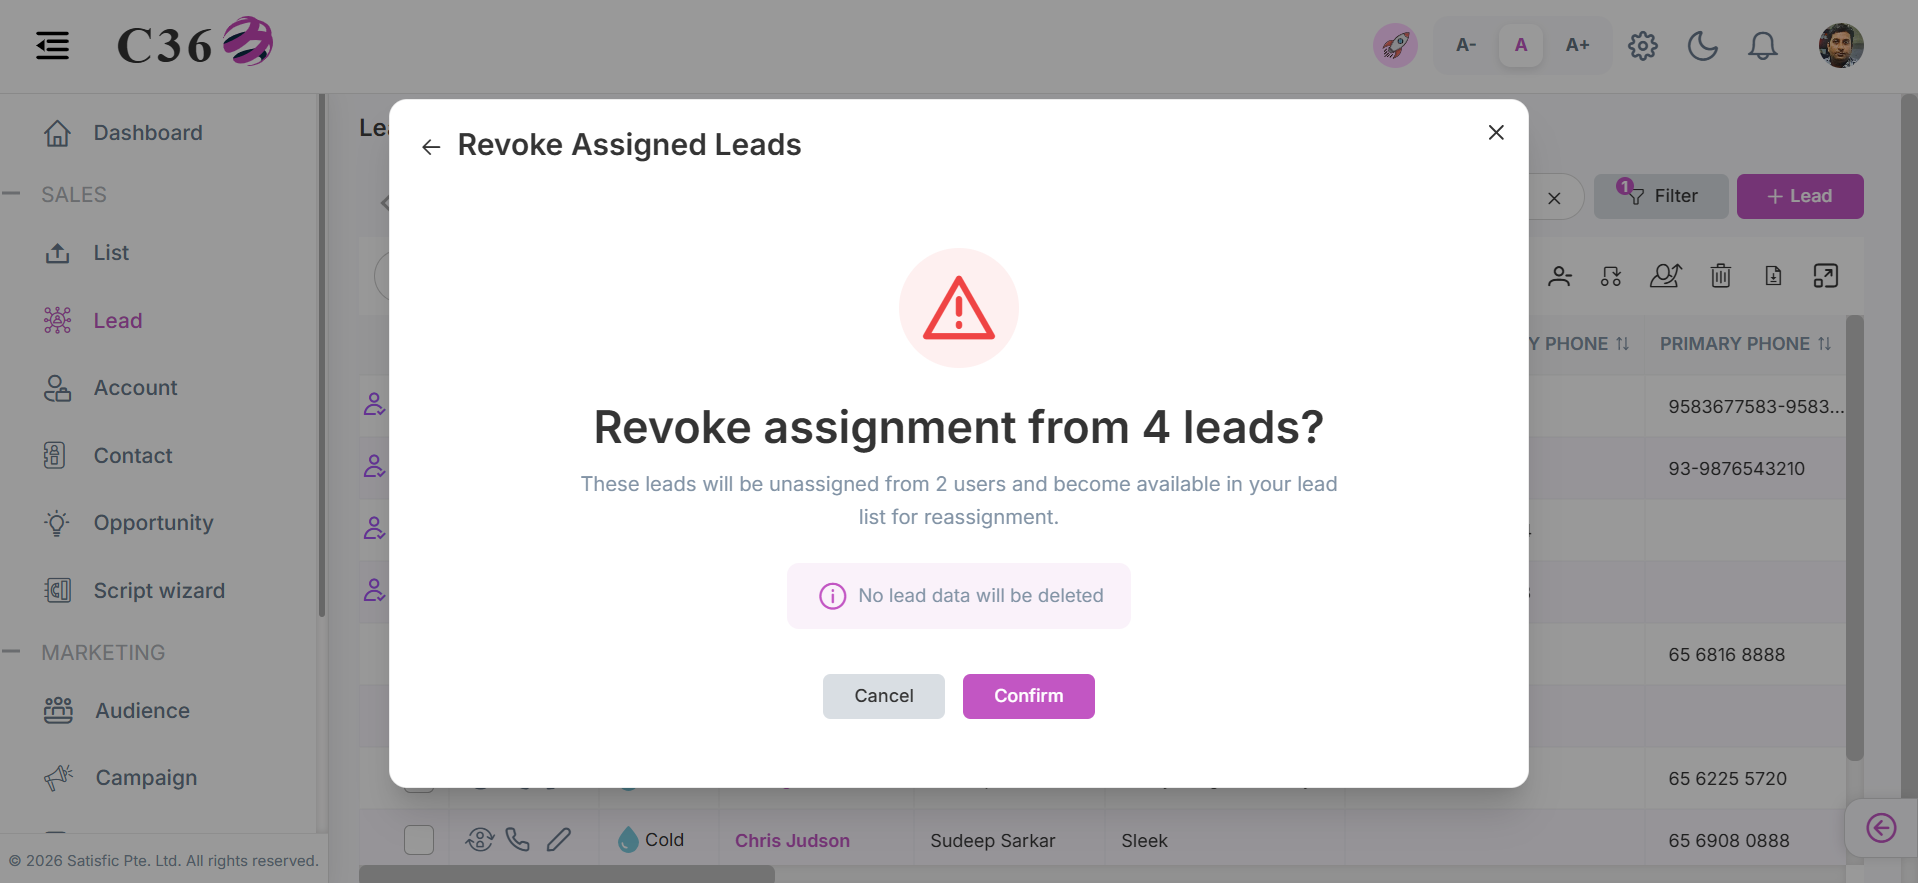
- Check the assignement revoked from number of lead and "Confirm" the revoke process.
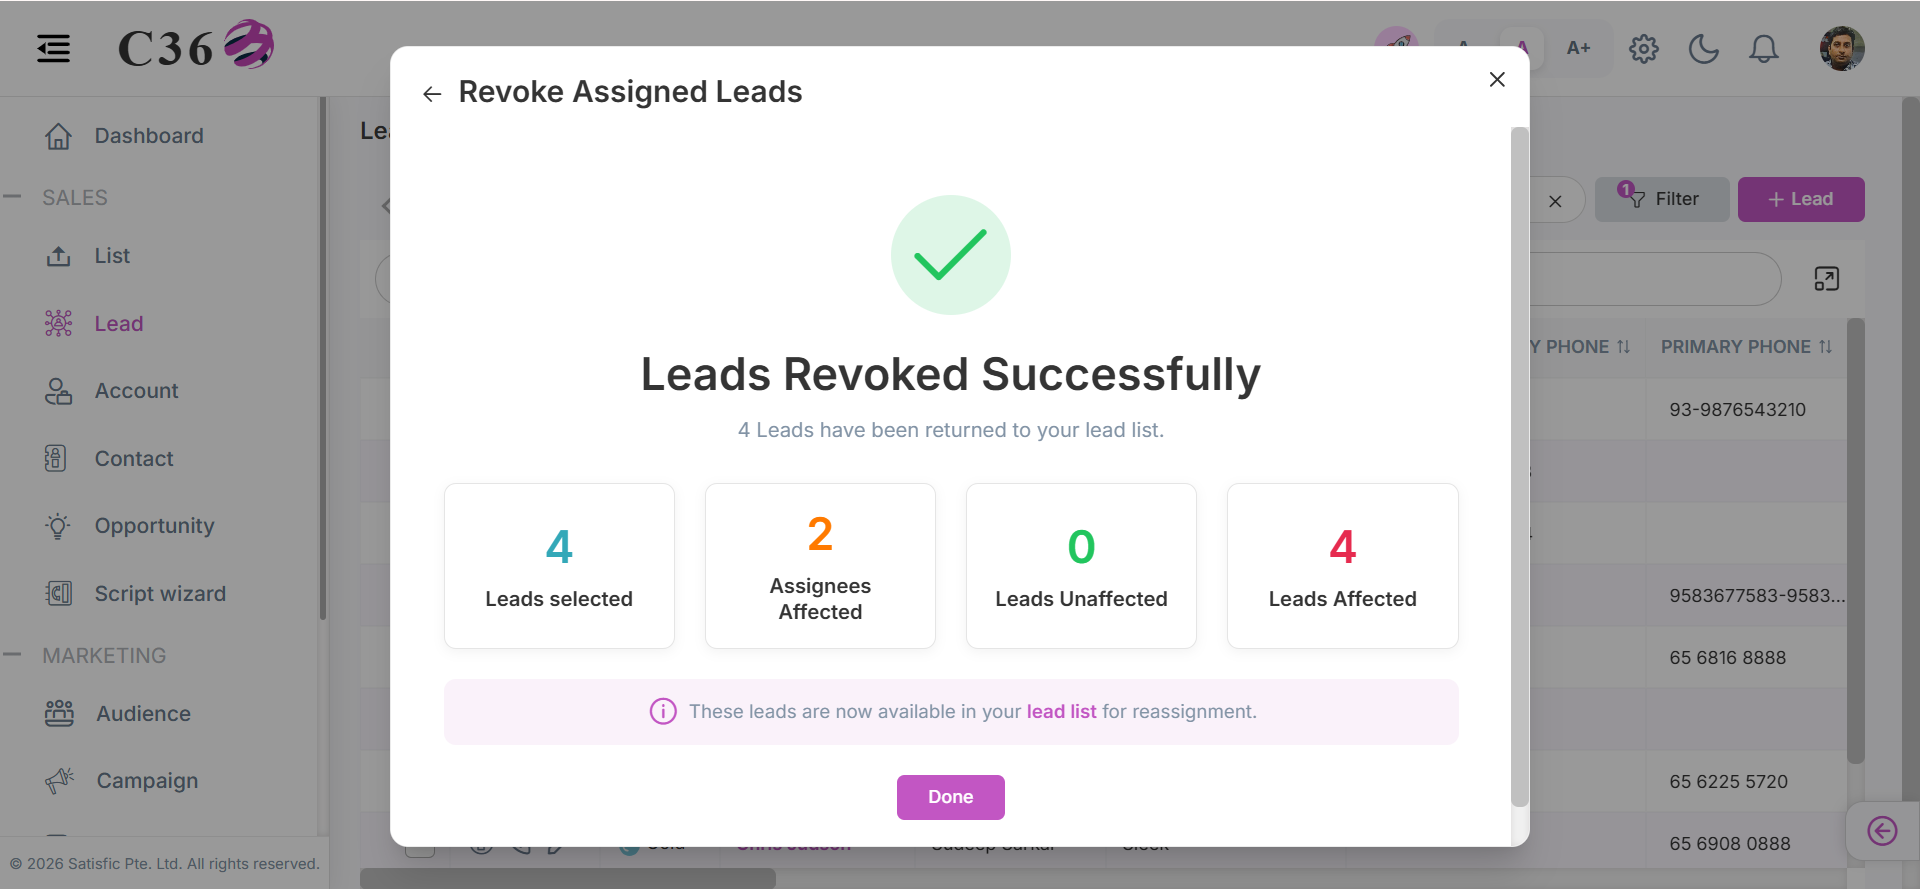
- Check the successful revoked lead statistics and click on Done.
- Revoke assignment will work for shark tank and round robin once the shark tank and round robin assign processes will completed.
- You can revoke assignment from upto 500 leads at a time.
✏️ Add / Edit Leads
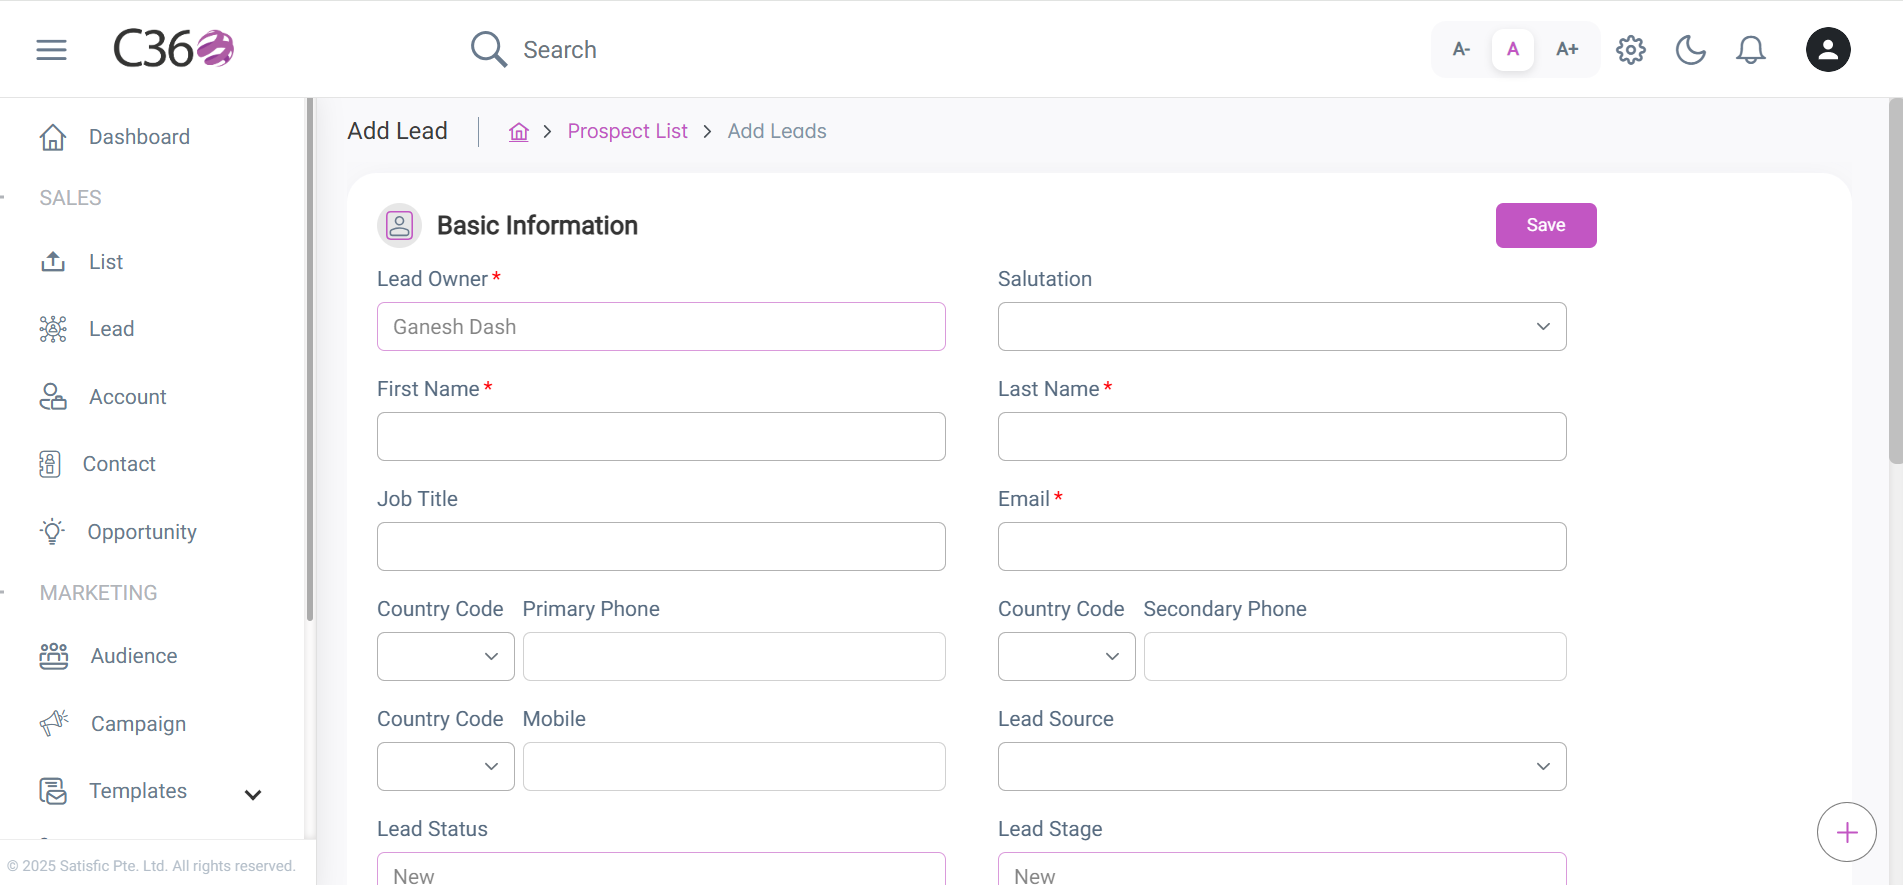
- Add → Click Add Lead → Fill mandatory fields (marked with
*) → Save. - Edit → Use the pencil icon (inline) or open detail page → Edit → Save.
Lead can be created or added using three ways:
- Normal Addition from list Page.
- Via Import Lead.
- While adding audience Campaign (If the lead does not exist in the list).
Click to see Lead Upload
- To upload leads, click on Lead Upload.