📝 Form Builder
The Form Builder in C360 allows you to design, manage, and assign forms that can be integrated with campaigns, landing pages, and lead management.
To access it:
➡️ Go to Marketing → Components → Form Builder from the left-hand menu.
🗂️ Form Builder Views
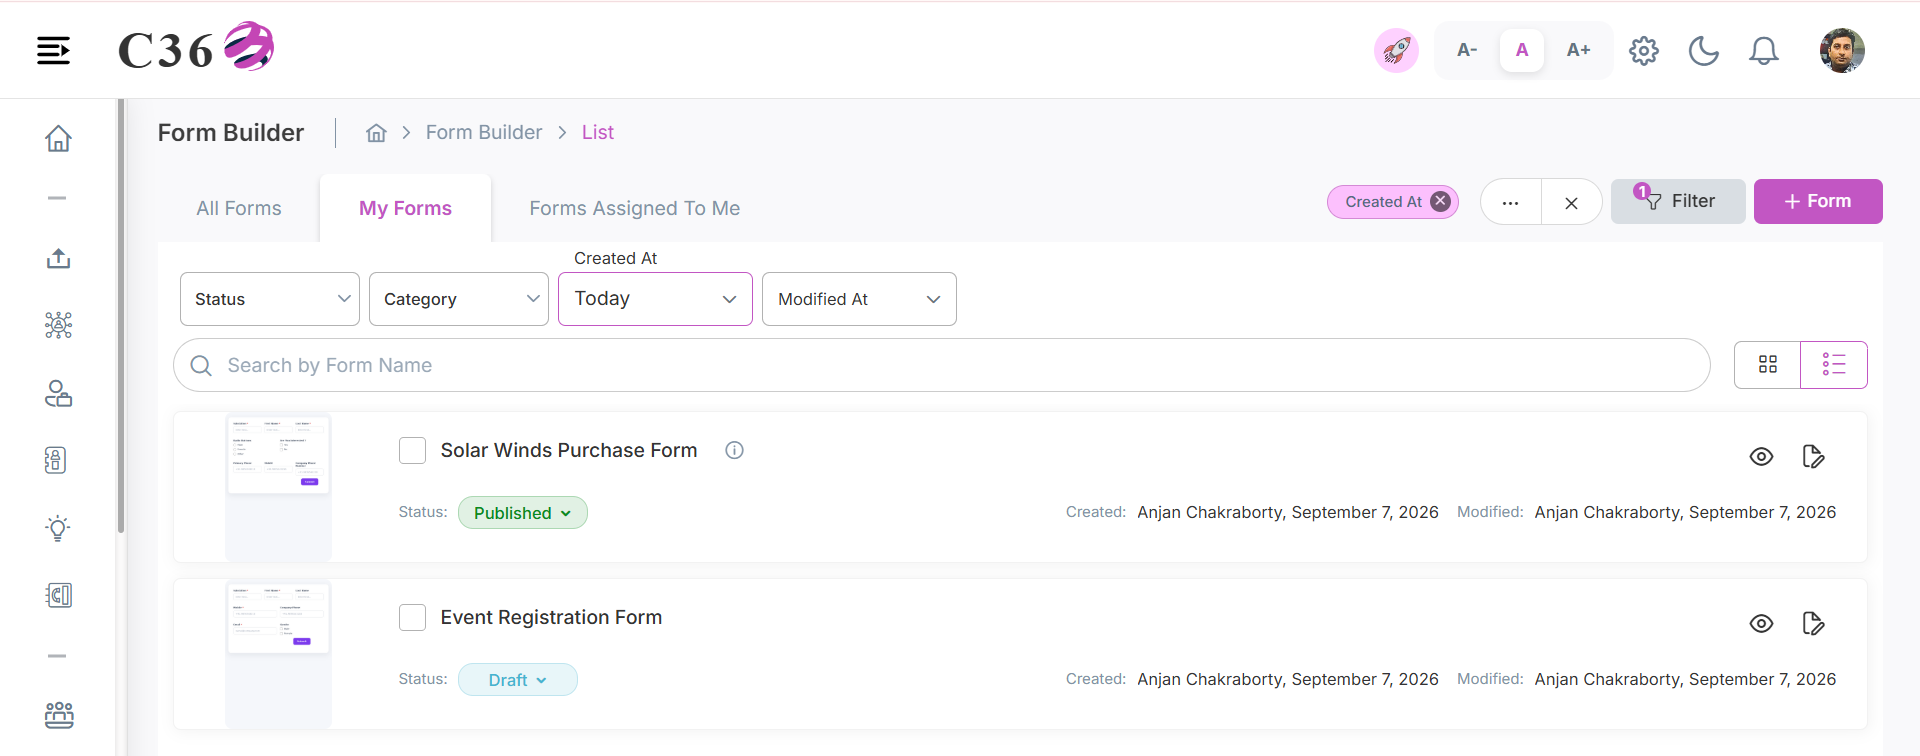
- The Forms list provides a complete overview of all created forms.
- Form Builder can be viewed in Grid View or List View.
- 🔲 Grid View
- 📜 List View
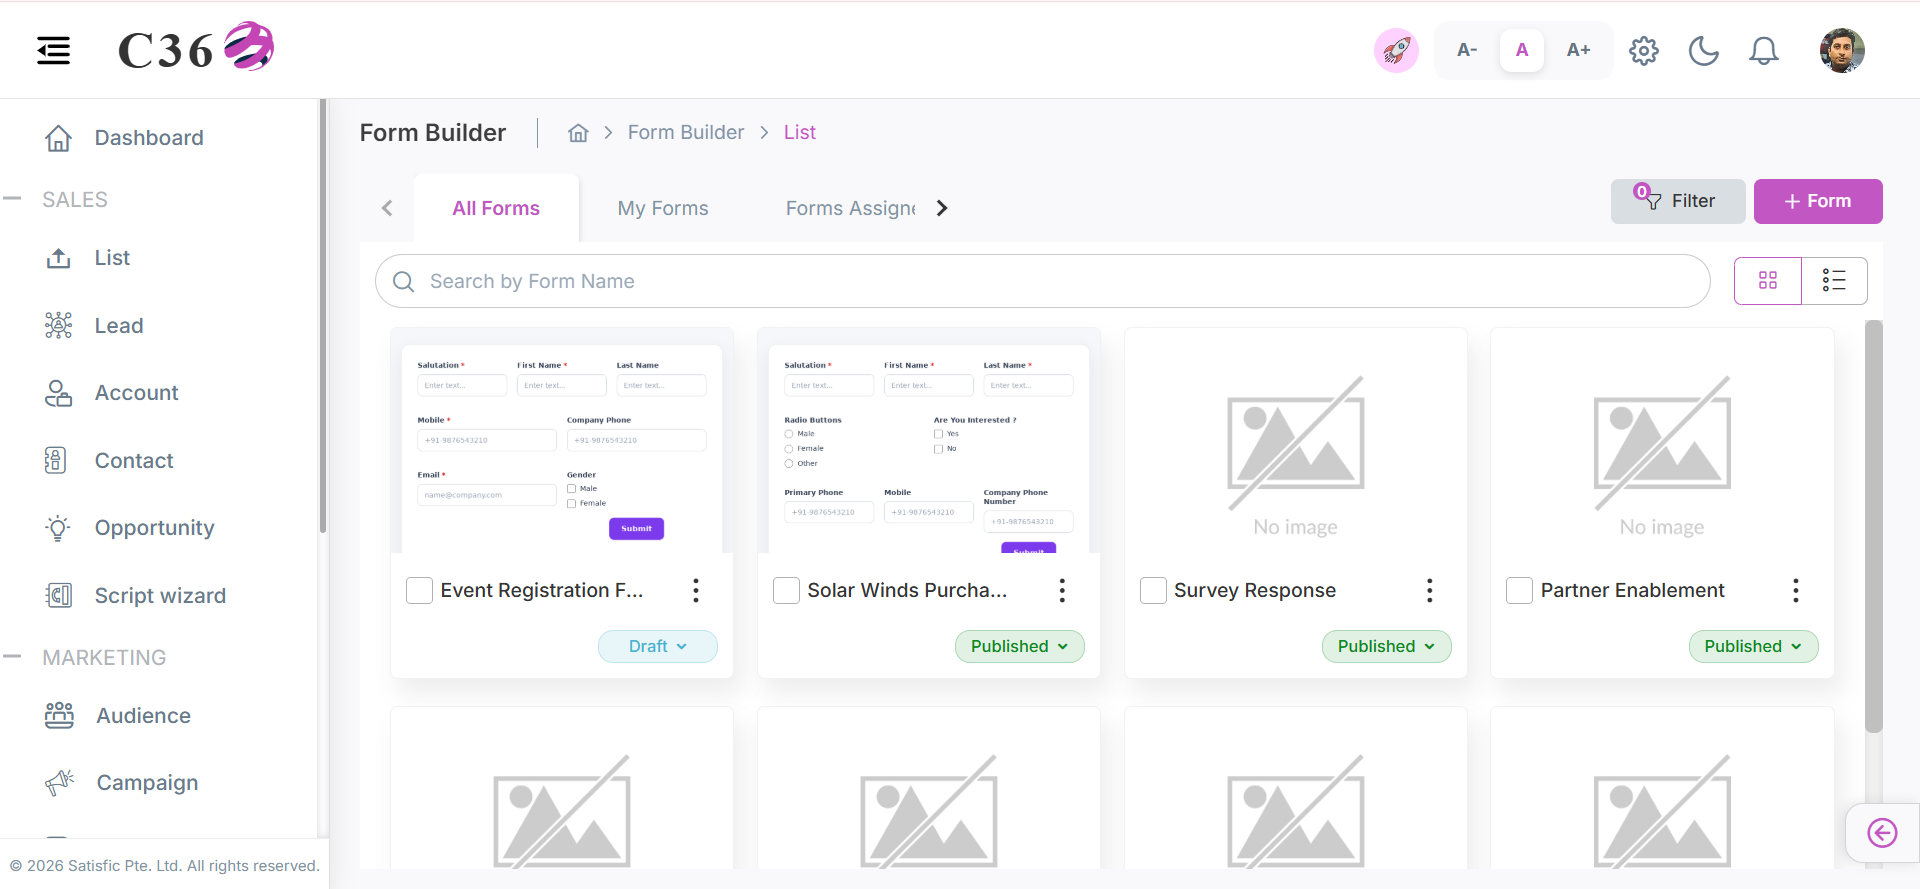
- Grid View – Shows each form as a card with quick actions like edit.
- Can change the status of the form from Draft to Published and vice versa.
tip
- Hovering on "i" icon allows you to see the Description.
- Hoverring on the Form Card and clicking the preview icon allows you to see the form preview in a new tab.
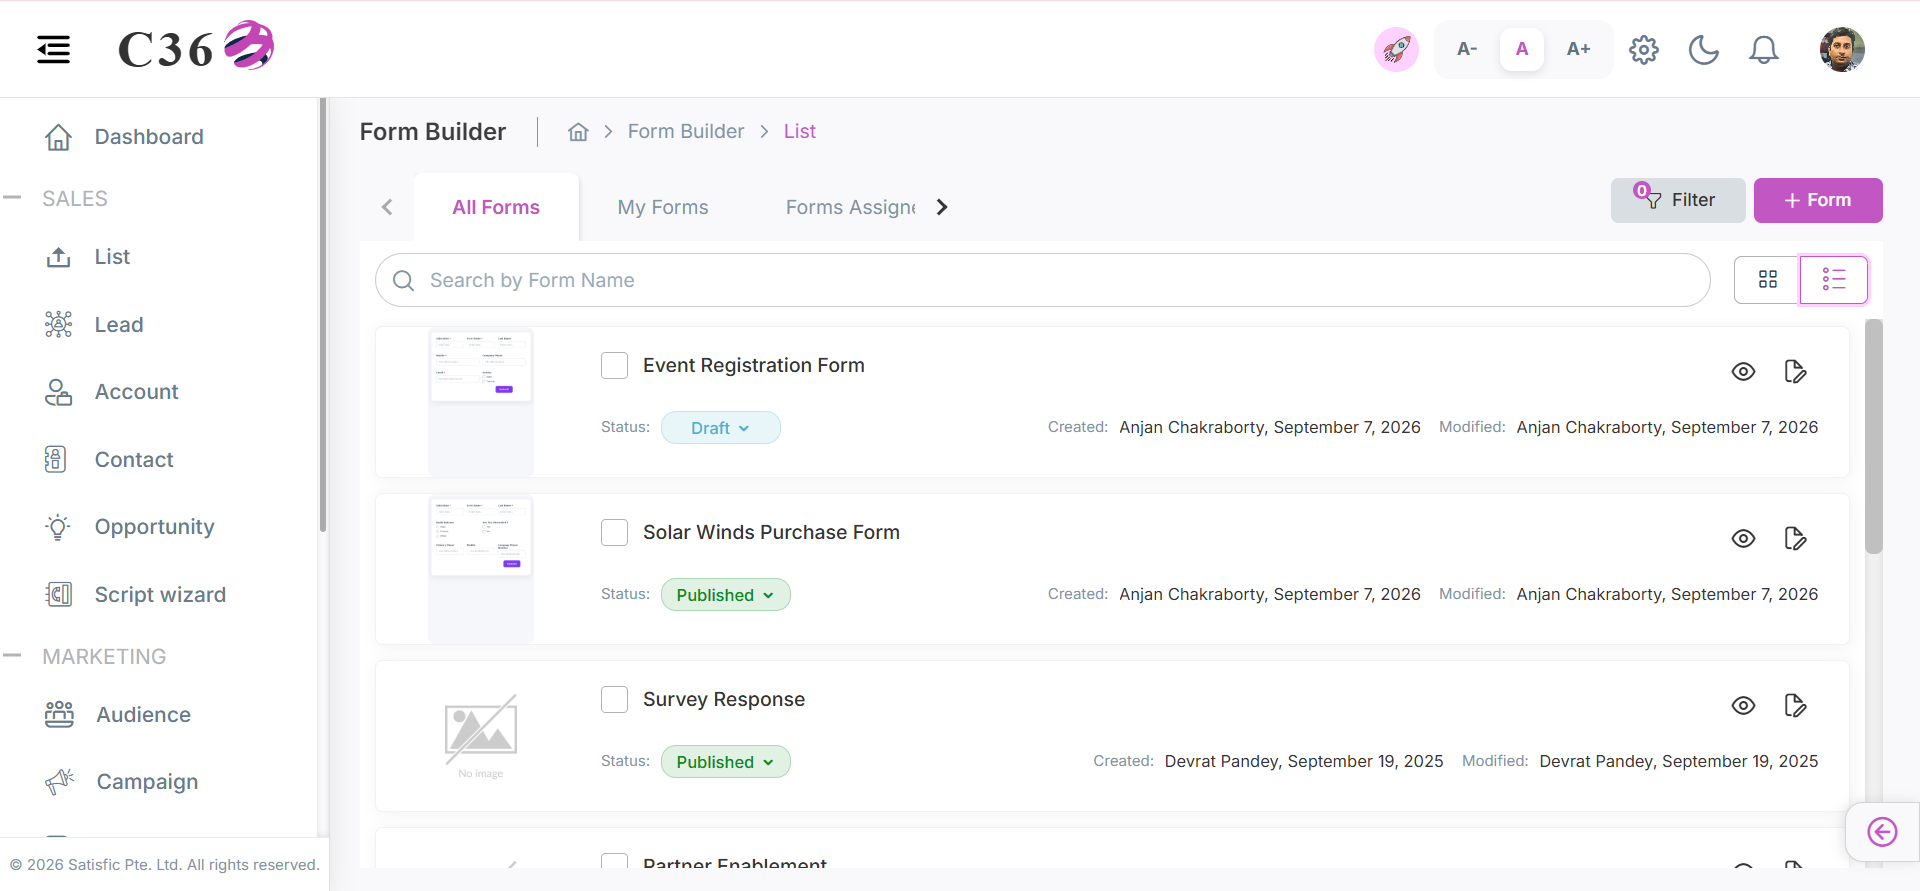
- List View – Shows Forms in a table with columns like Name, Status, Created By, Modified By, Preview and Edit.
- Can change the status of the form from Draft to Published and vice versa.
🔍Searching for a Form
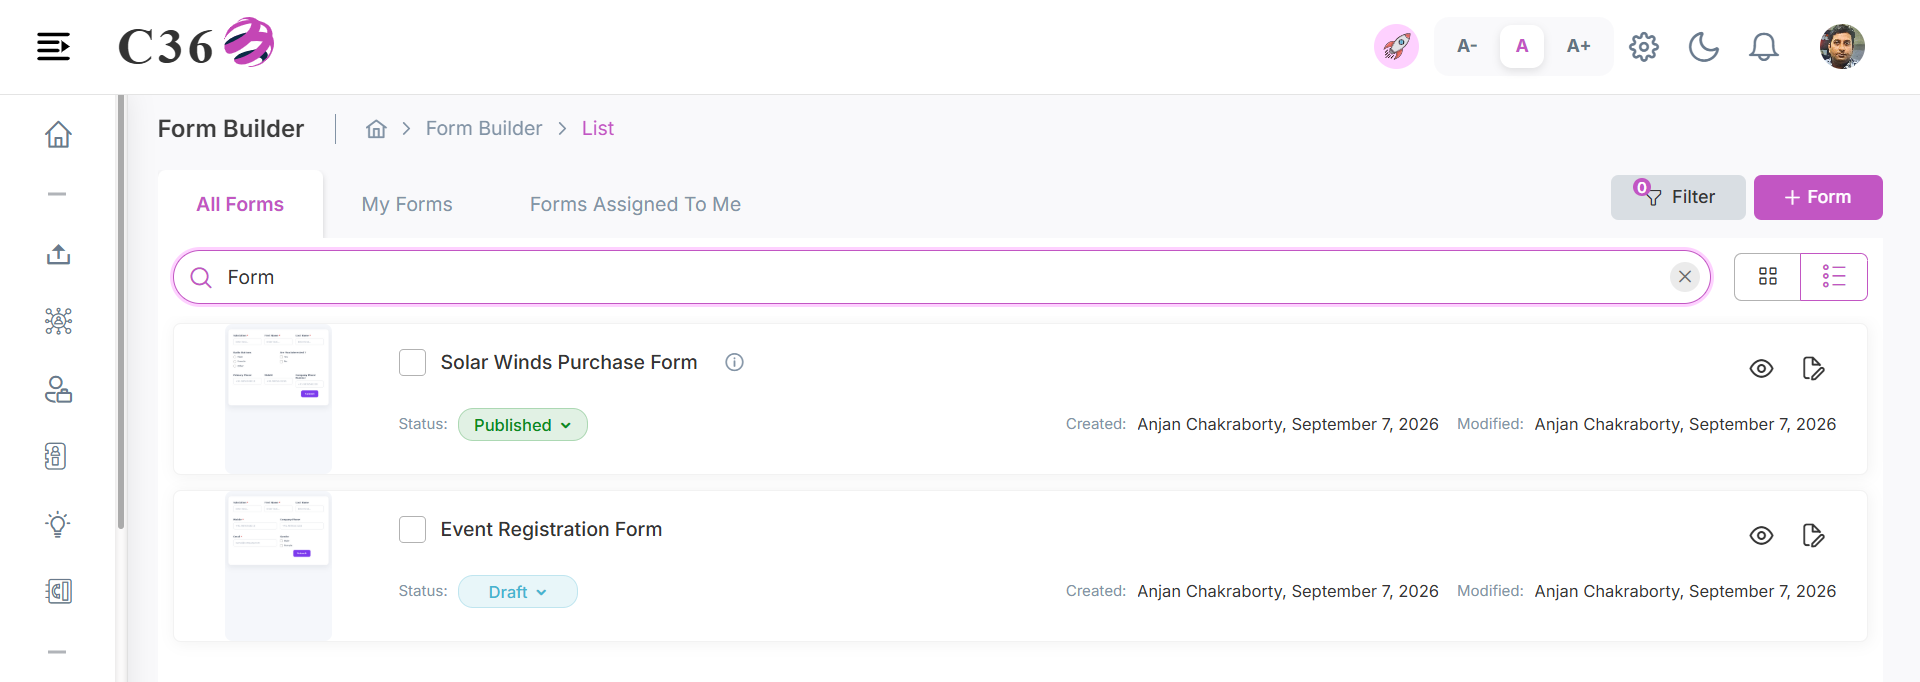
- Enter a keyword or form name in the Search bar.
- Matching results will appear instantly.
🎛️Filtering Forms
You can filter Forms by:
- Status
- Category
- Created At
- Modified At
- All/ My Form / Form Assigned To Me
note
- All: Created by me/Assigned to me/Created by below users.
- My Form: Created by me
- Form Assigned To Me: The form which was assigned to me by someone.
➕ Add Form
- Click Add Form to create a new form.
- Fill in the Form Name, Category, and Description.
- Click Save to create the form.
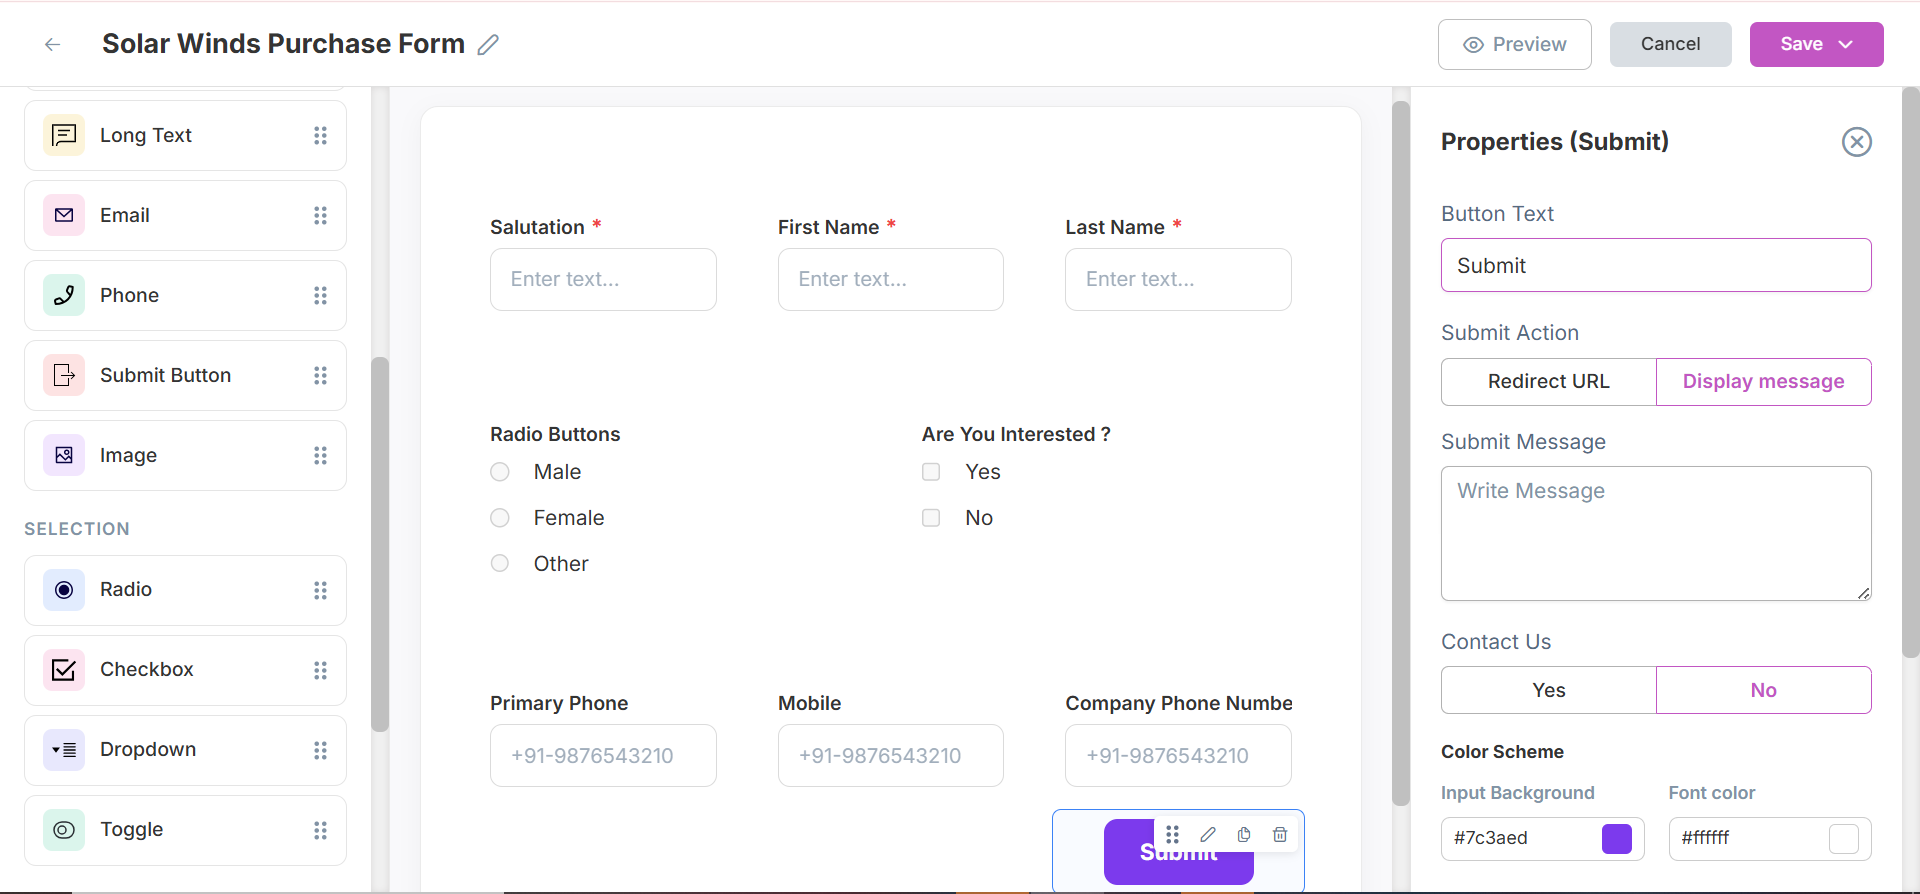
- After saving, you will be redirected to the Form Builder page where you can add fields and actions.
- Costumize the form by adding fields and defining actions.
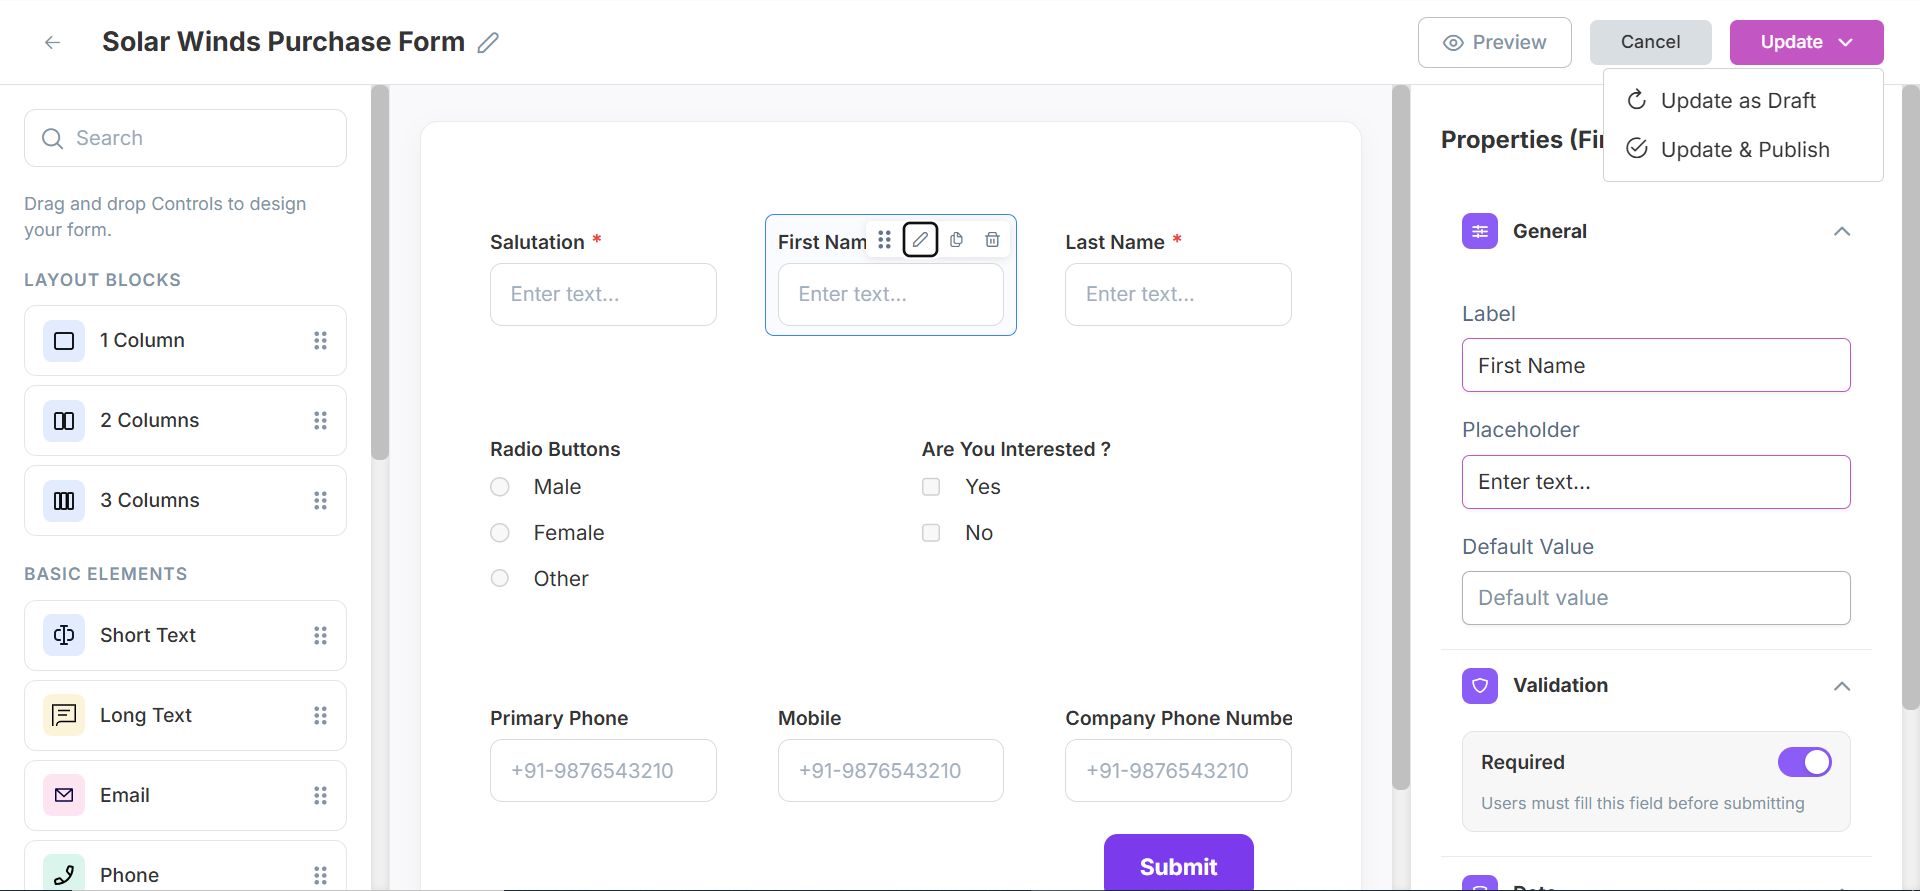
- Click on Save as Draft to save the form as a draft or Save as Publish to make it live.
Click to see additional actions in builder page
- Can edit the form name.
- Can preview the form by clicking on the Preview button.
- Can Edit,Copy,Delete and Drag the form fields.
- On edit field, you can change the Field Label, Field Type, Placeholder, Required Field, Default Value, Options.
- Can Cancel the form creation process by clicking on Cancel button.
- Can search the left panel elements by typing the field name in the search bar.
note
- On Submit button you can add a Custom Message or Redirect to URL as submit action.
- On Submit button you can also add ** CRM Submit Actions** like Modify Campaign Segments, Download an Asset, Send Email to Lead, Send Email to User, Send Form Results.
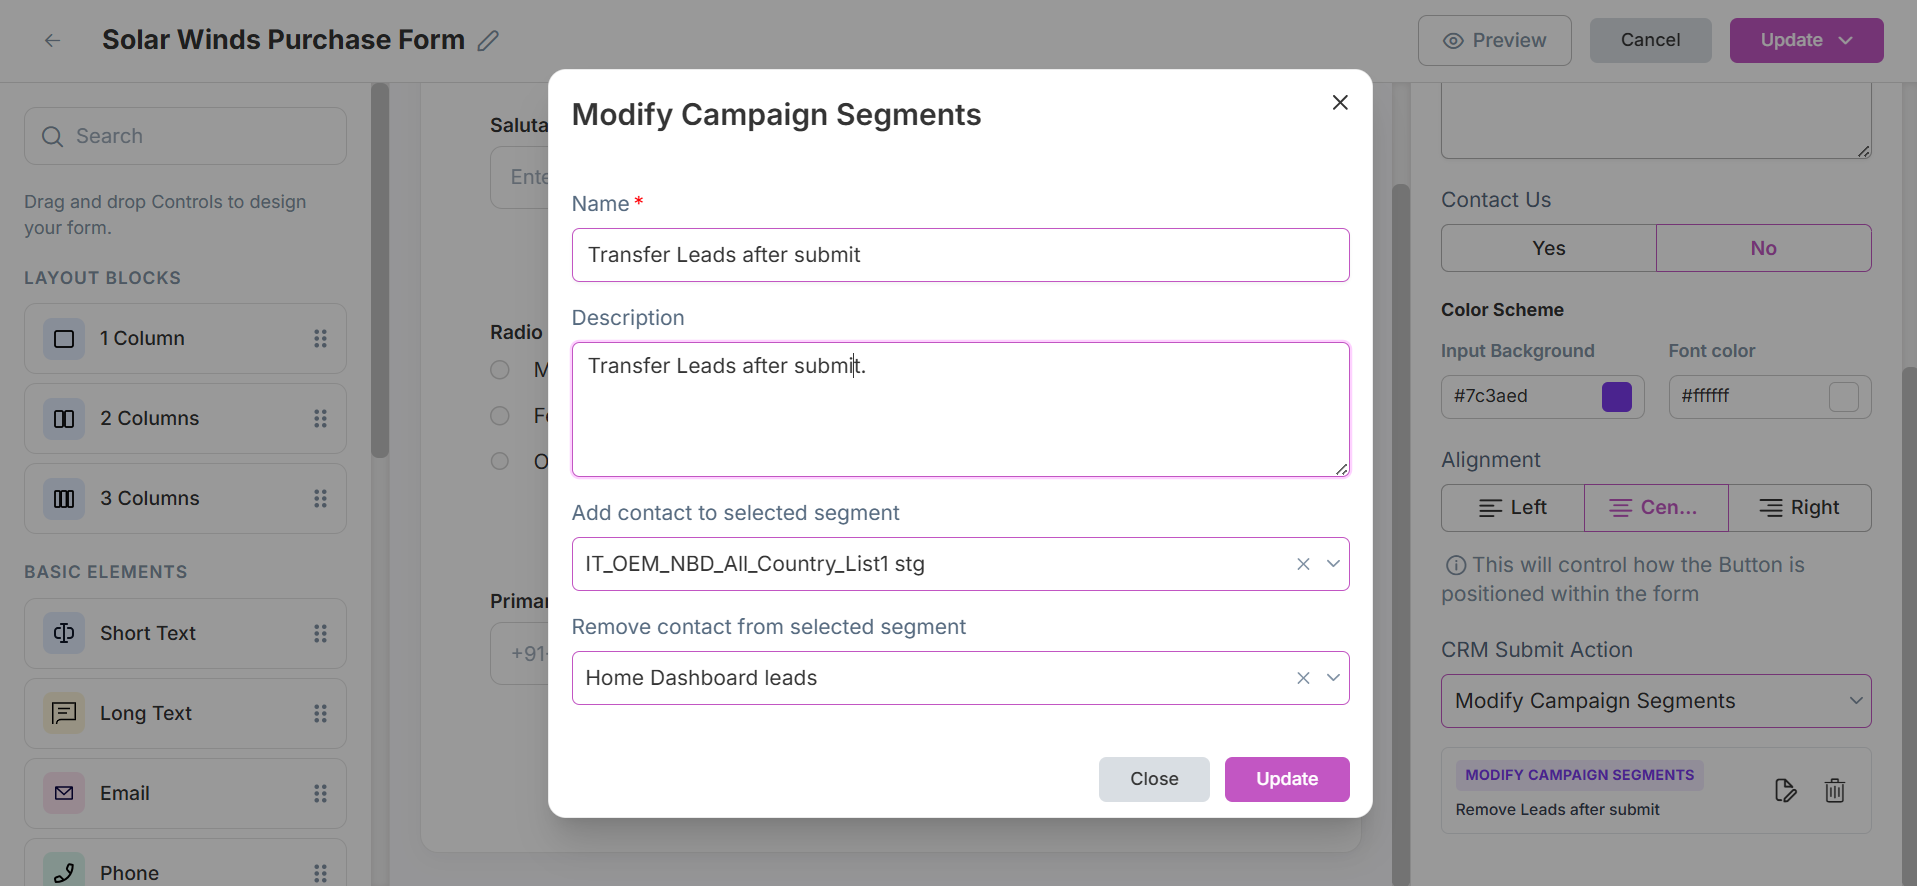
⚡ CRM Submit Actions Defination and Usage.
Define automated actions that trigger after form submission.
- 📊 Modify Campaign Segments
- Add or remove contacts from segments.
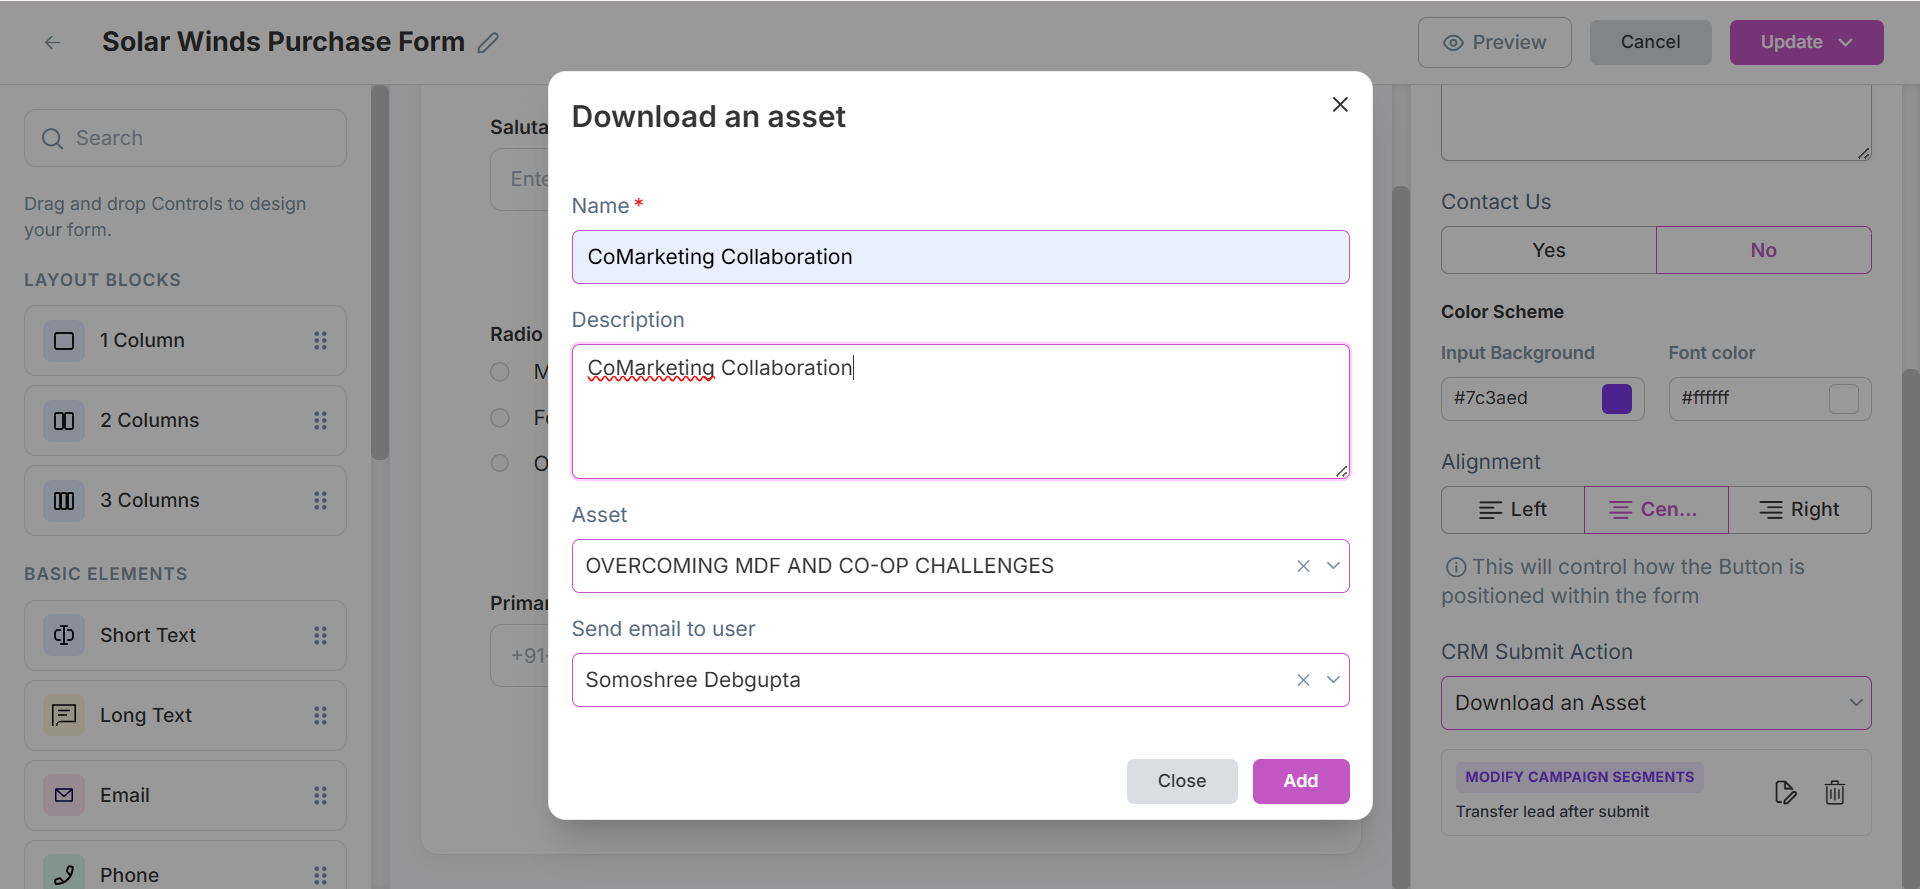
- 📂 Download an Asset
- Provide downloadable content upon after form submission.
- 📧 Send Email to Lead
- Send an email to the lead after form submission.
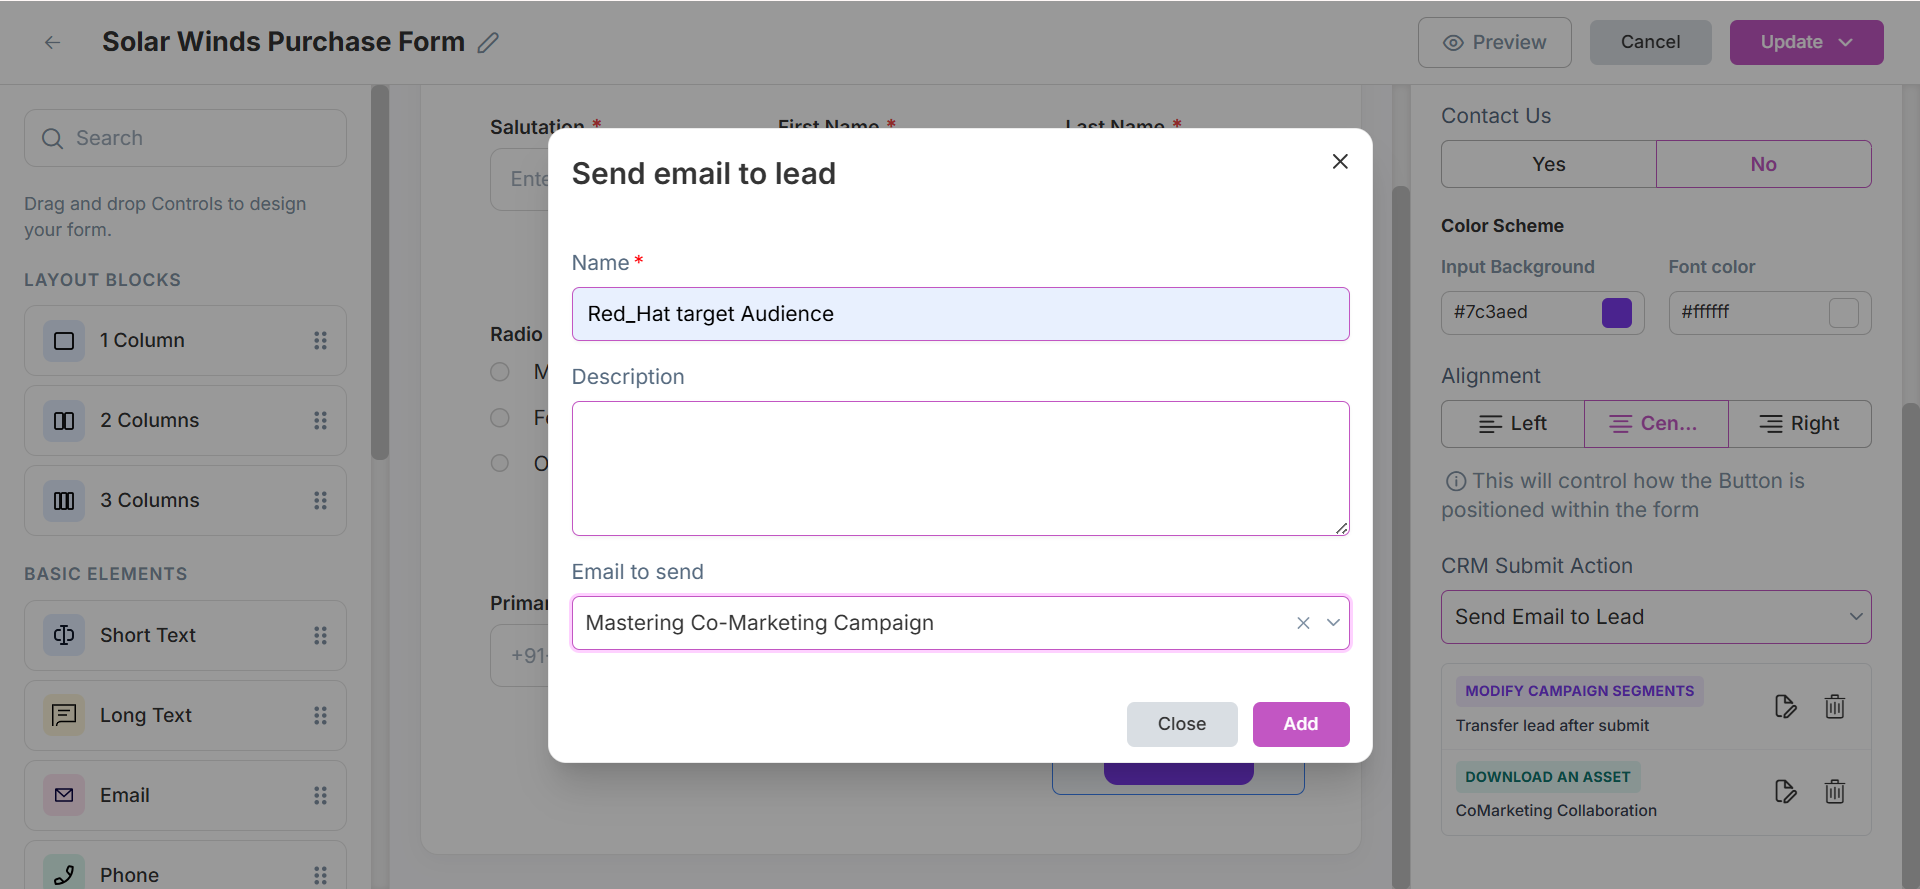
- 👤 Send Email to User
- Send an email to the user after form submission.
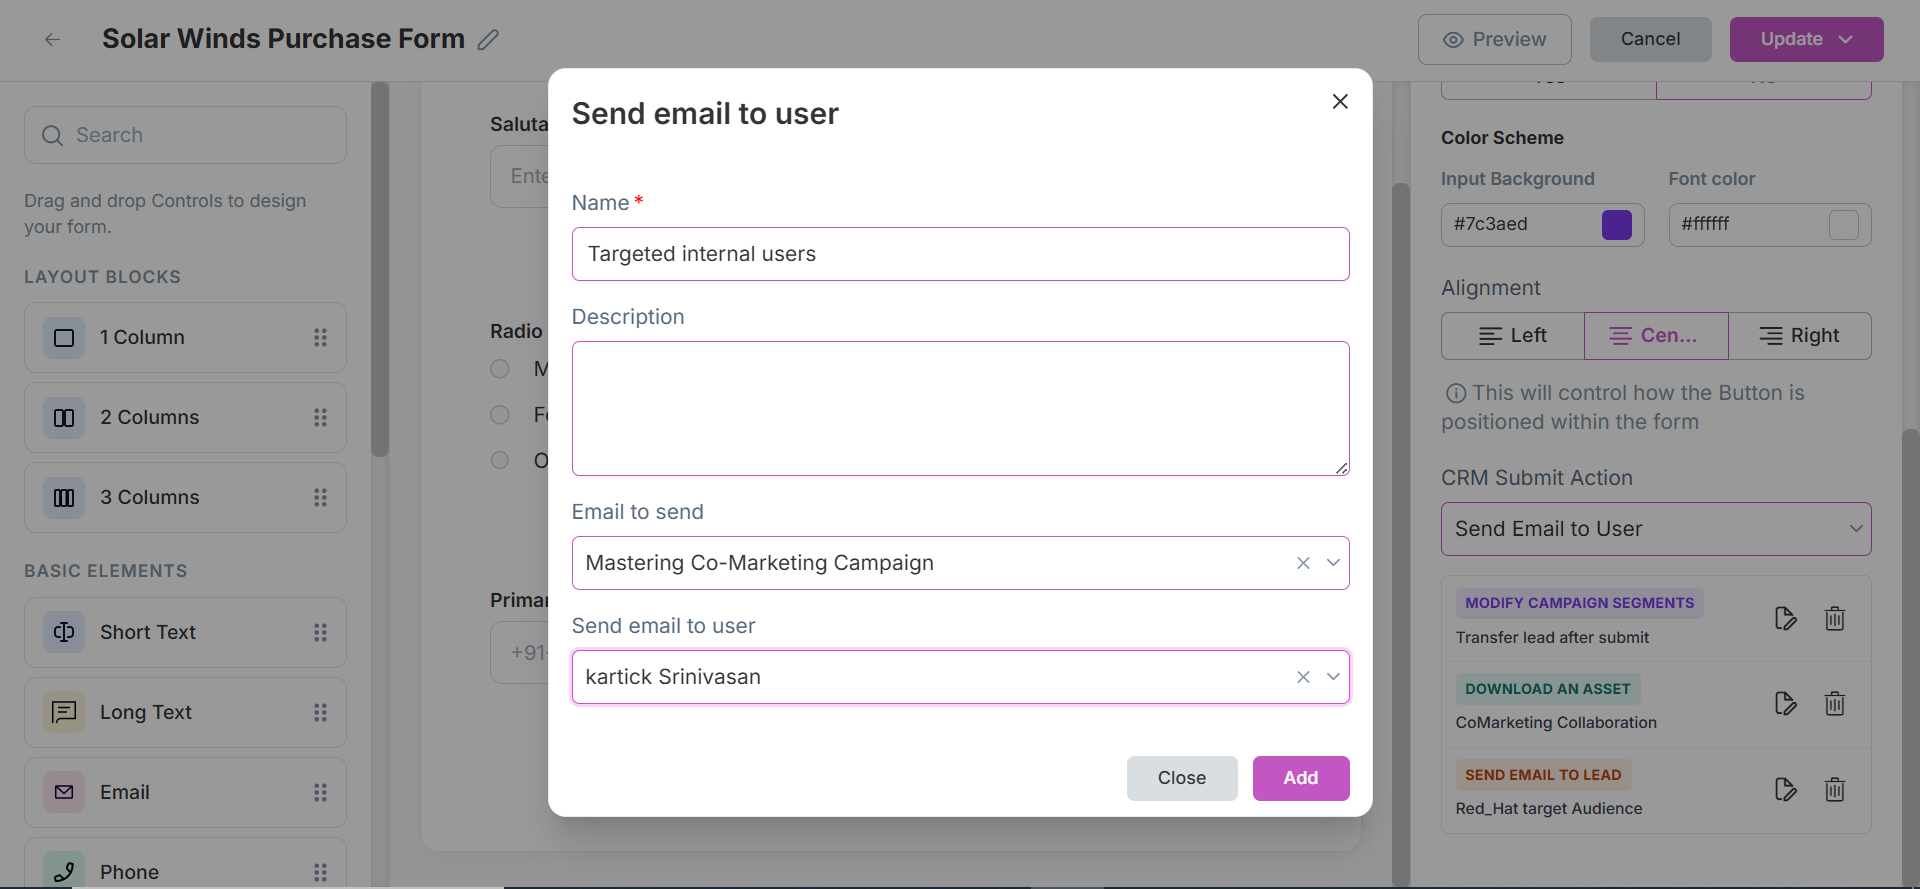
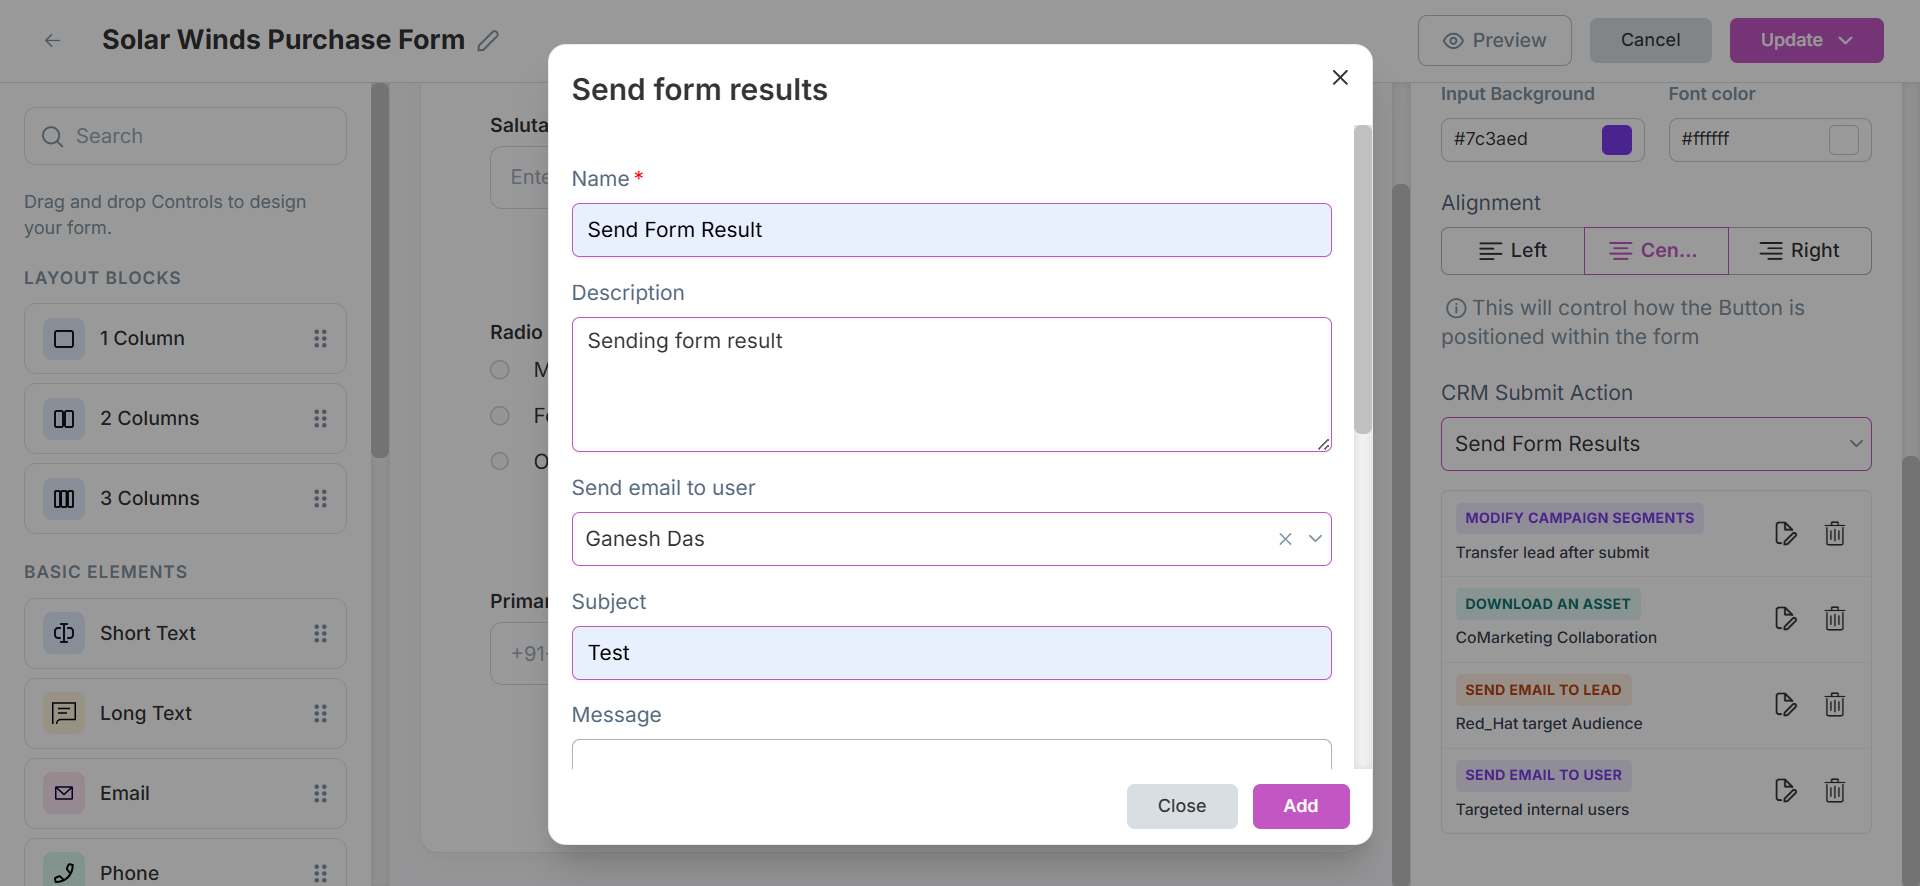
- 📤 Send Form Results
- Send form responses via email with options for To, CC, BCC, Send to Owner, Send to Contact.
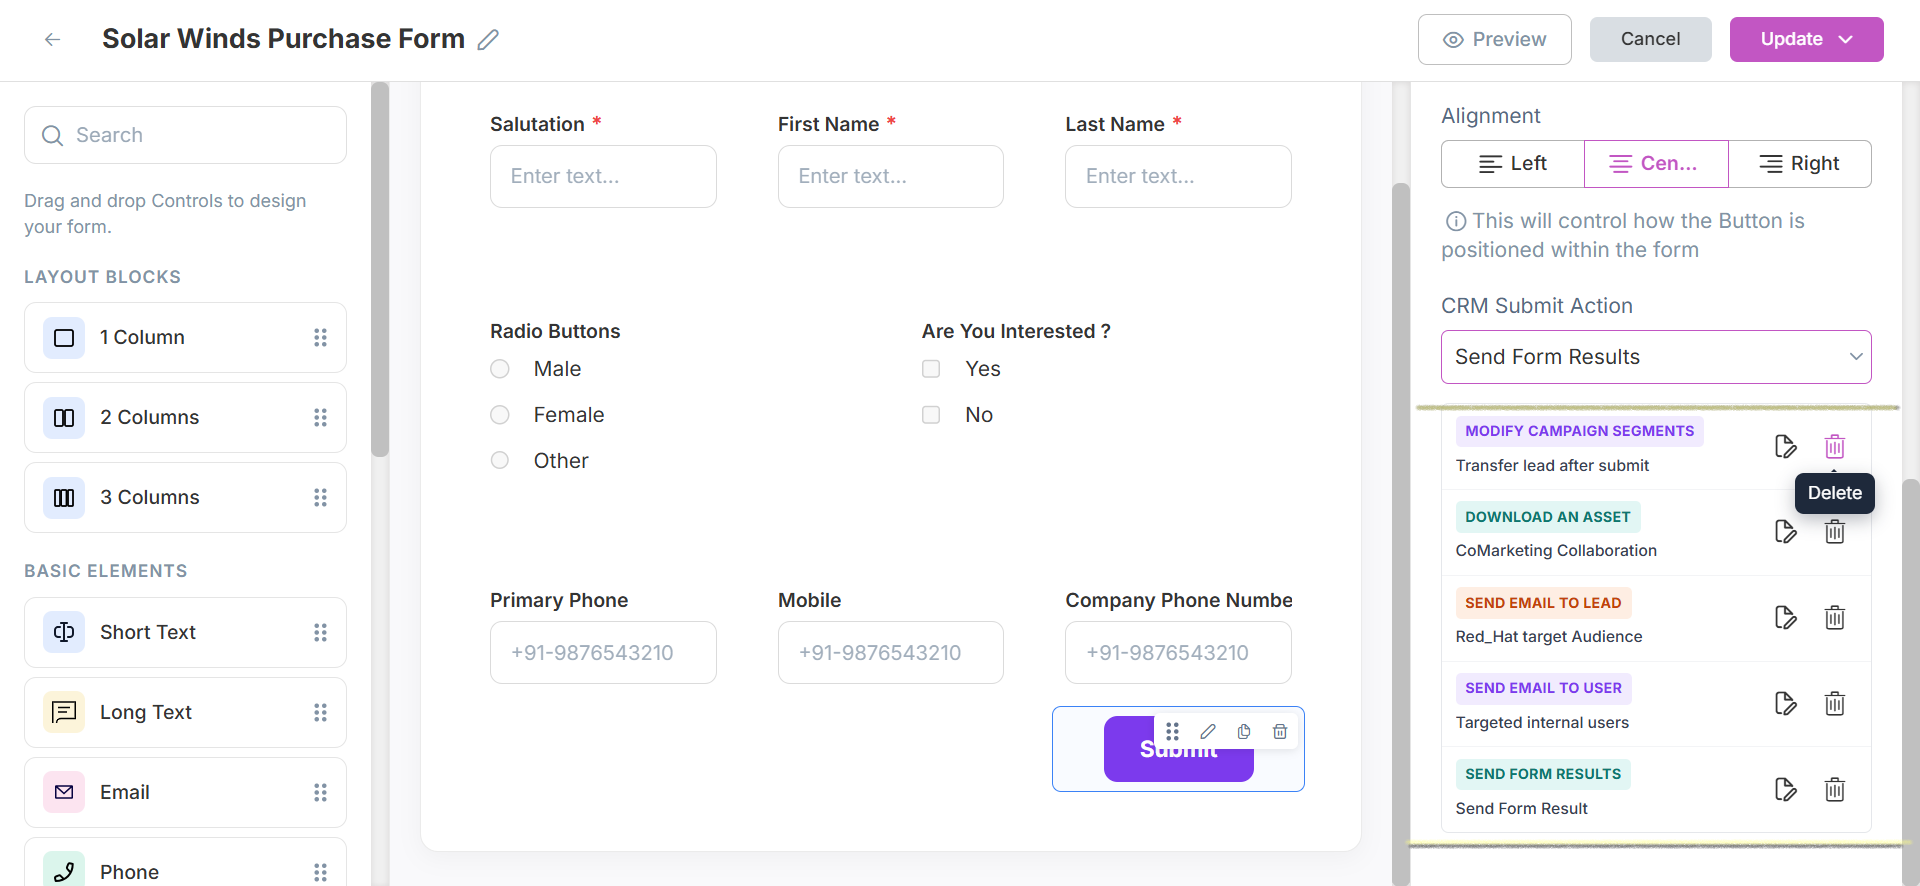
info
- To edit or delete individual fields/actions, use the icons beside each item.
- Always click Update after changes.
✏️ Edit Form
- Select the form you want to edit.
- Click the Edit icon.
- Modifications can be made to the form's name, category, description if needed and click Update.
- Make the necessary changes in the form builder.
- Click Update as Draft to save the form as a draft or Update as Publish to make it live.
👁️ Preview Form
- Hover on the form you want to preview in grid view and click on the Preview button.
- Or click on the Preview icon in the list view.
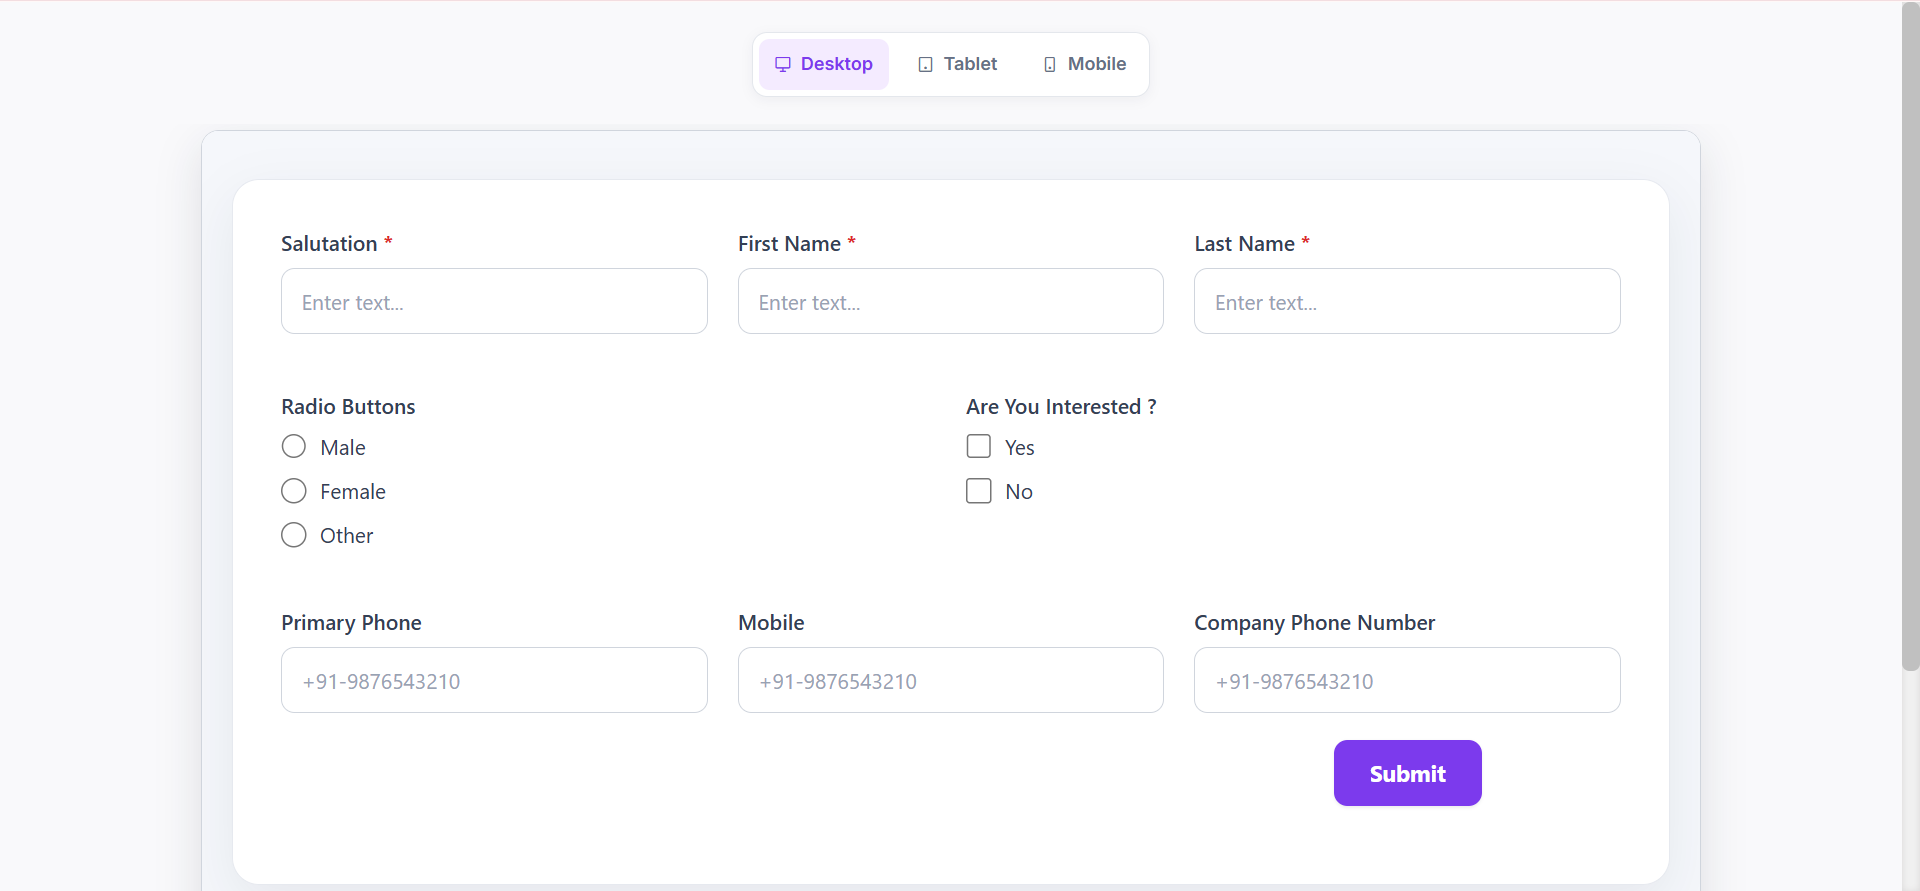
- A new tab will open with the form preview where you can see the form in desktop, tablet, and mobile views.
👥 Assigning Forms
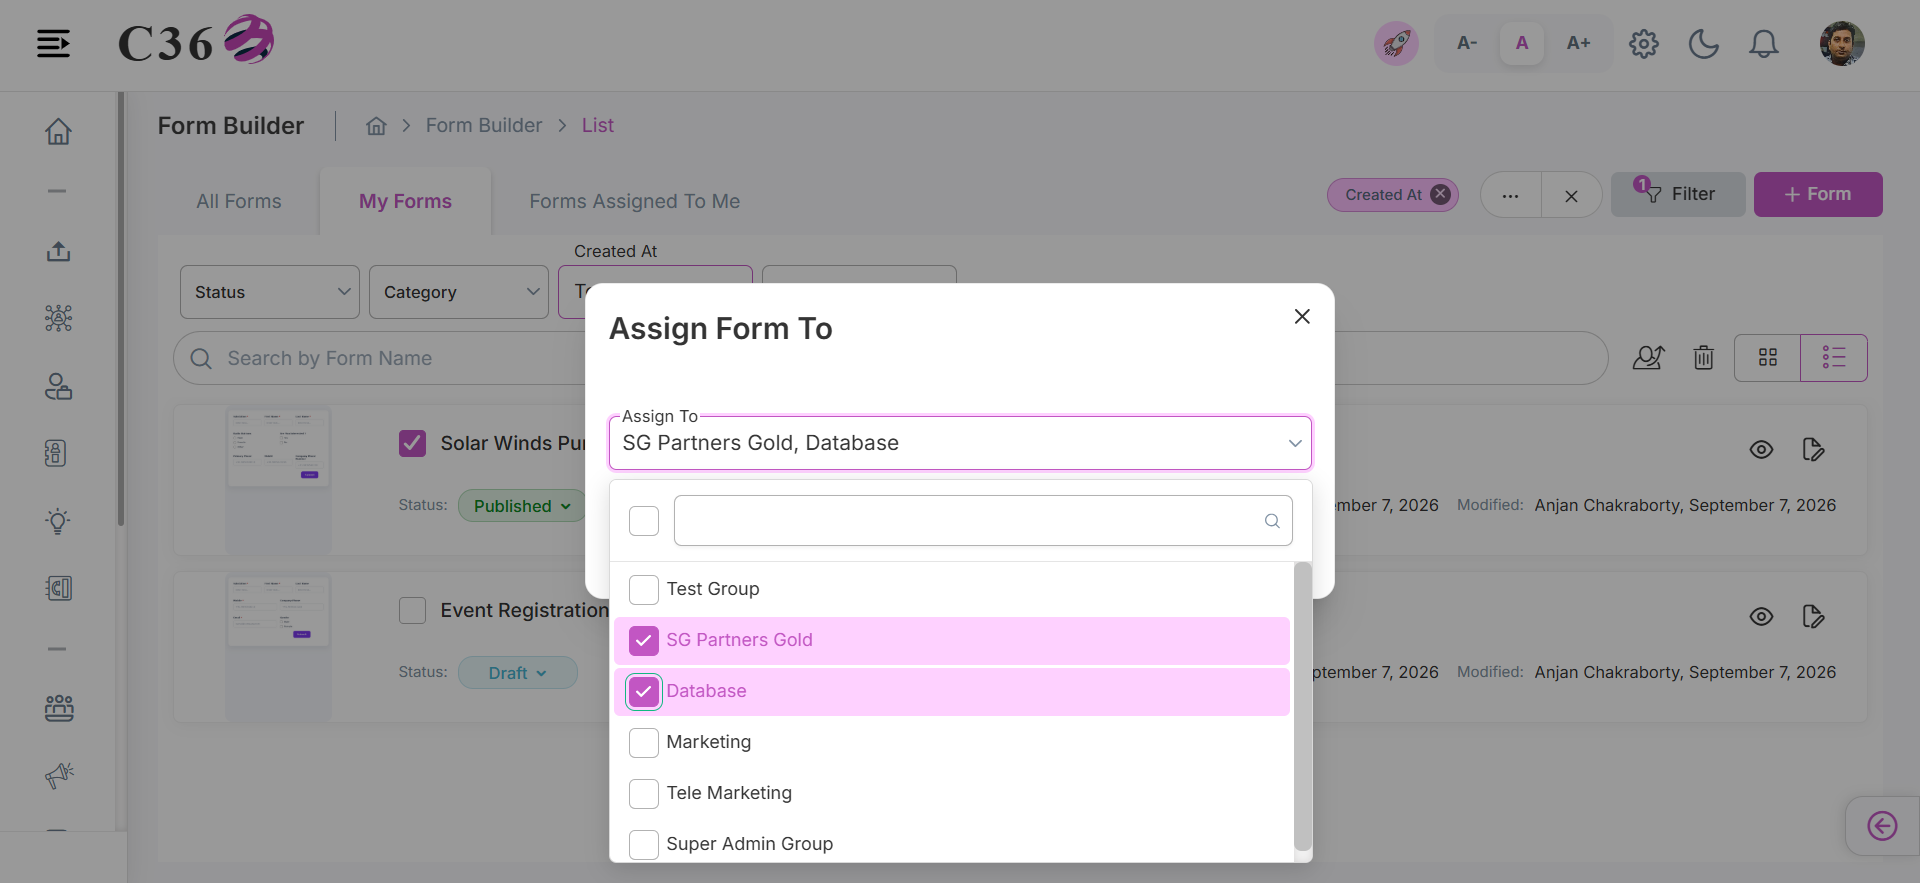
- Select one or more forms from the list.
- Click Assign To at the top.
- Choose a group from the dropdown.
- Click Assign to confirm.
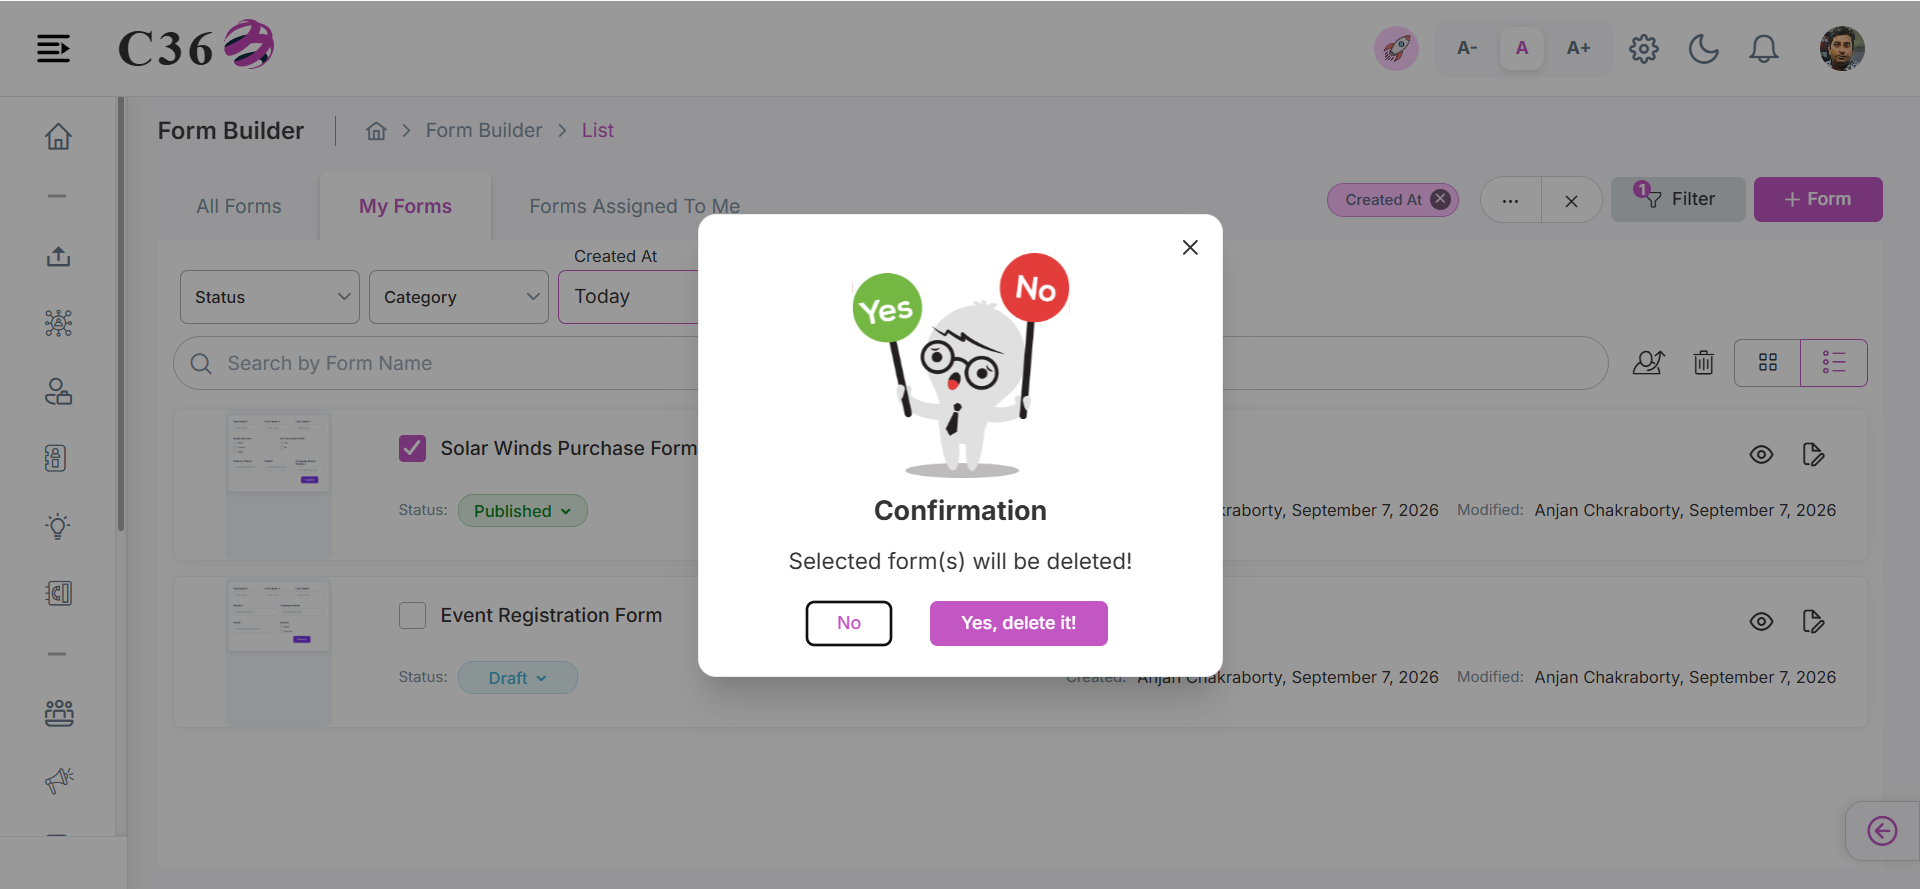
🗑️ Deleting Form
- Select the checkbox(es) for the Form you want to delete.
- Click the Delete icon .
- Click on Yes from the confirmation pop-up if you want to delete.