📢 Campaign Management
The Campaign Management module in C360 allows you to plan, launch, and monitor marketing campaigns that engage your audience through emails, webinars, and other activities.
To access it: ➡️ Go to Marketing → Campaign from the left-hand menu.
📋 Managing Campaigns
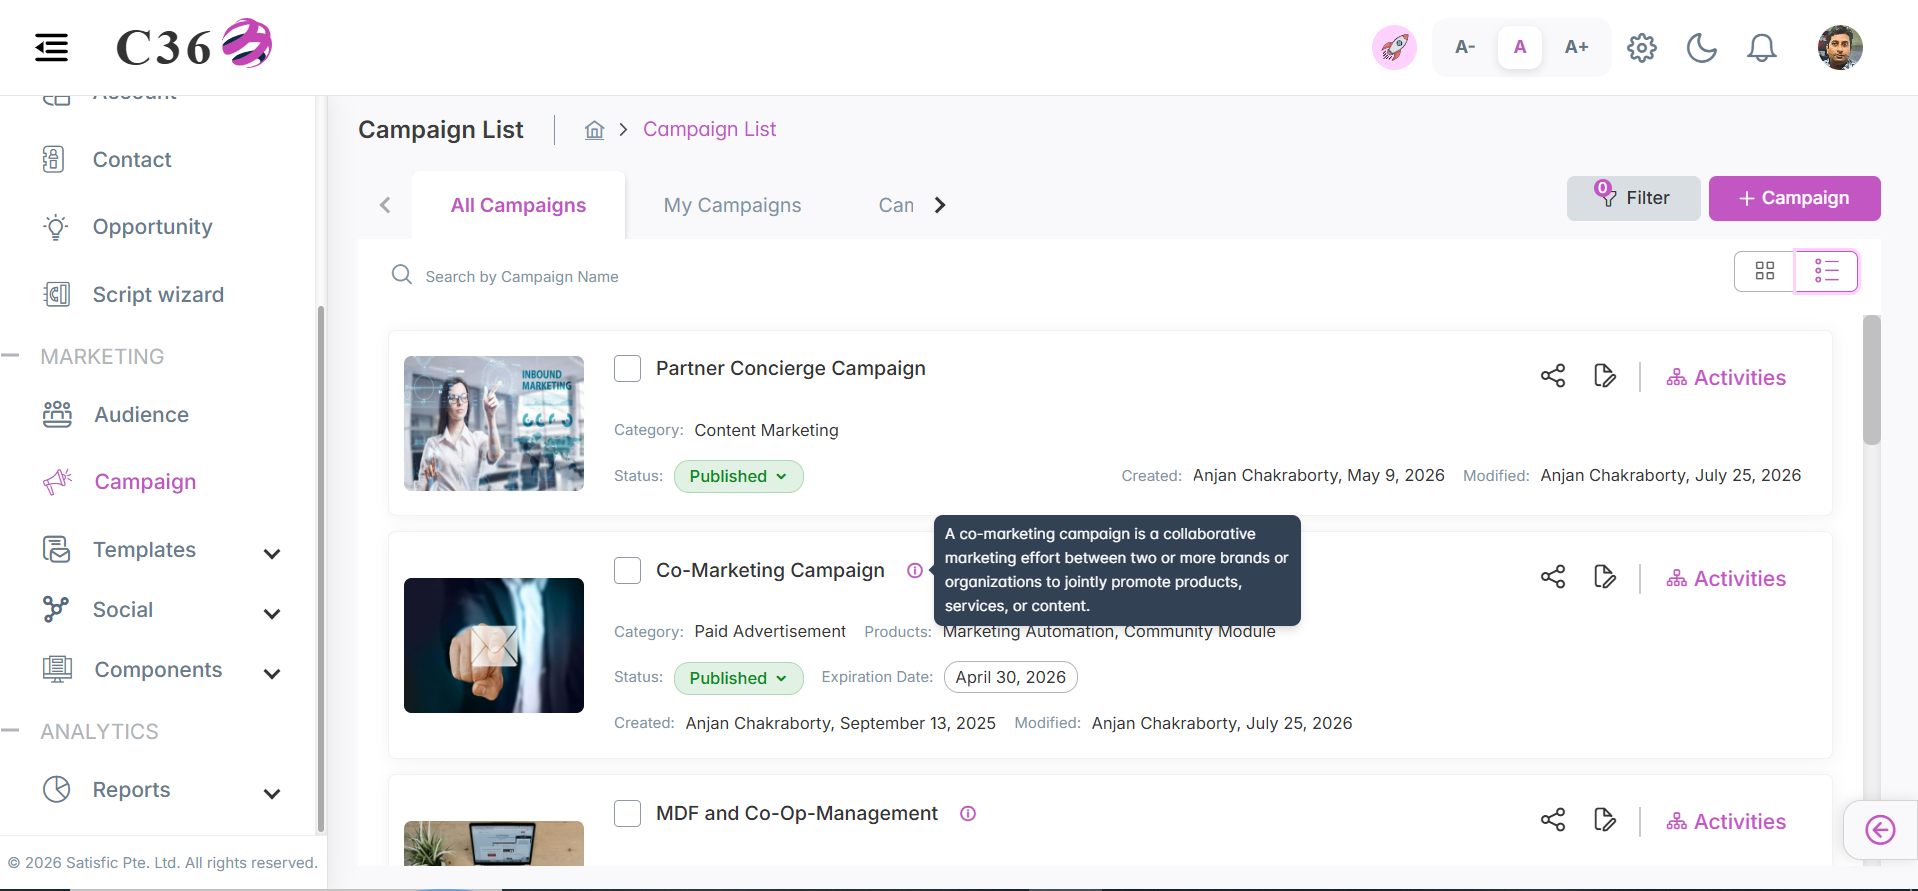
The Campaigns section provides a clear overview of all campaigns. You can toggle between List View and Grid View for easier management.
🔎 Actions In The List And Grid View
- Search campaigns by name
- Add a new campaign
- Assign campaigns to user groups
- Delete campaigns (single or bulk)
- Toggle between List / Grid View
- Status modification (Draft / Published / Expired)
✏️ Edit → Pencil icon
🗑️ Delete → Trash icon
🖥️ Campaign Views
- 📄 List View
- 🔳 Grid View
The List View displays campaigns in a structured table format for quick scanning and comparison.
| Field | Description |
|---|---|
| Campaign Name | Name of the campaign |
| Description | Brief summary of the campaign |
| Created Date | Campaign creation date |
| Modified Date | Last updated date |
| Status | Draft / Published / Expired |
| Expiration | End date of the campaign (if set) |
| Actions | Assign, Edit, or Add/View Activities |
The Grid View presents campaigns as visual cards with thumbnails and quick actions.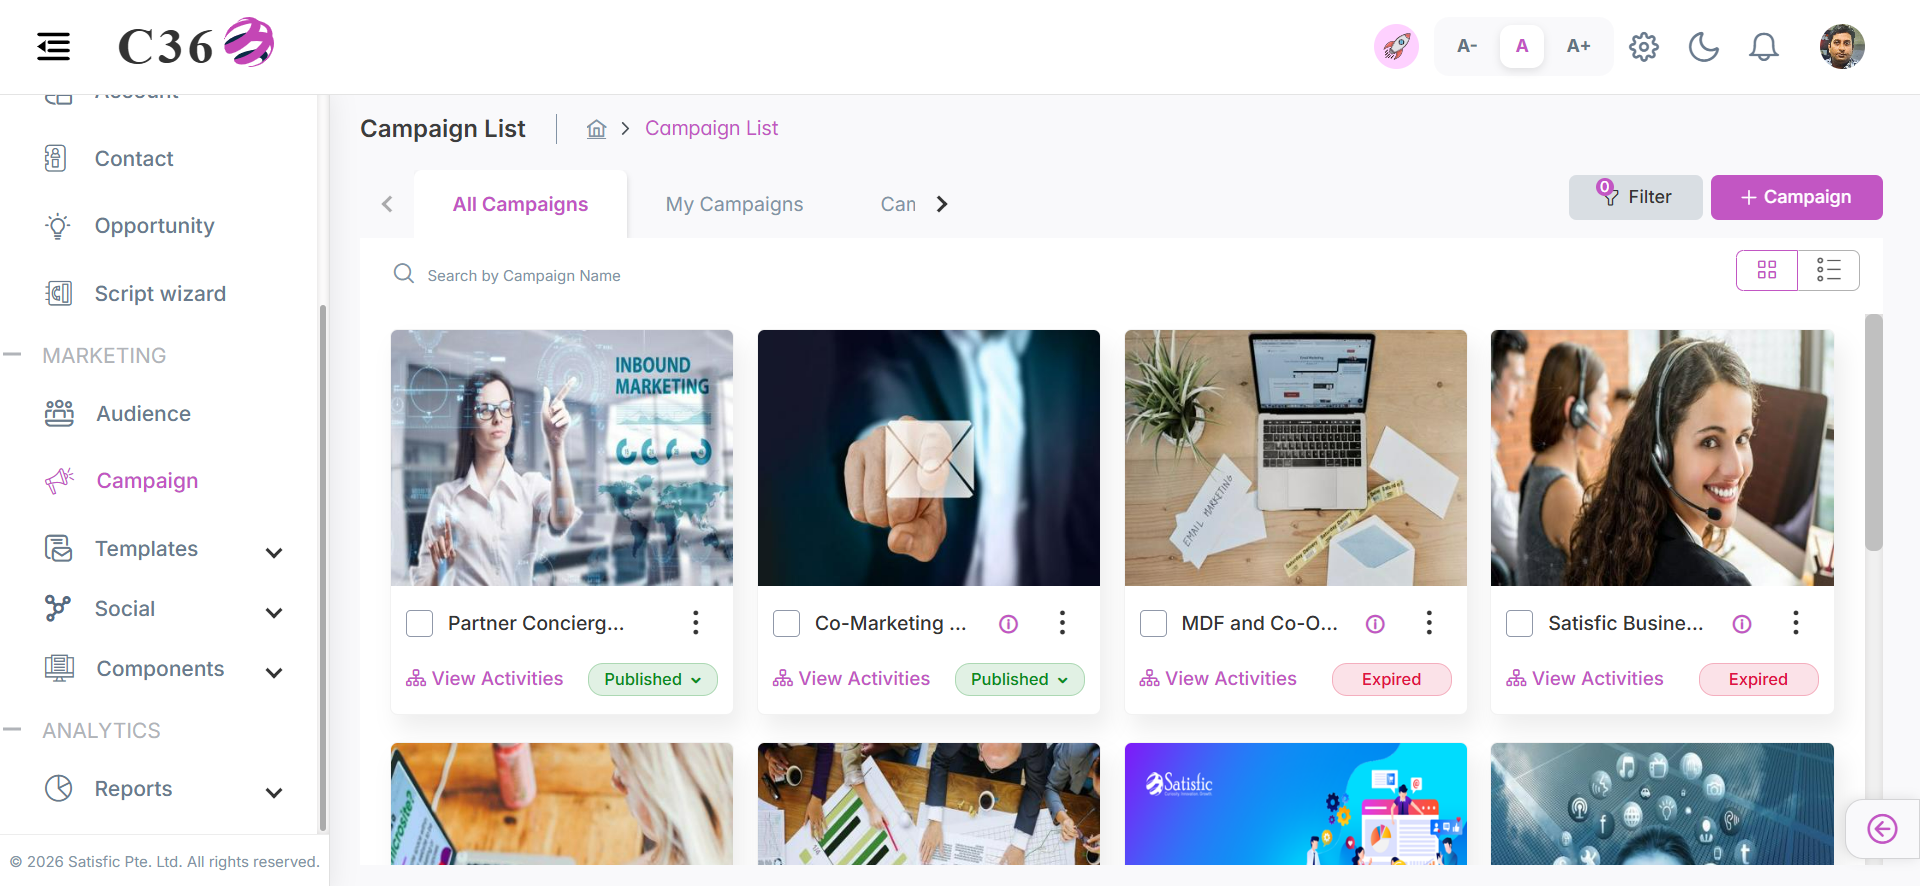
Campaign Flow
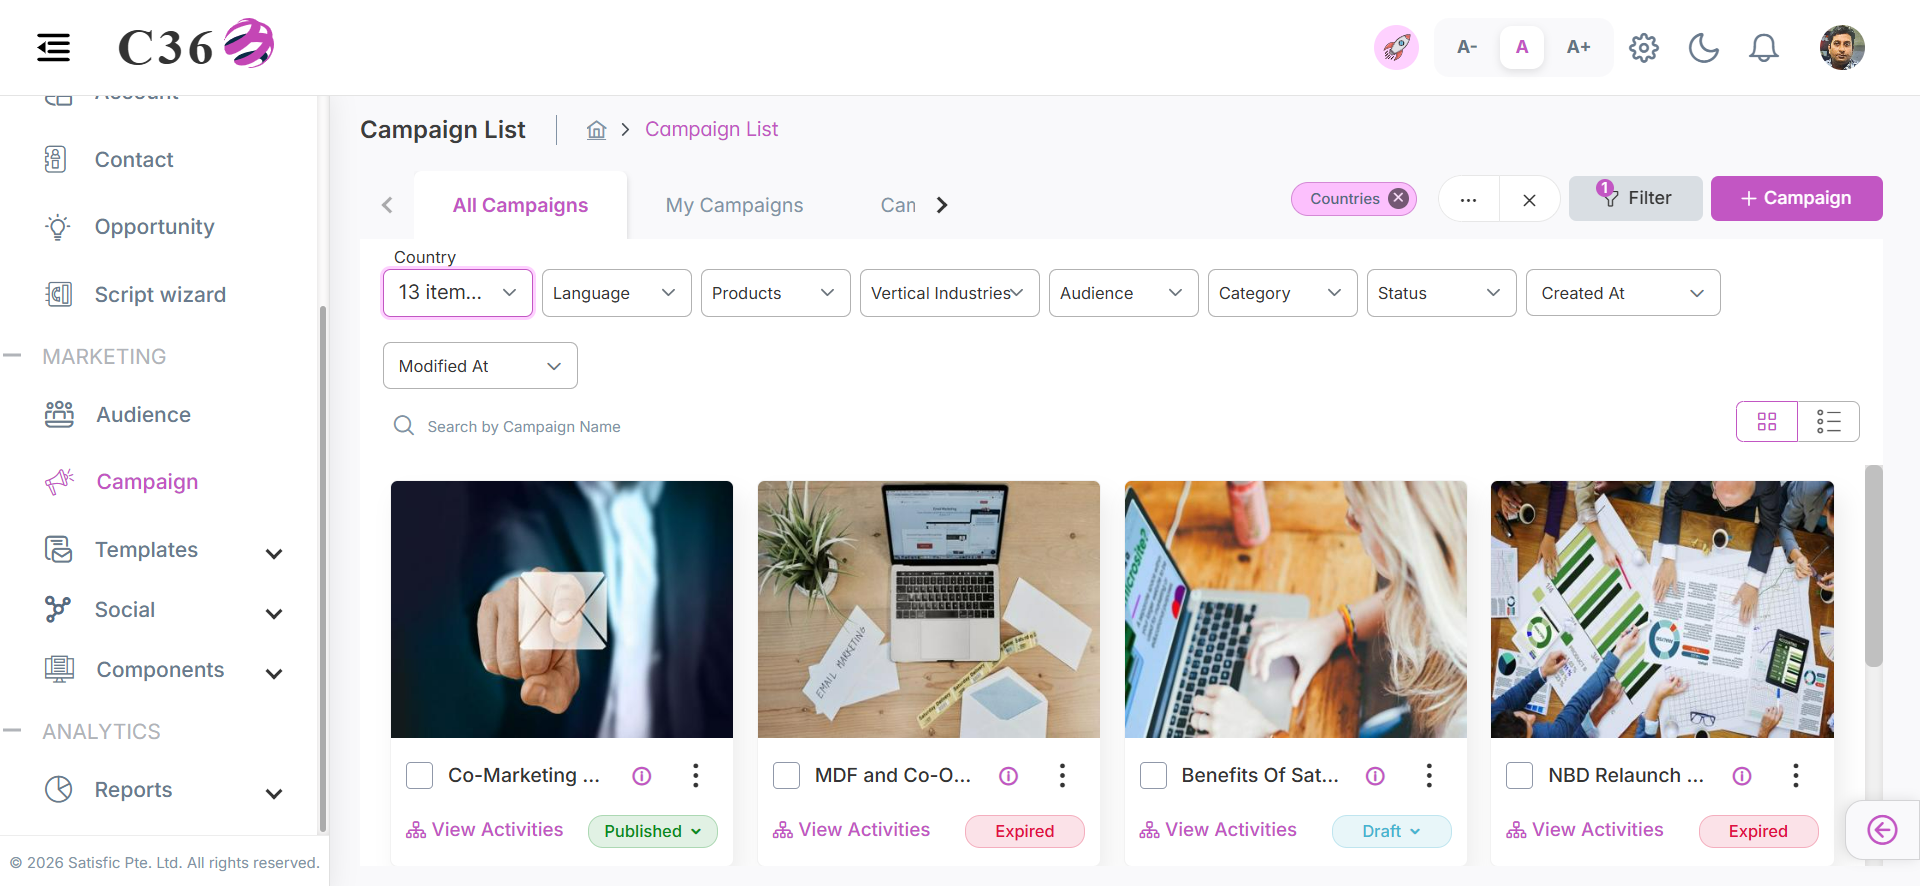
🔍 Search & Filter Campaigns
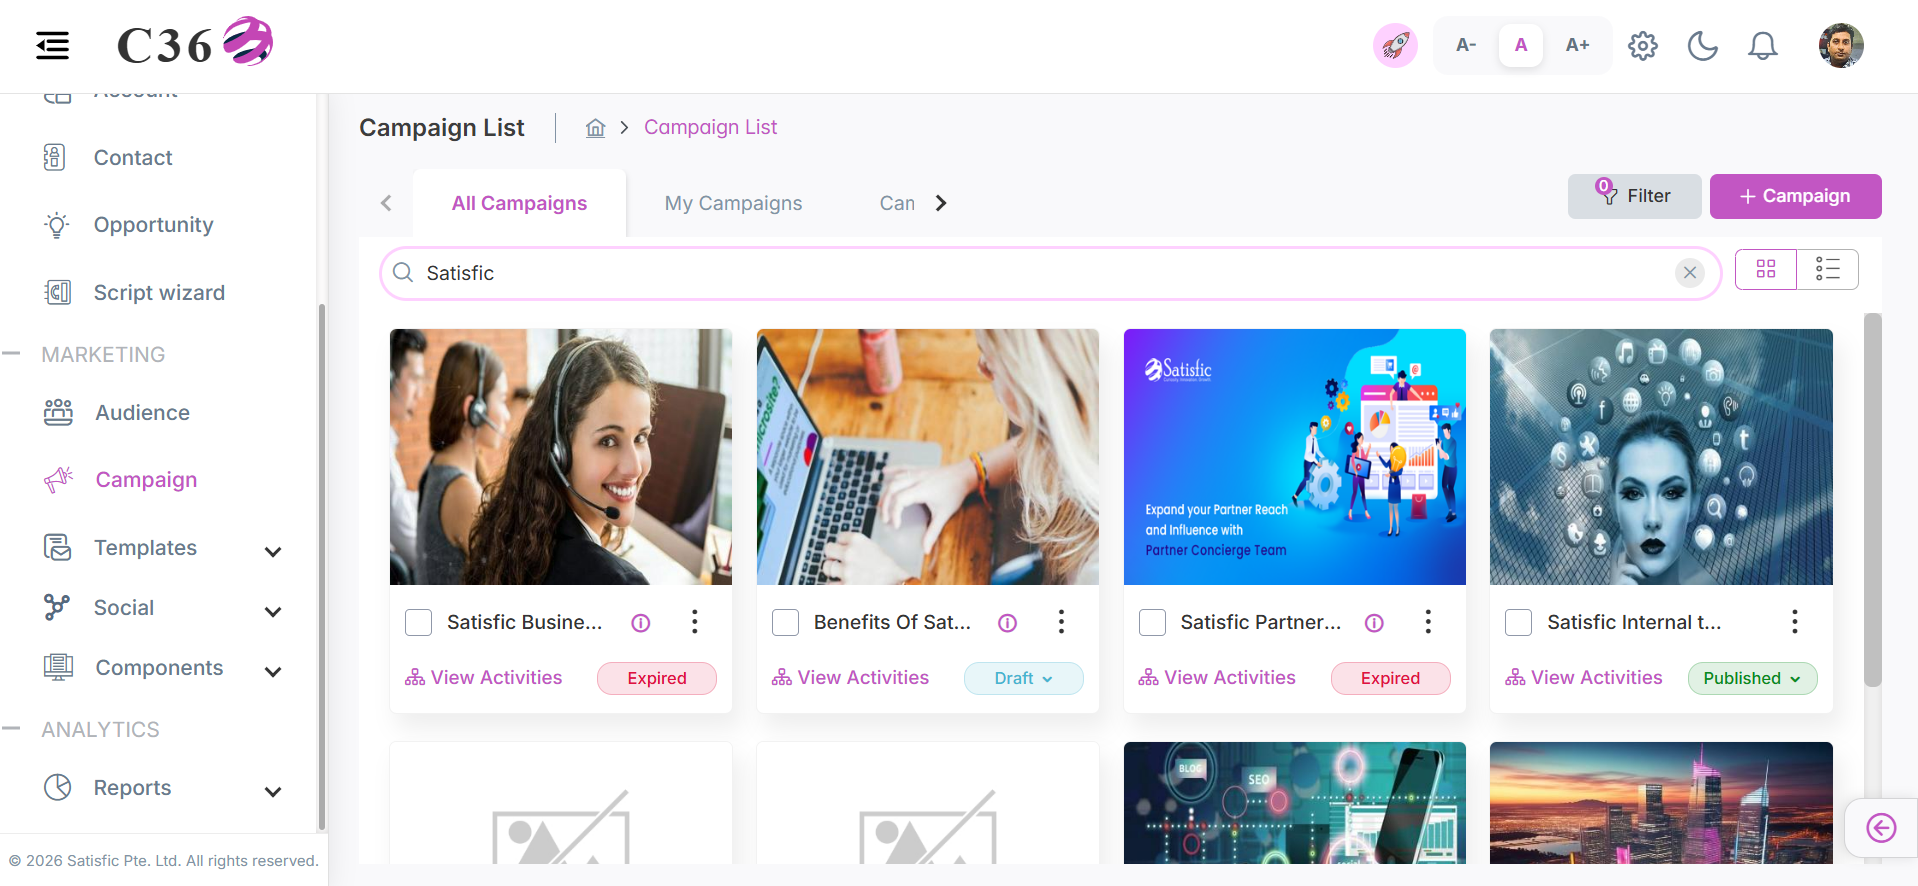
Search Campaigns
- Enter a campaign name in the search bar
- Press Enter or click the search icon
Filter Campaigns
You can refine campaign results using filters.
Available Filters
- Country → Campaign location
- Language → Campaign language
- Industry → Vertical focus (IT, Healthcare, etc.)
- Products → Related products
- Audiences → Target segments
- Campaign Category → Promotional, Informational, etc.
- Status → Draft / Published / Expired
- Created / Modified Dates → Time-based filtering
- All Campaigns/ My Campaigns / Campaigns Assigned To Me
- All Campaigns: Created by me/Assigned to me/Created by below users.
- My Campaigns: Created by me
- Campaigns Assigned To Me: Campaigns that were assigned to me by another user.
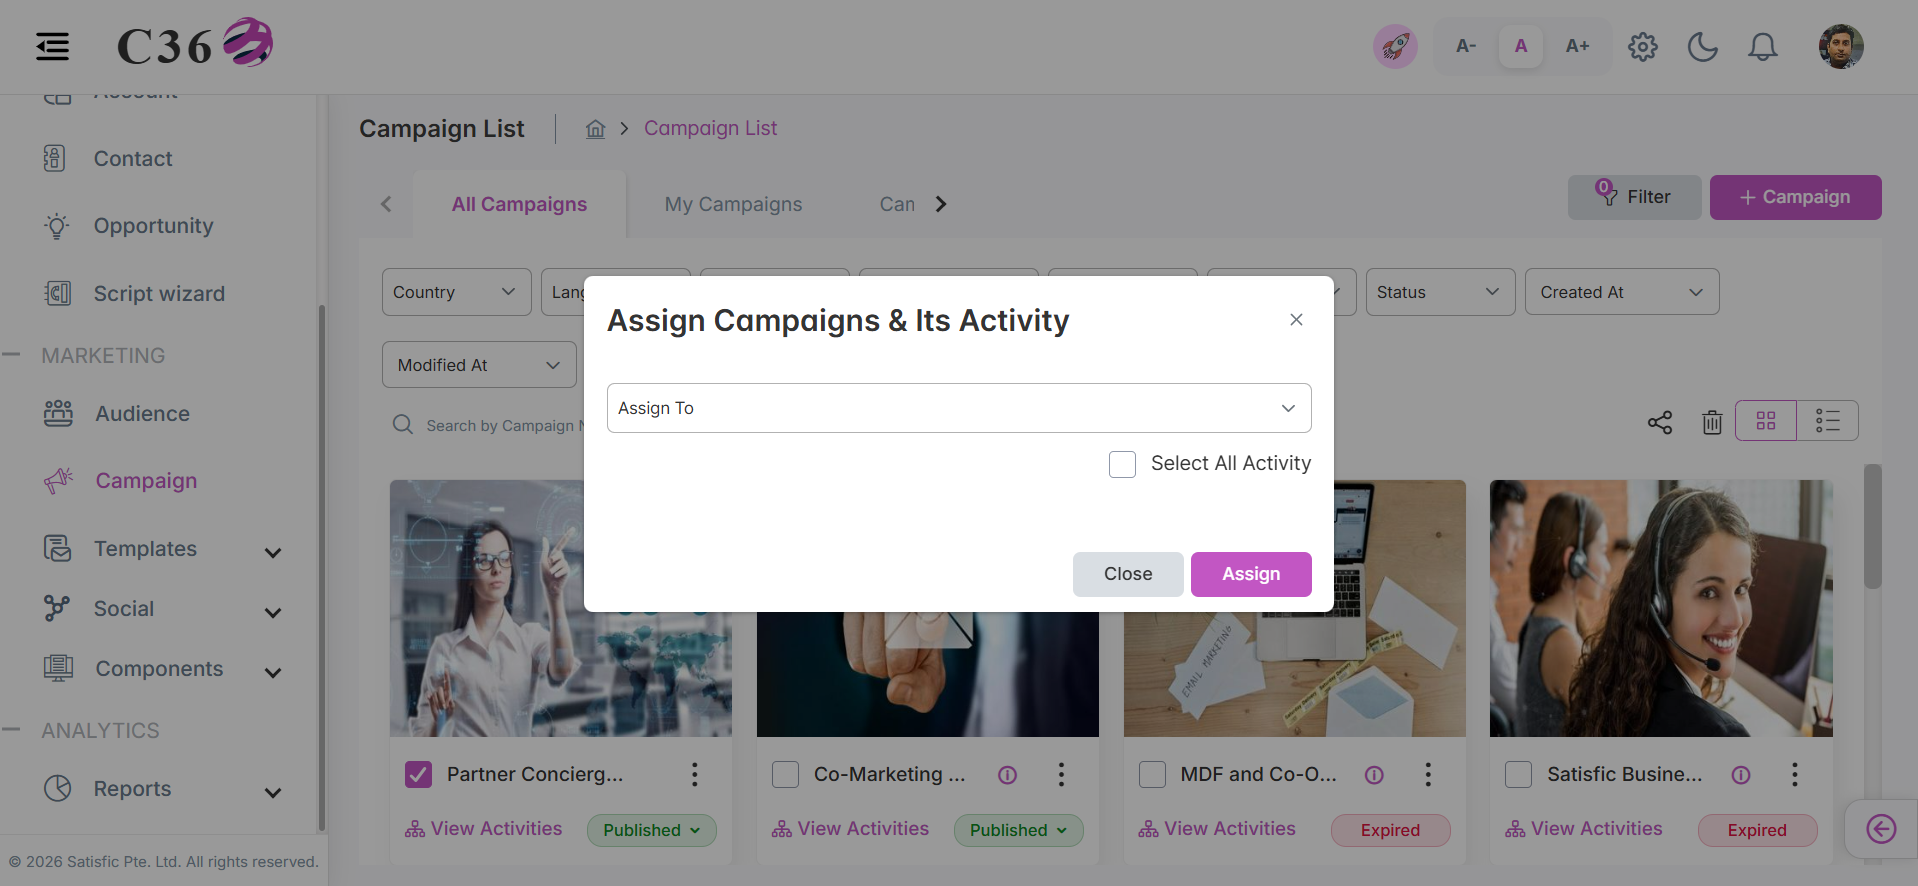
👥 Assigning Campaigns
- Select one or more campaigns from the list.
- Click Assign To in the top bar.
- Select the appropriate user group and confirm the assignment.
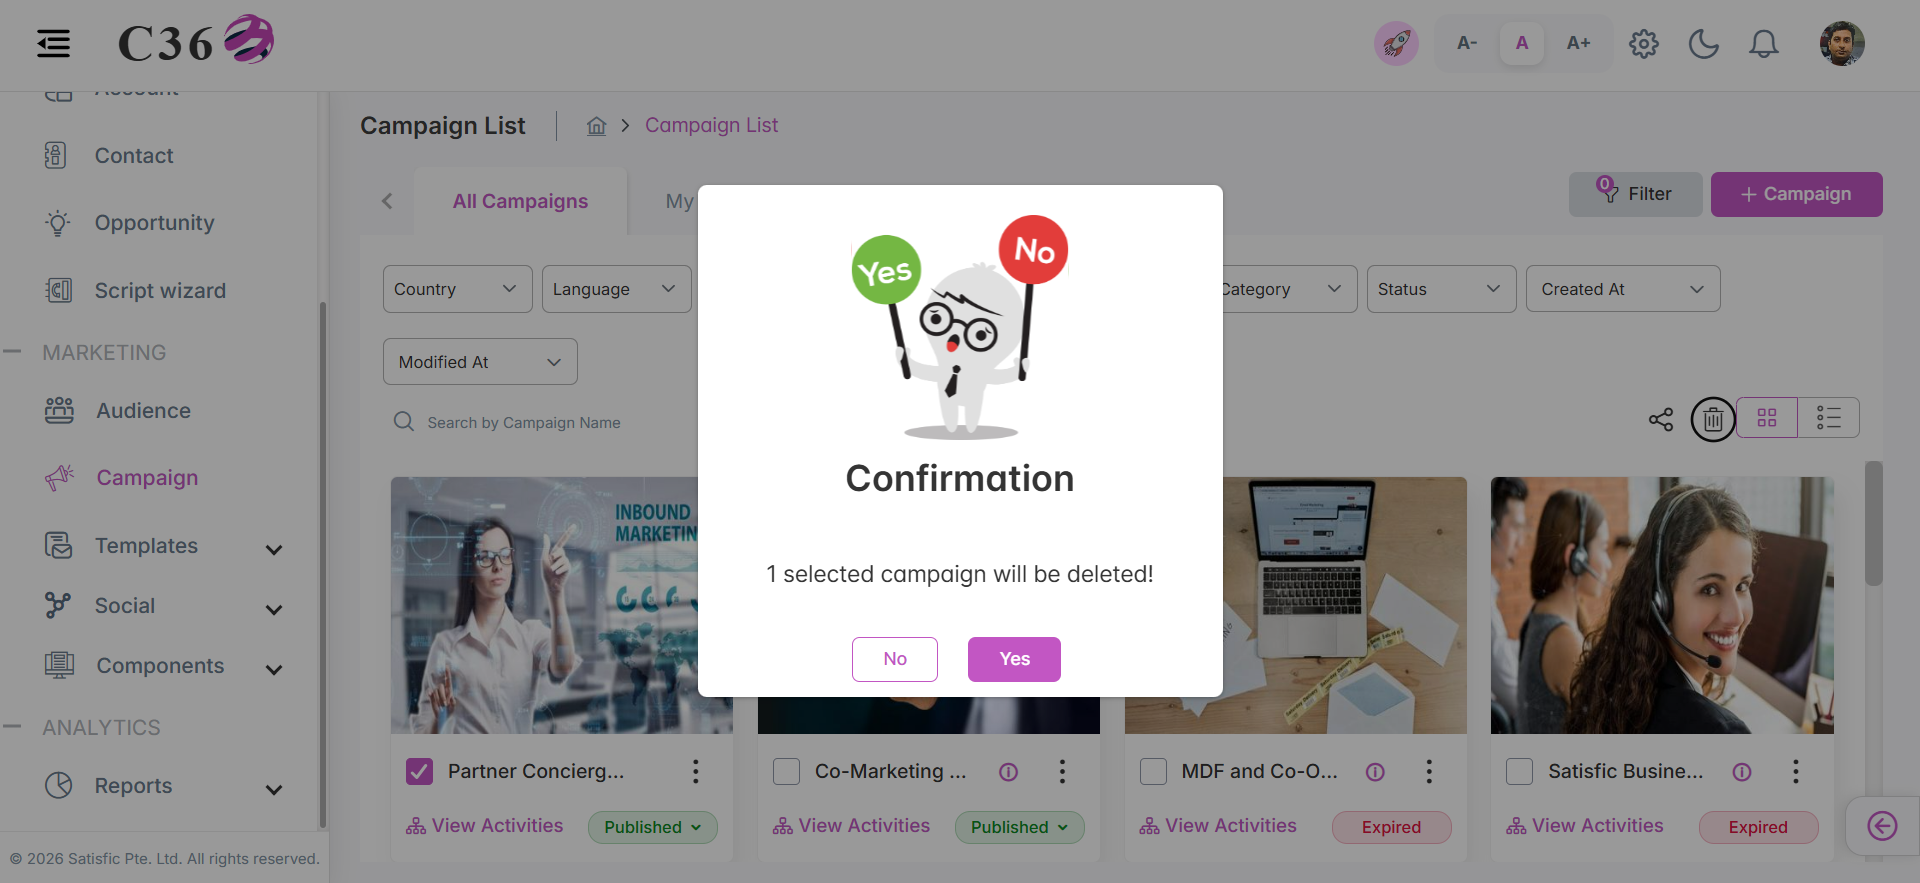
🗑️ Deleting Campaign
- Select the checkbox(es) for the Campaign you want to delete.
- Click the Delete icon .
- Click on Yes from the confirmation pop-up if you want to delete.
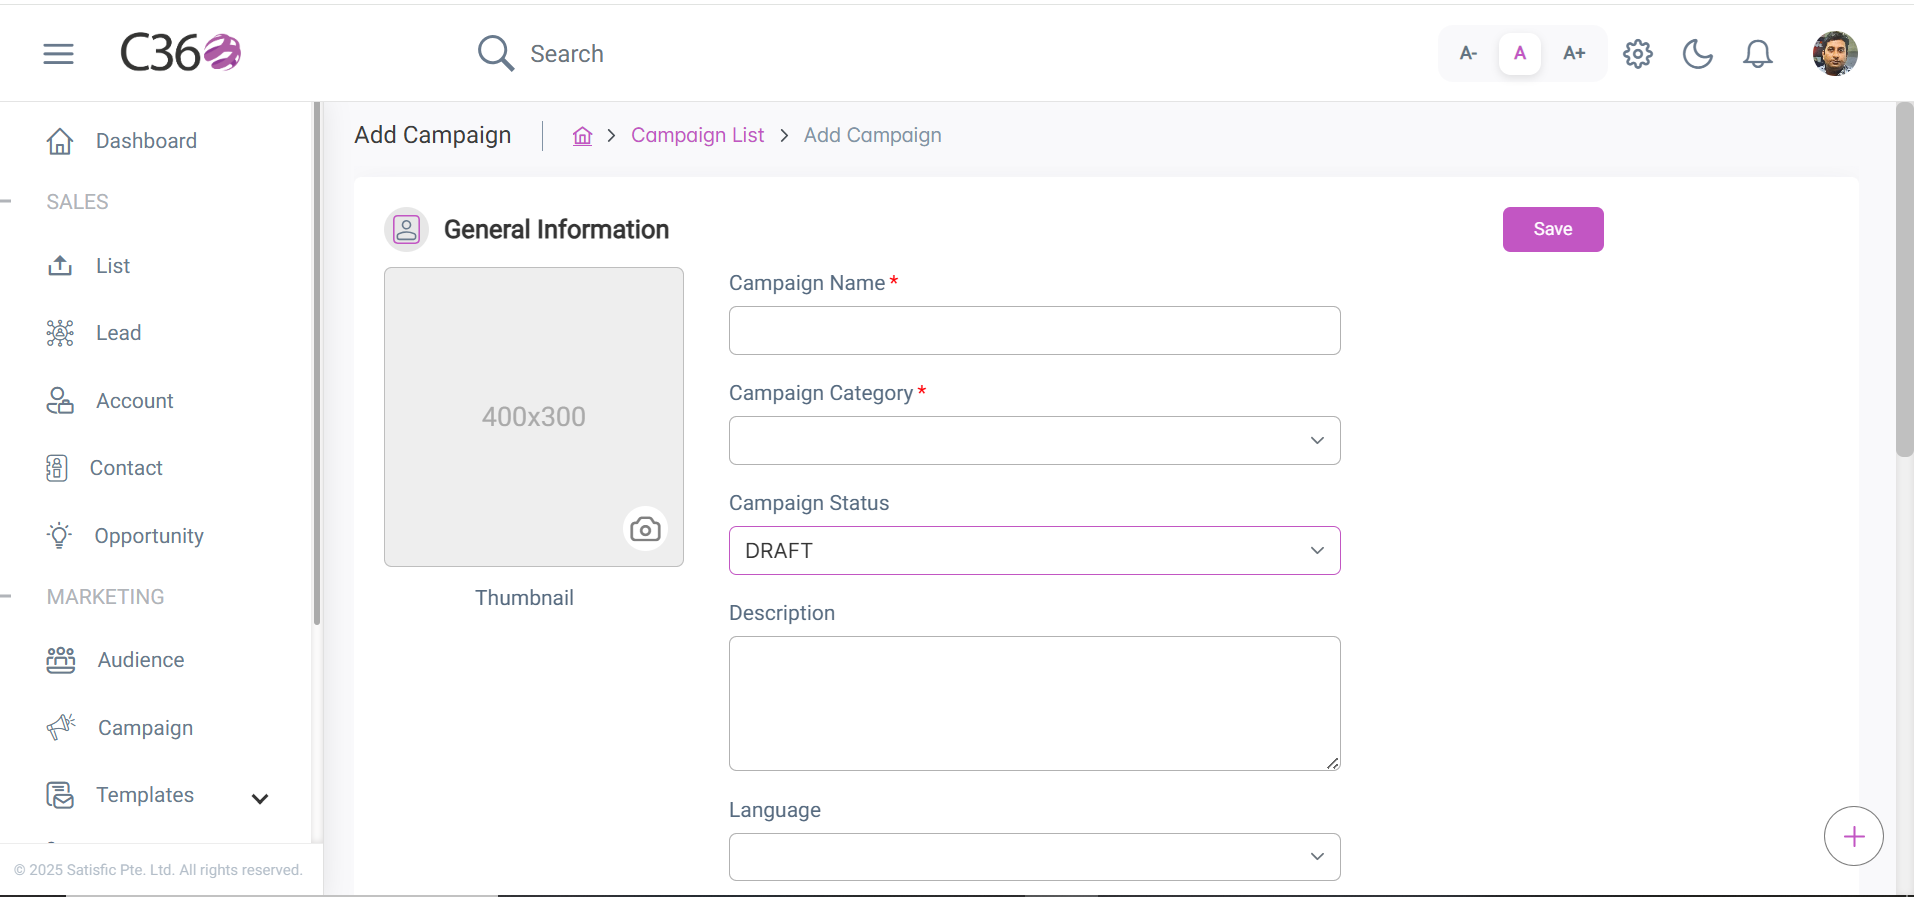
✏️ Adding or Editing Campaigns
When creating or editing a campaign, the interface is organized into tabs. Complete the required fields (marked with *) and click Save to proceed.
- General Info
- Attributes
General Information (Required Fields)
- Campaign Name — Title of the campaign
- Category — Promotional / Informational / Seasonal
- Status — Draft / Published / Expired
- Description — Brief summary of the campaign
- Thumbnail — Visual identifier
- Language — Primary campaign language
- Estimated Budget — Planned budget allocation
- Expiration Date — Campaign end date (if applicable)
Attributes
- Audiences — Target segments
- Products — Associated products
- Vertical Industries — Relevant industries
- Regions / Countries — Target geographies
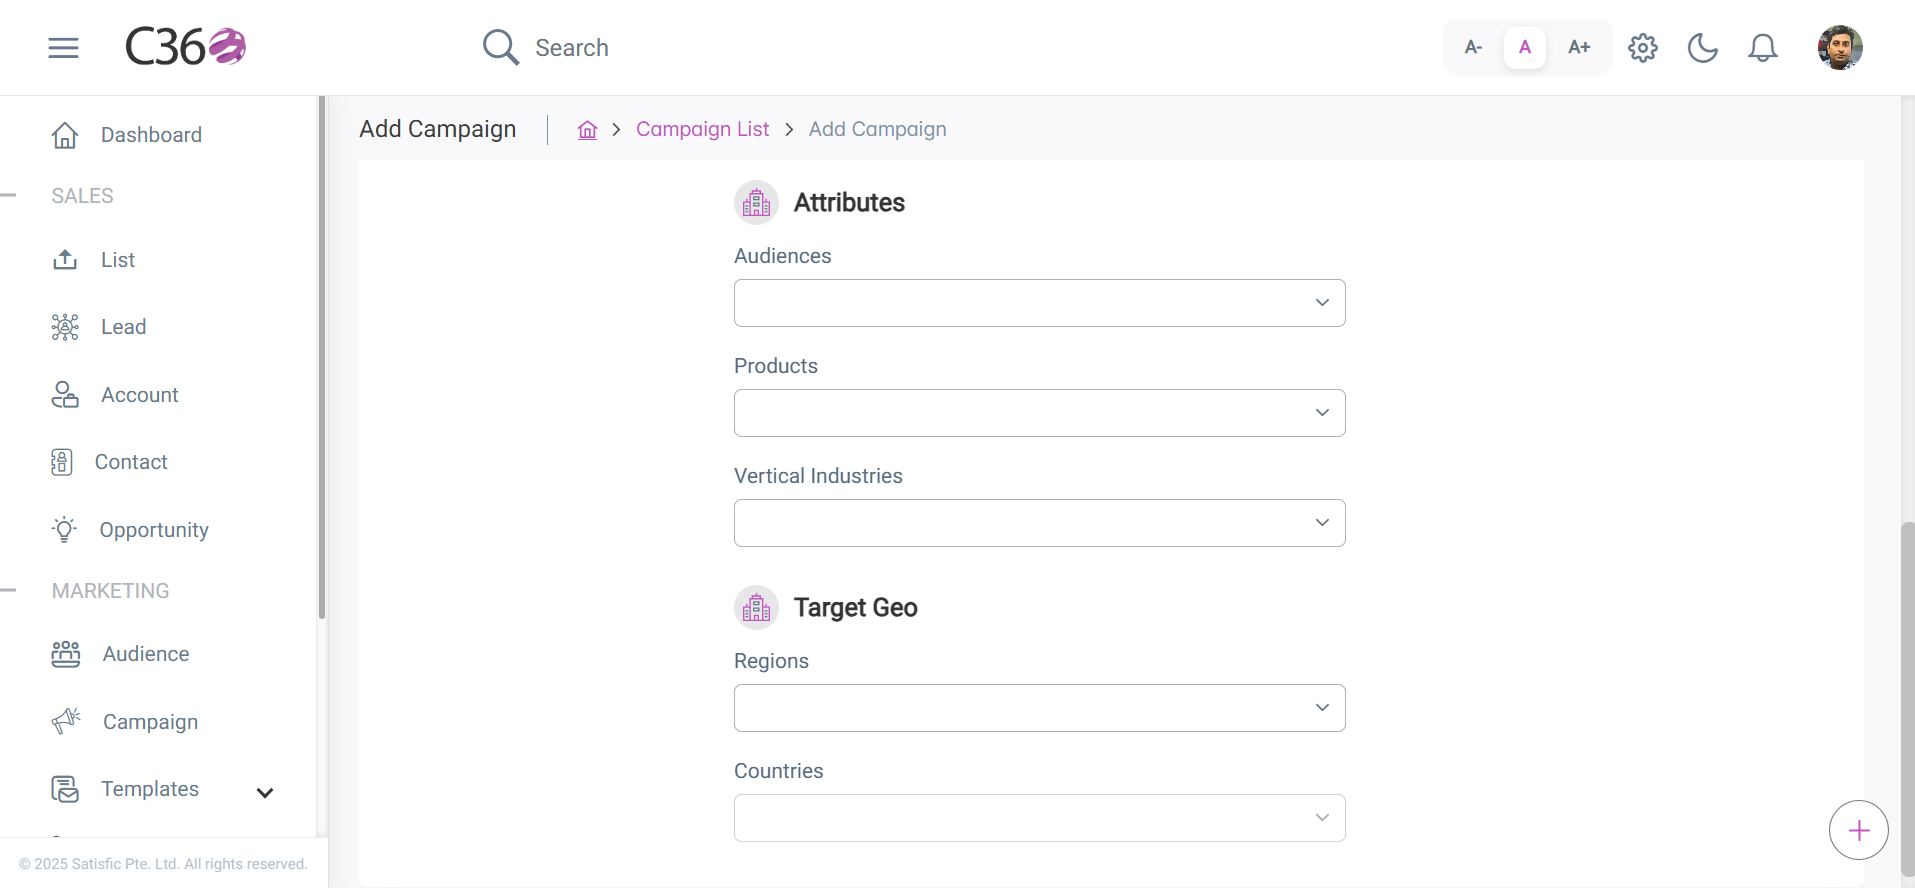
Once you save the General Information and Attributes, the Activities tab becomes available for configuring campaign activities.
--
📑 Campaign Activities
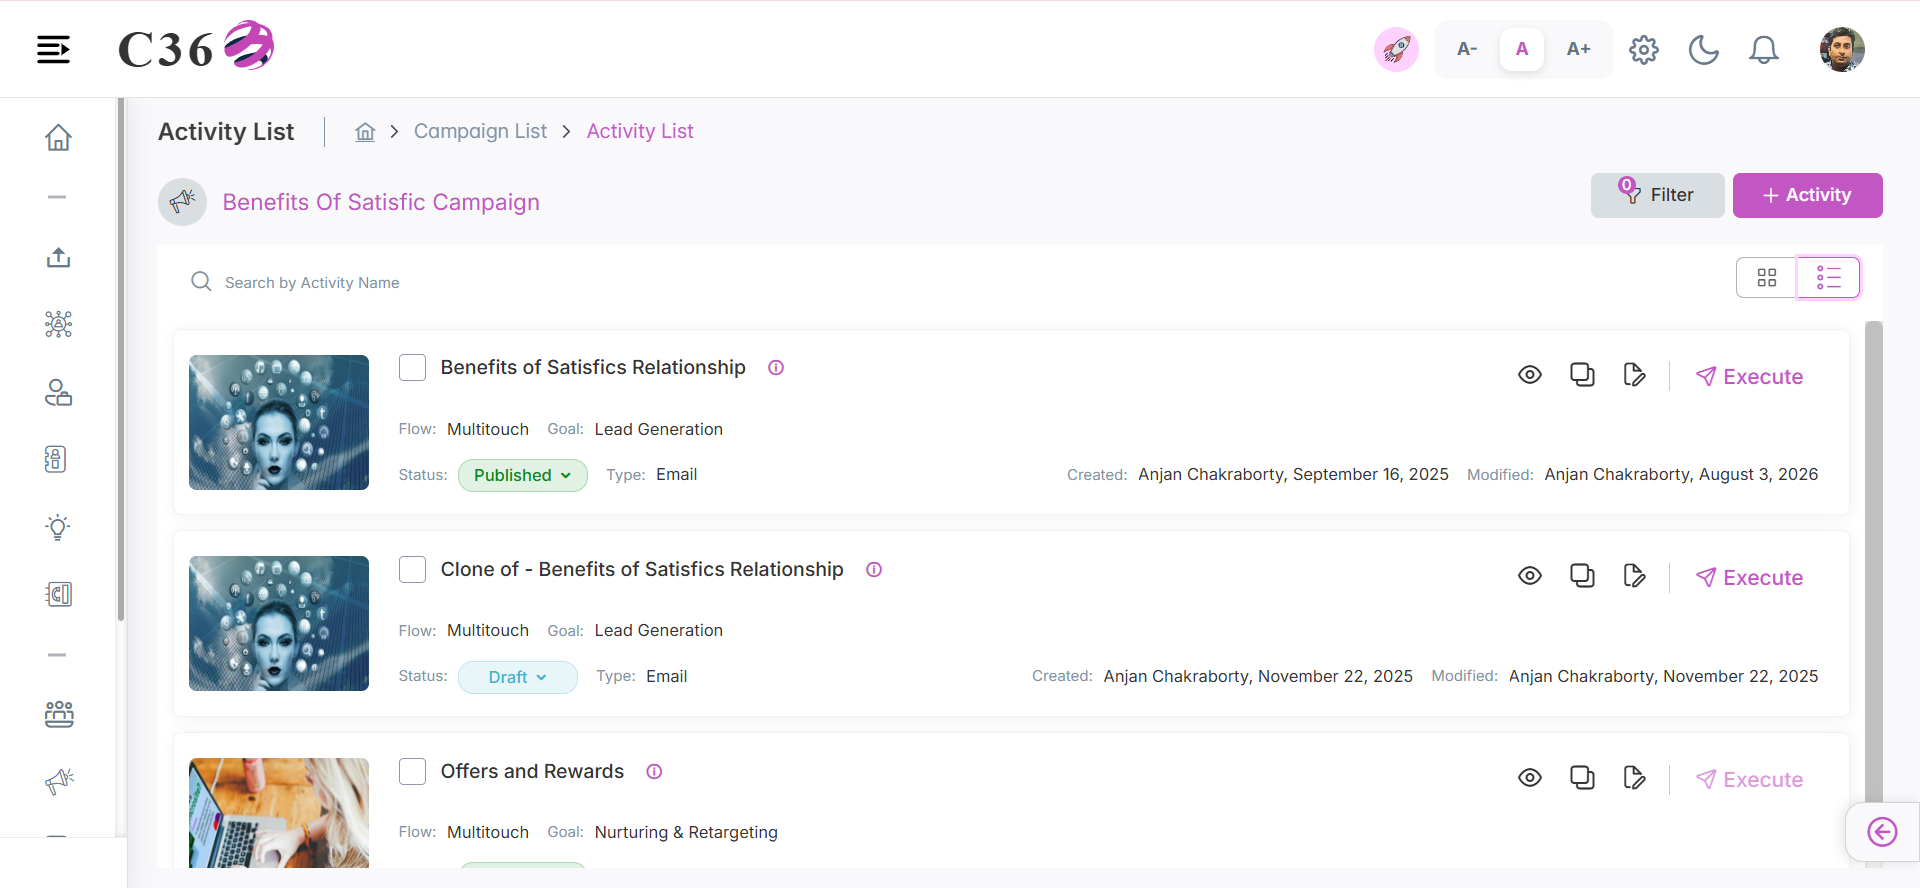
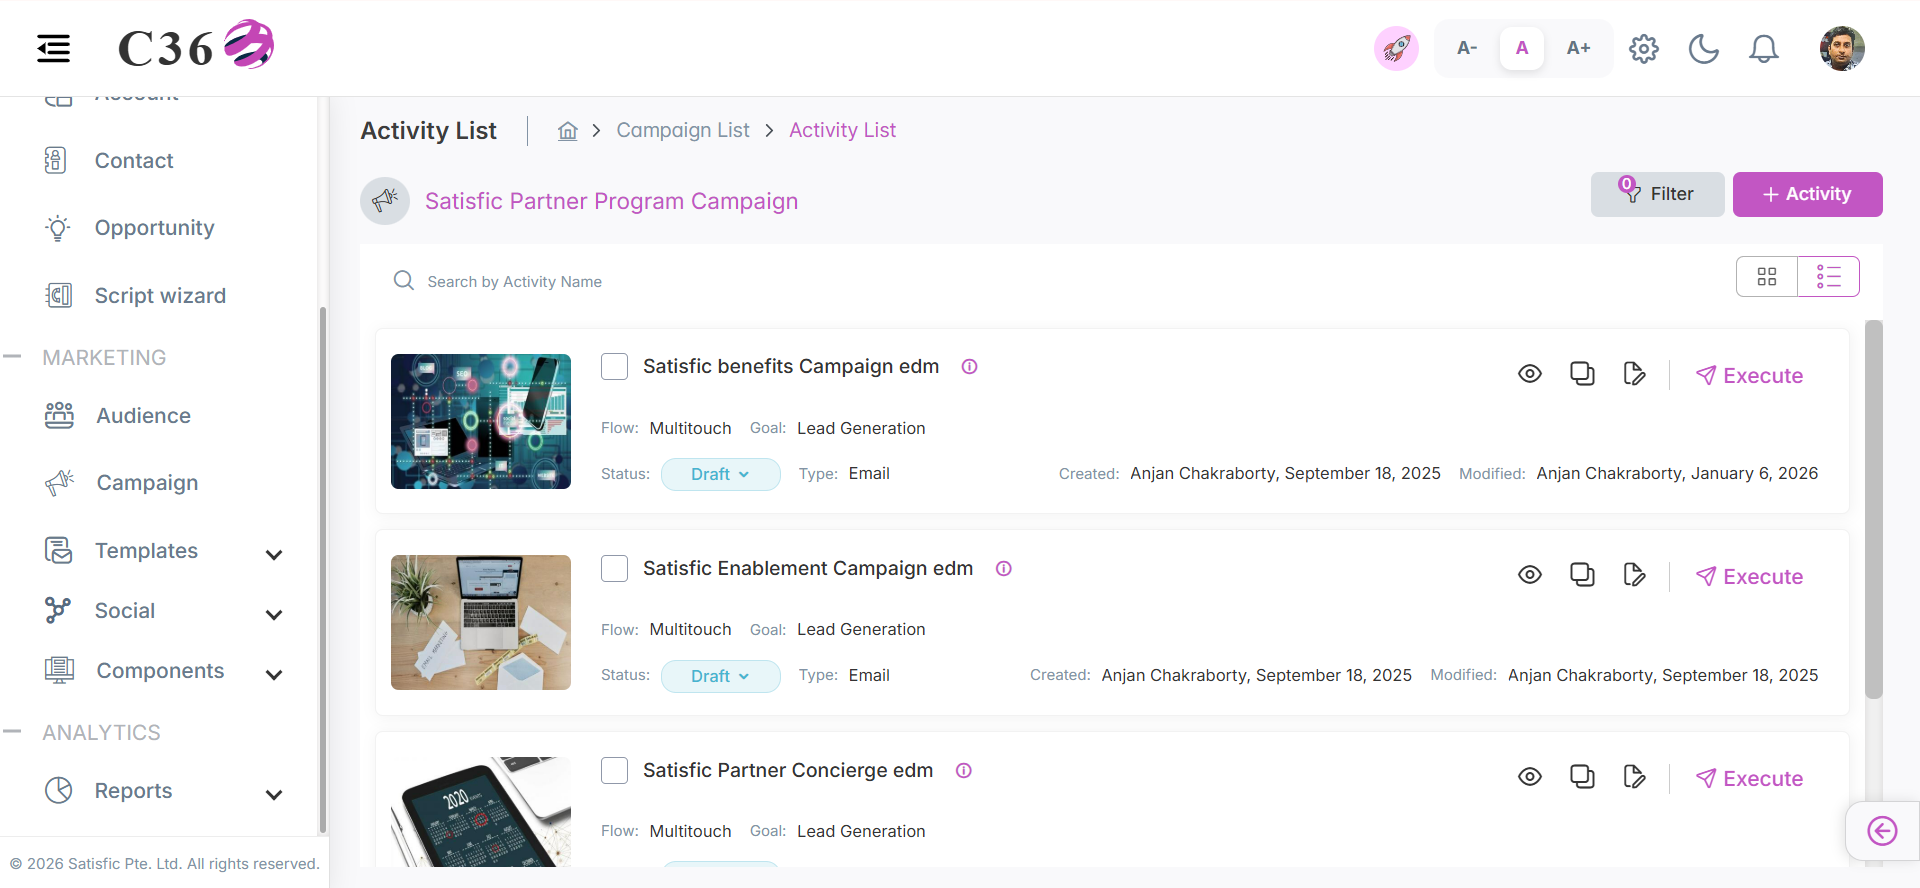
Each campaign can include one or more Activities (e.g., Emails, Webinars). Activities can be managed in List View or Grid View, and support the following actions:
- Preview
- Clone
- Edit
- Delete
- Execute
- Status modification (Draft / Published / Expired).
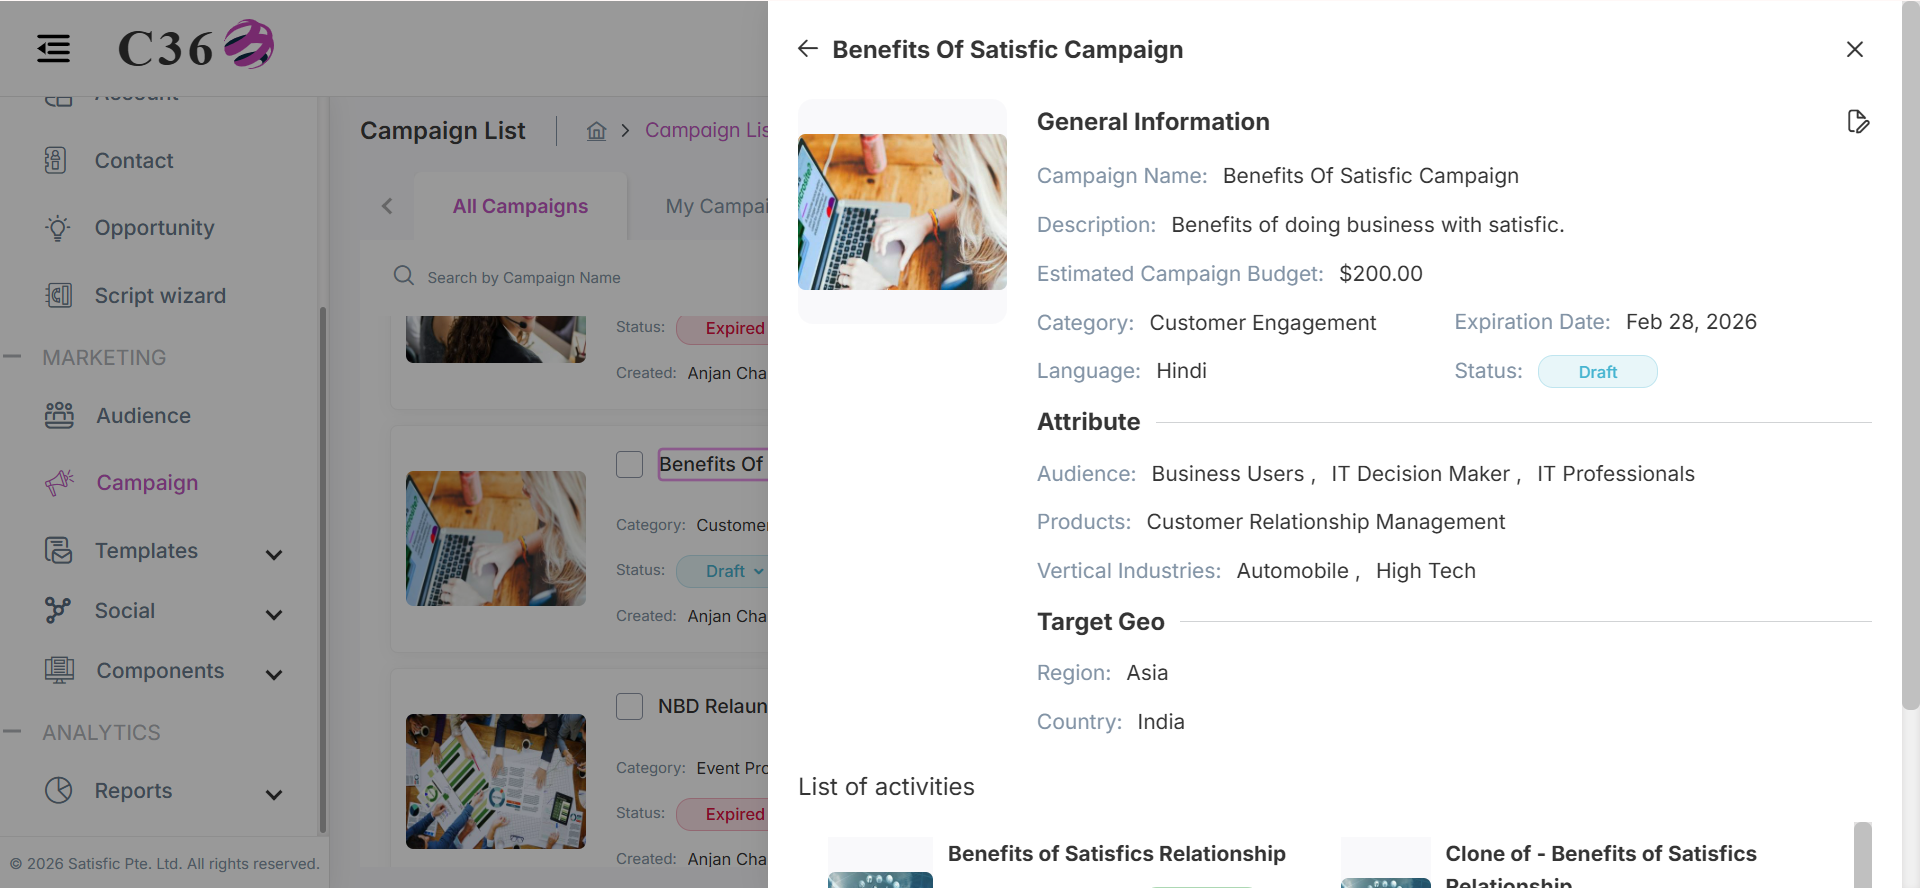
- Details Page View : Clicking on the activity name opens a detailed view with all relevant information.
- View Description : Hover on the "i" icon.
- 📄 List View
- 🔳 Grid View
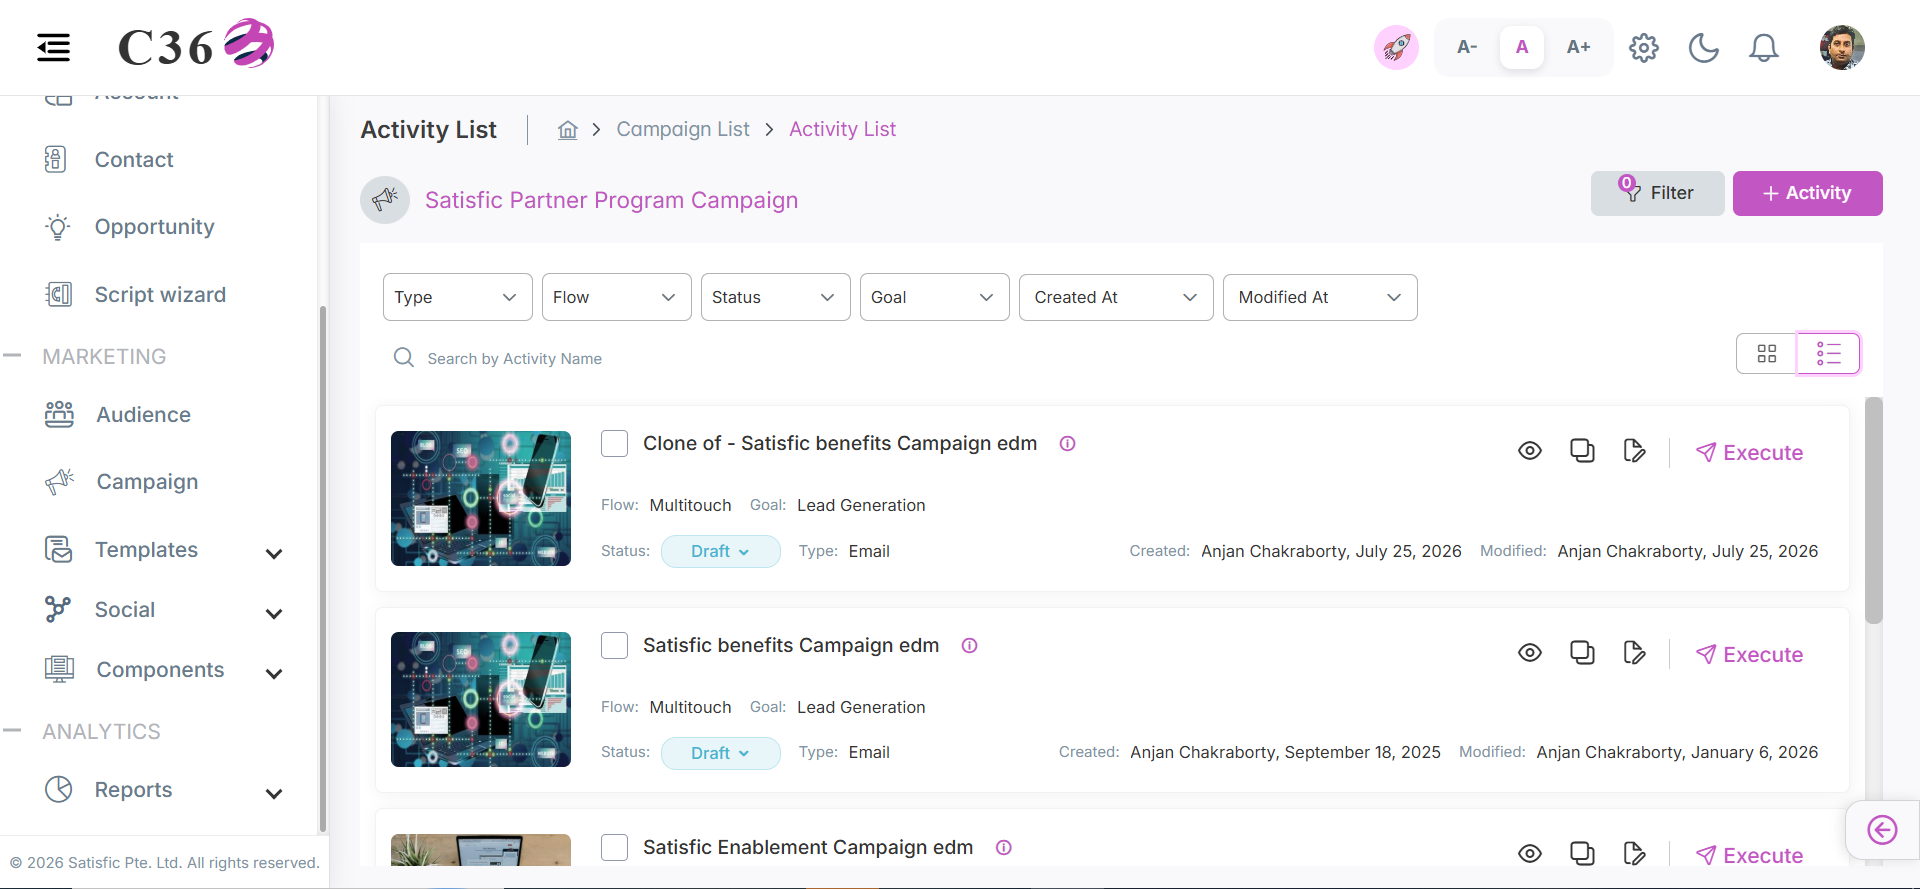
The List View presents activities in a tabular format for quick scanning.
| Field | Description |
|---|---|
| Activity Name | Title of the activity |
| Type | Email / Webinar |
| Status | Draft / Published |
| Flow | Single Touch / Multi Touch |
| Created / Modified | Timestamps for creation and last update |
| Actions | Preview, Clone, Edit, Delete, Execute |
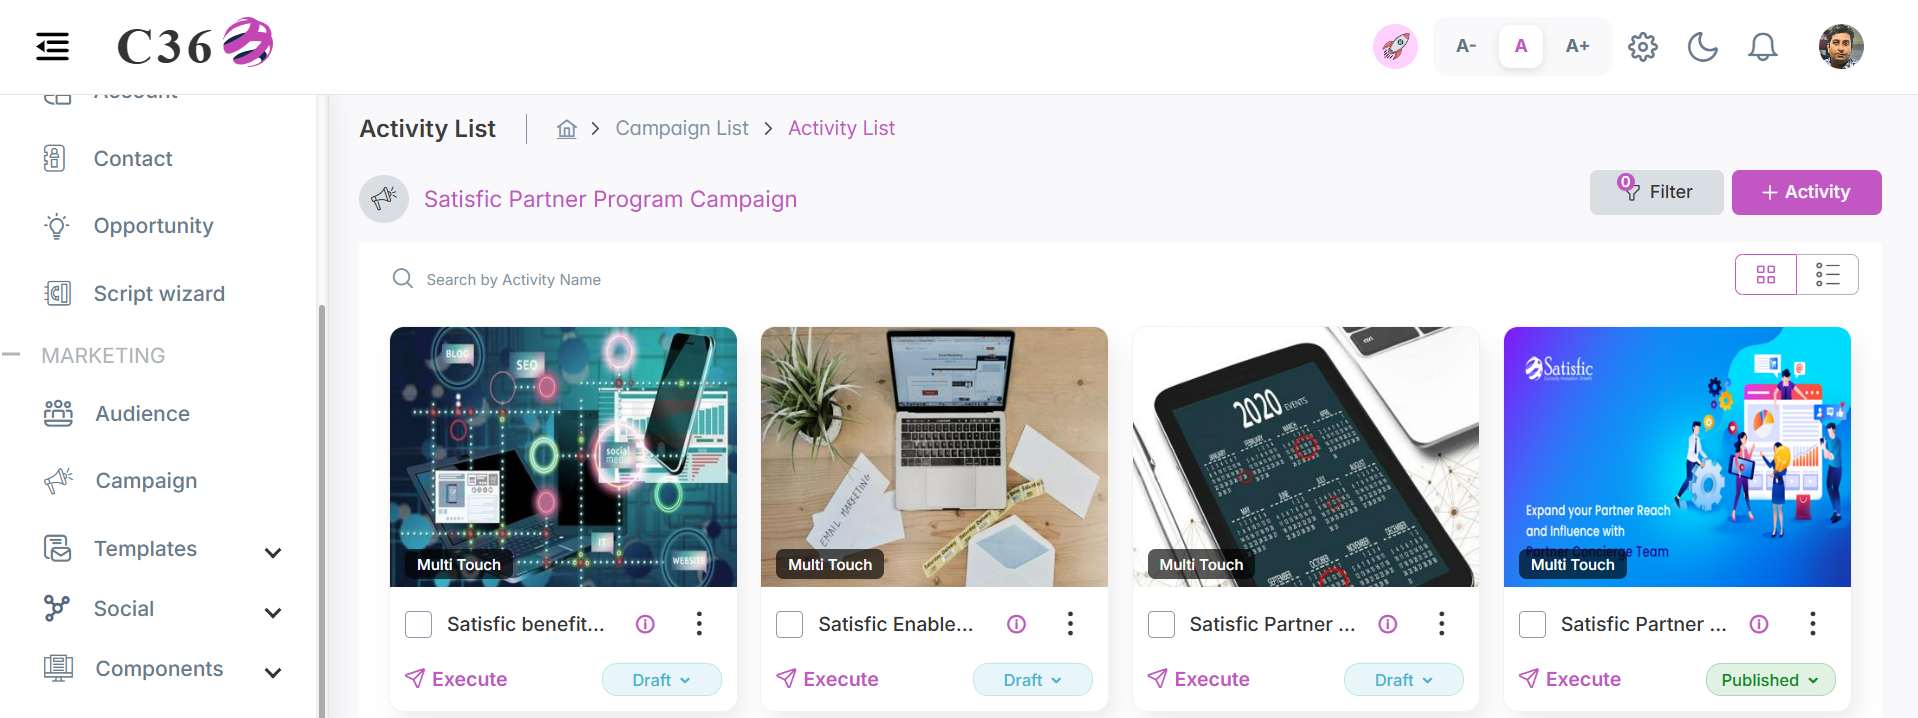
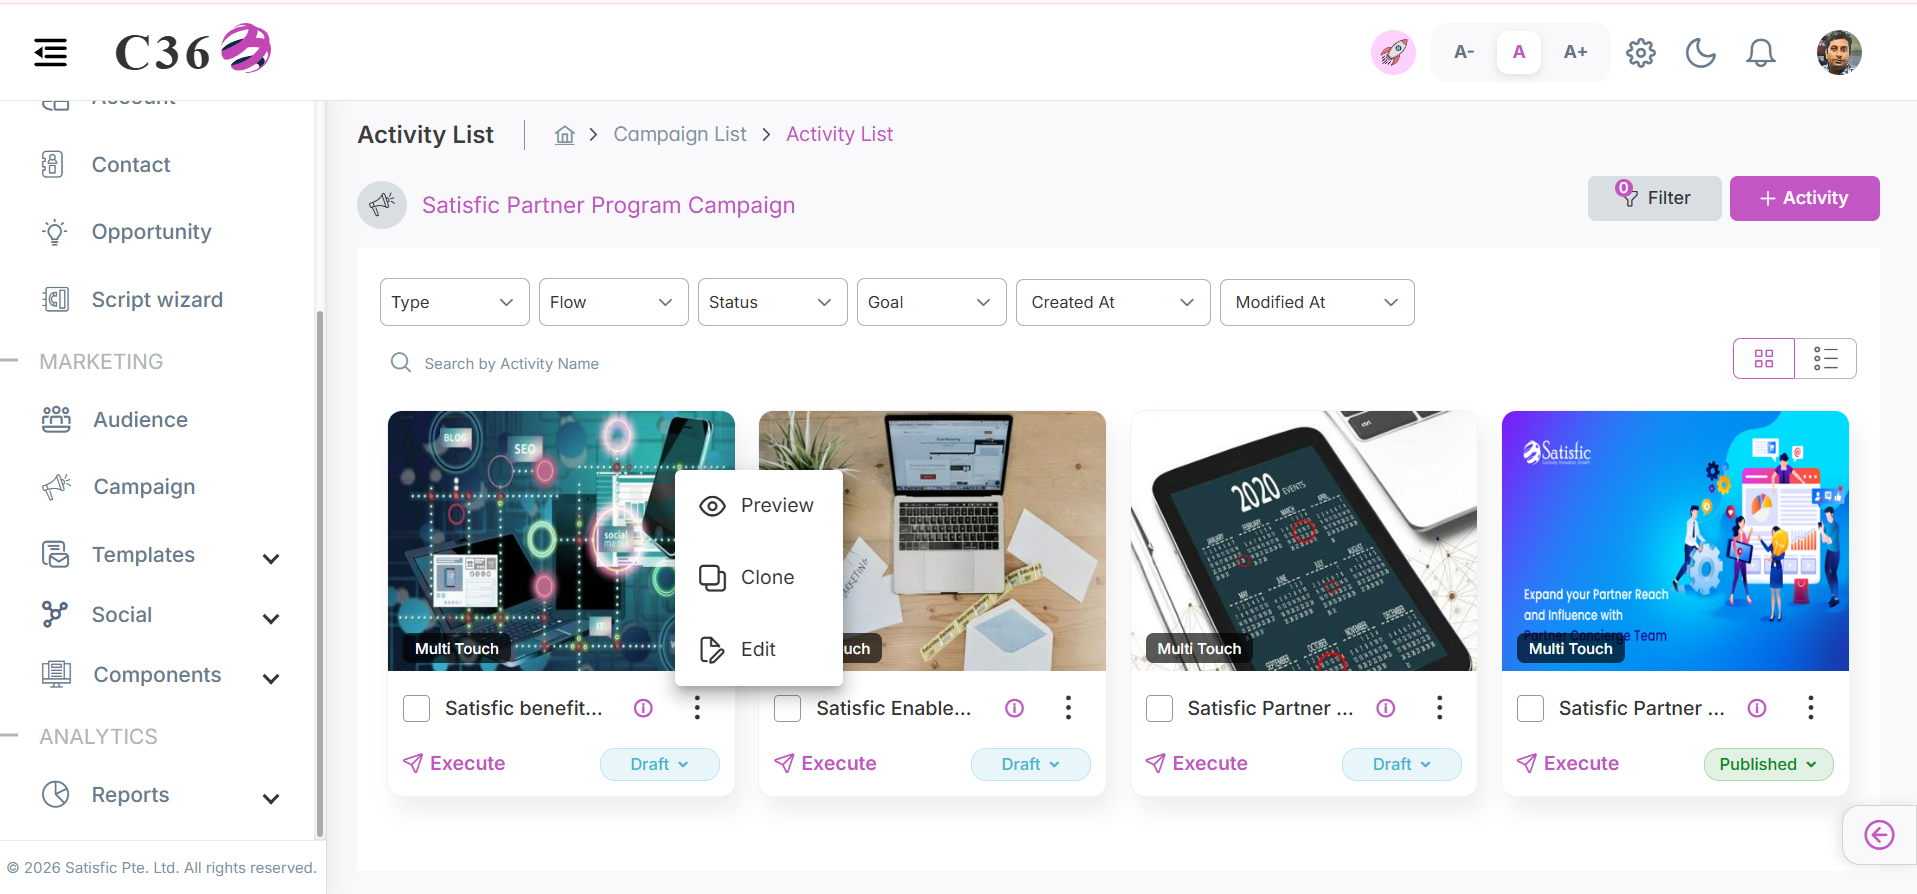
The Grid View displays activities as visual cards with key details.
Use the ⋮ menu on each card to access available actions:
- Edit
- View Info
- Clone
- Preview
- Delete
🔎 Search & Filter Activities
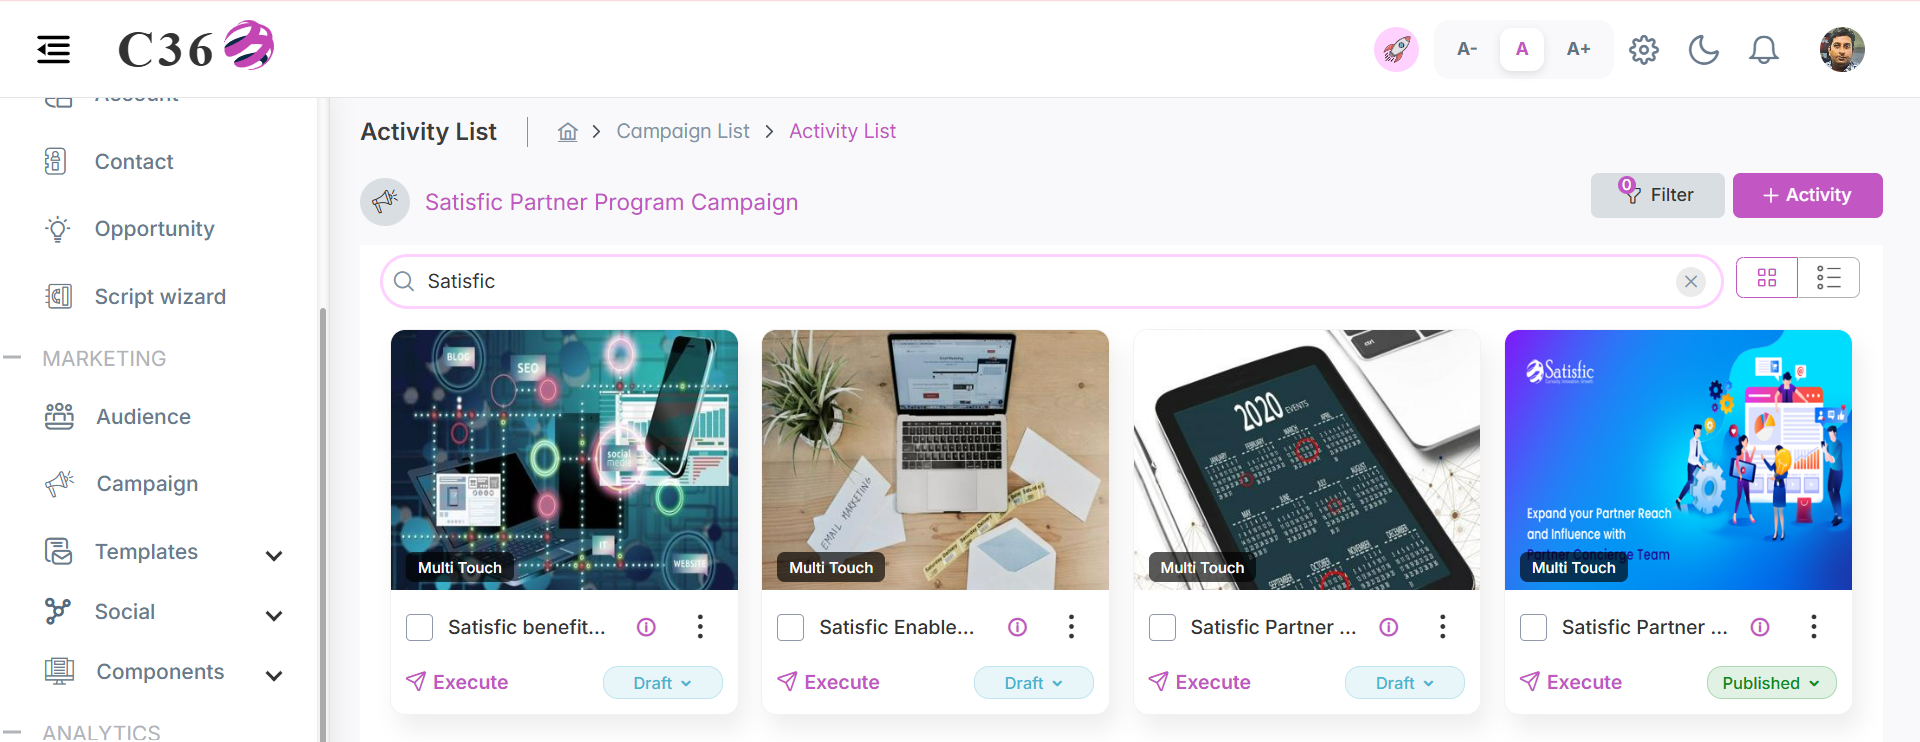
Search Activities
- Enter an Activity name in the search bar.
- Press Enter or click the search icon.
Filter Activities
You can refine activity results using filters.
Available Filters
Filter — Narrow results by:
- Type (Email, Webinar, etc.)
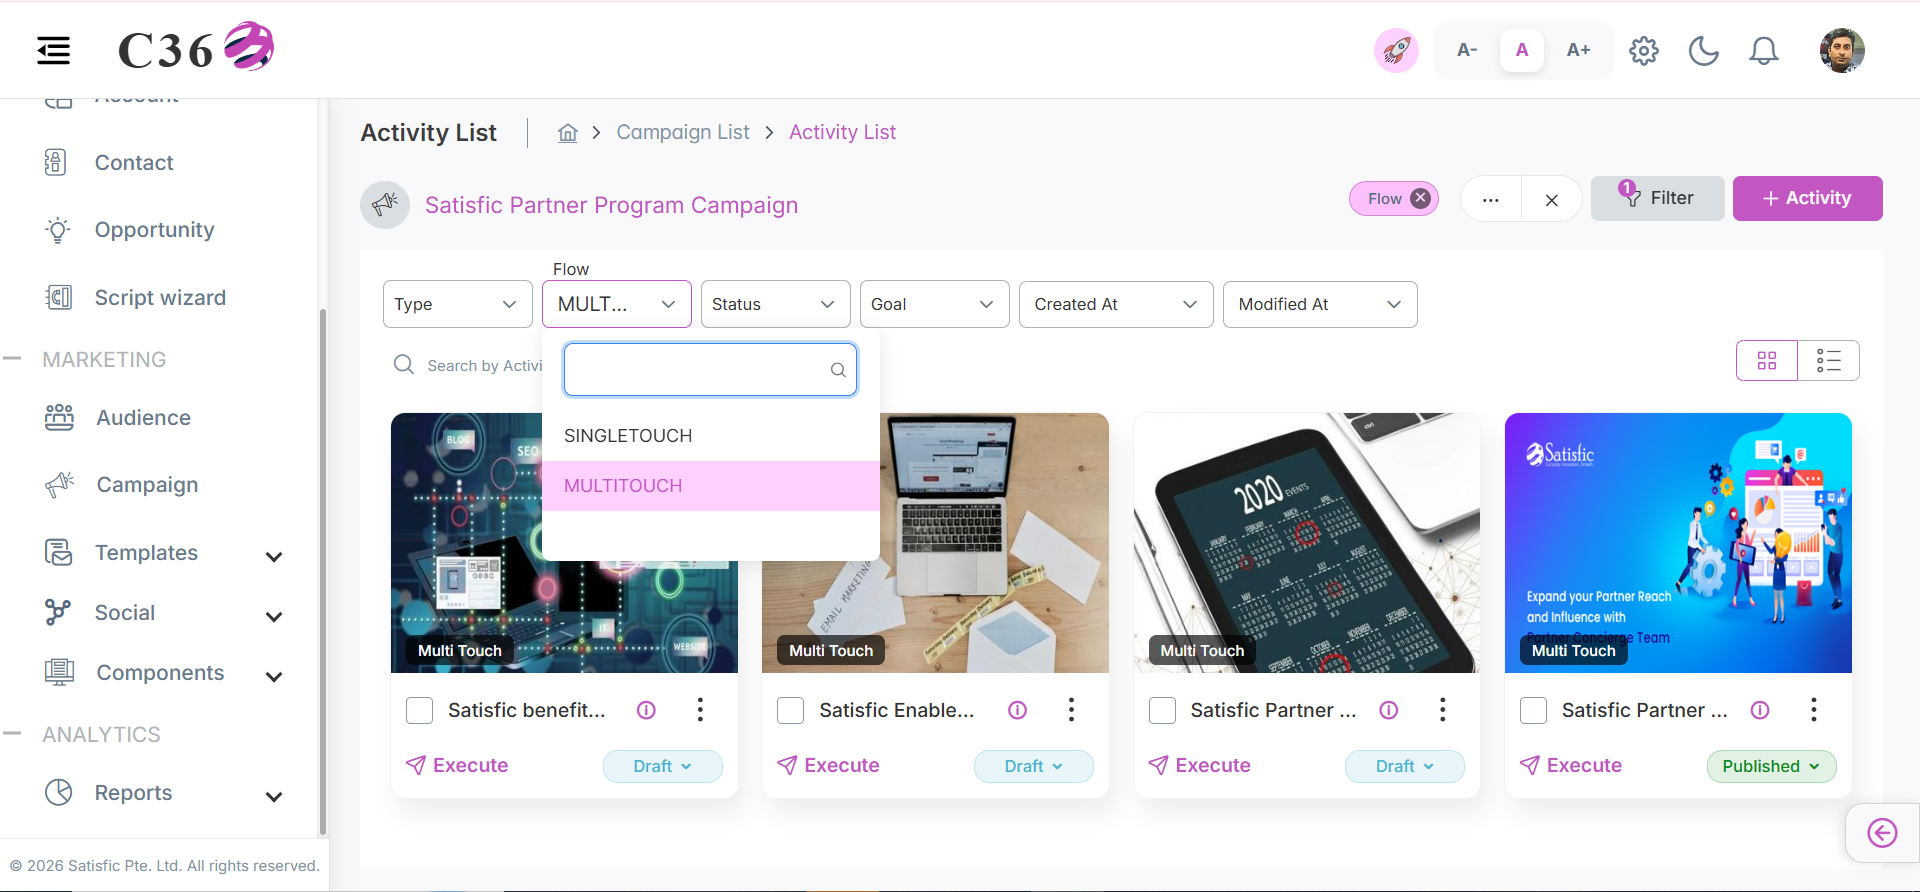
- Flow (Single / Multi Touch)
- Status (Draft / Published)
- Date Range (Created / Modified)
- All Activities/ My Activities / Activities Assigned To Me
- All Activities: Created by me/Assigned to me/Created by below users.
- My Activities: Created by me
- Activities Assigned To Me: The activities which were assigned to me by someone.
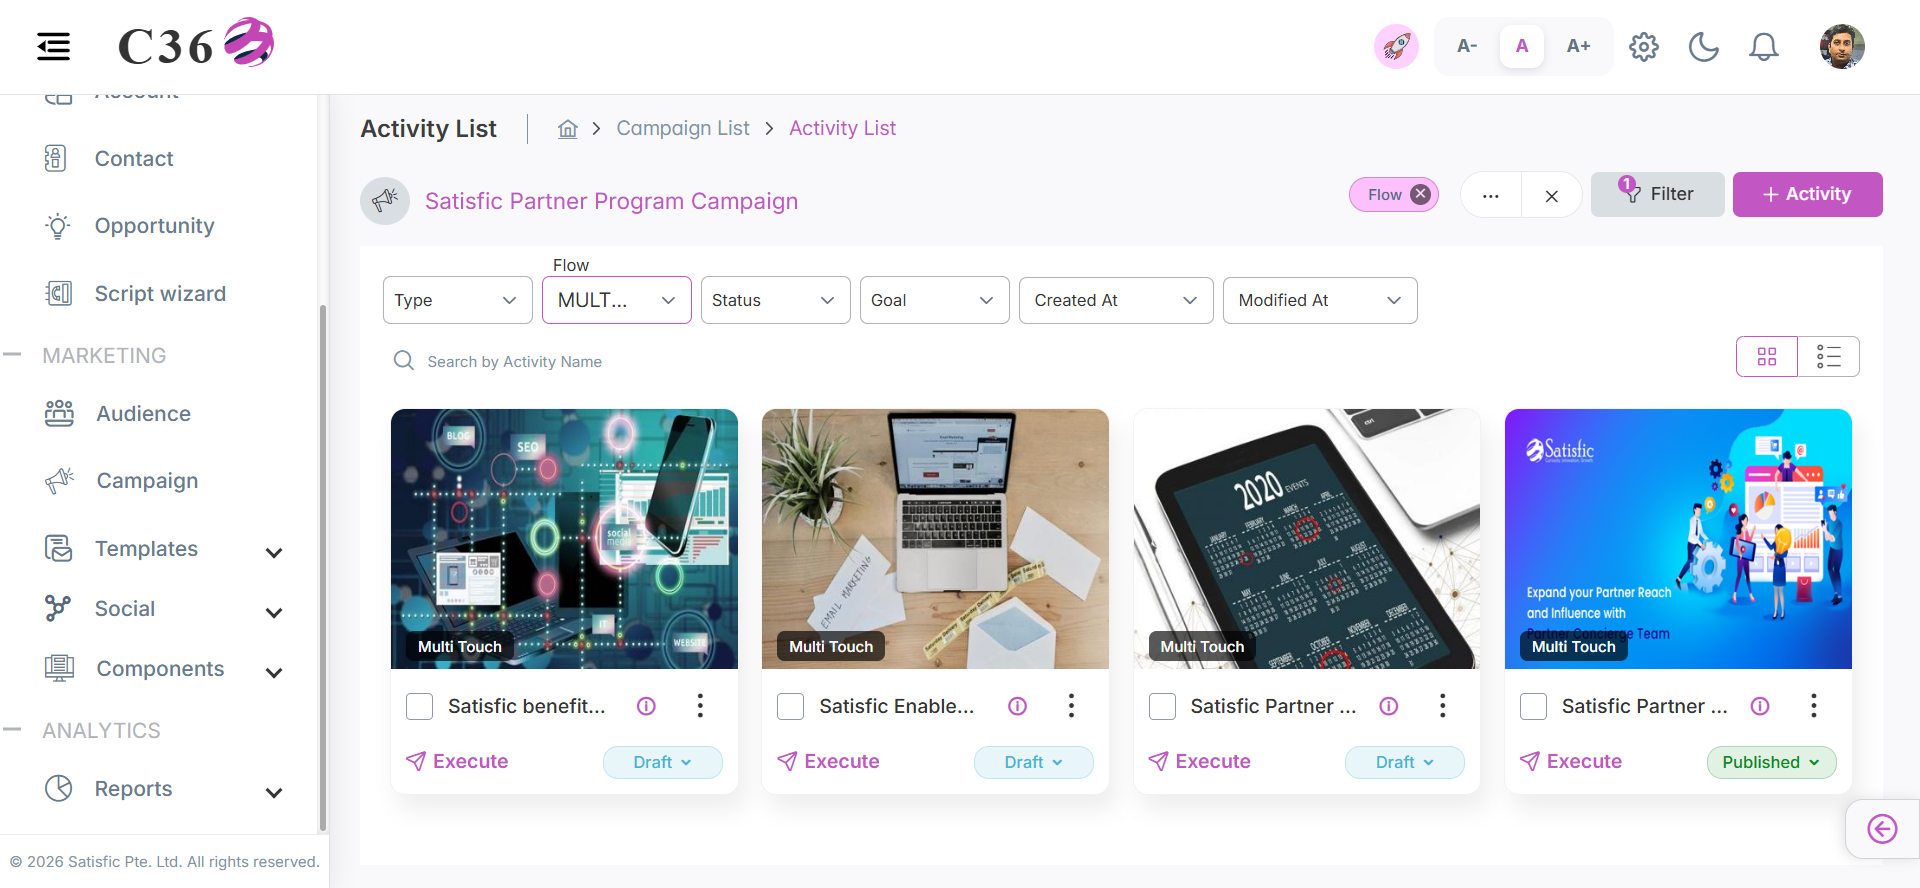
🔄 Flow Options
Activities can follow one of two flows:
- Single Touch — A one-time interaction using a predefined template.
- Multi Touch — A sequence of multiple steps in a campaign workflow.
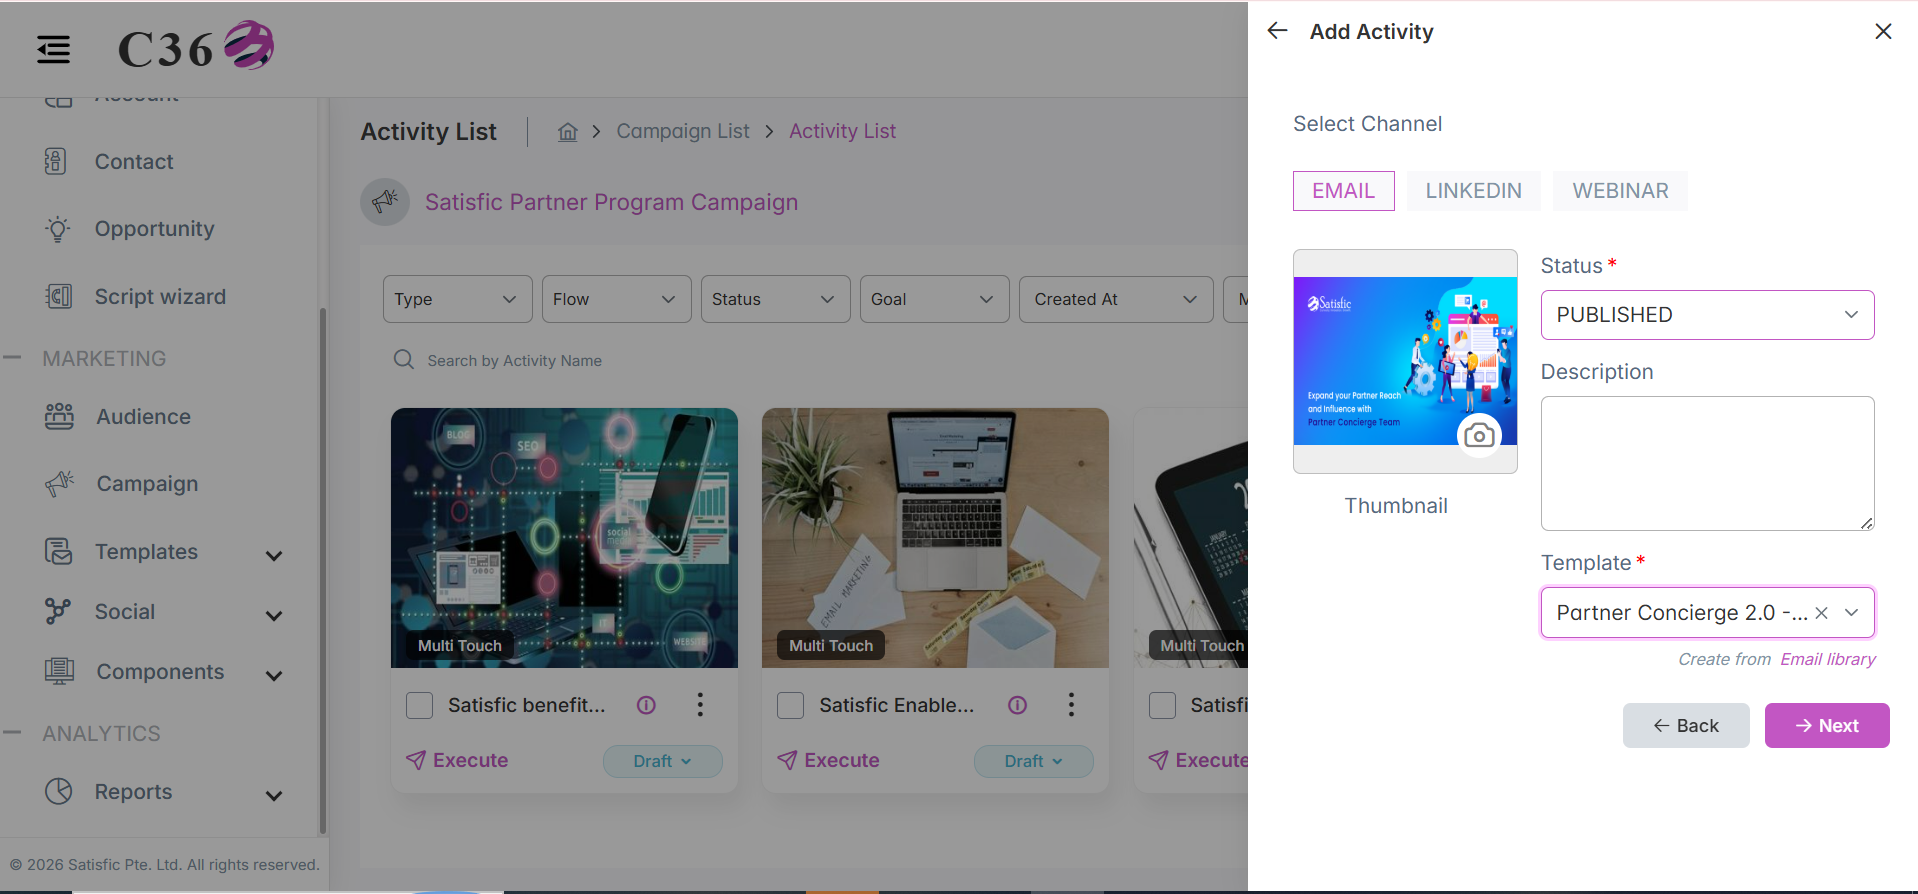
➕ Adding or Editing an Activity
To create or modify an activity, navigate to the Activities section and click Add Activity.
Required Details
When adding an activity, provide the following information:
- Name — a clear, descriptive title
- Description — purpose or context for the activity
- Status — set as Draft or Published
- Flow — choose Single Touch or Multi Touch
- Thumbnail — optional visual identifier
Click Save to finalize. Once saved, the activity can be previewed or executed directly from the List or Grid view.
📧 Single Touch Activity
- Click on Add Activity.
- Give Activity name , choose Activity Goal, and select flow type as Single Touch.
- Click on Next button.
- Select Channel, Provide status,thumbnail,description and Select an existing email template from the library, or create a new one.
- Click on Next button.
- Preview your configuration and click on Save button.
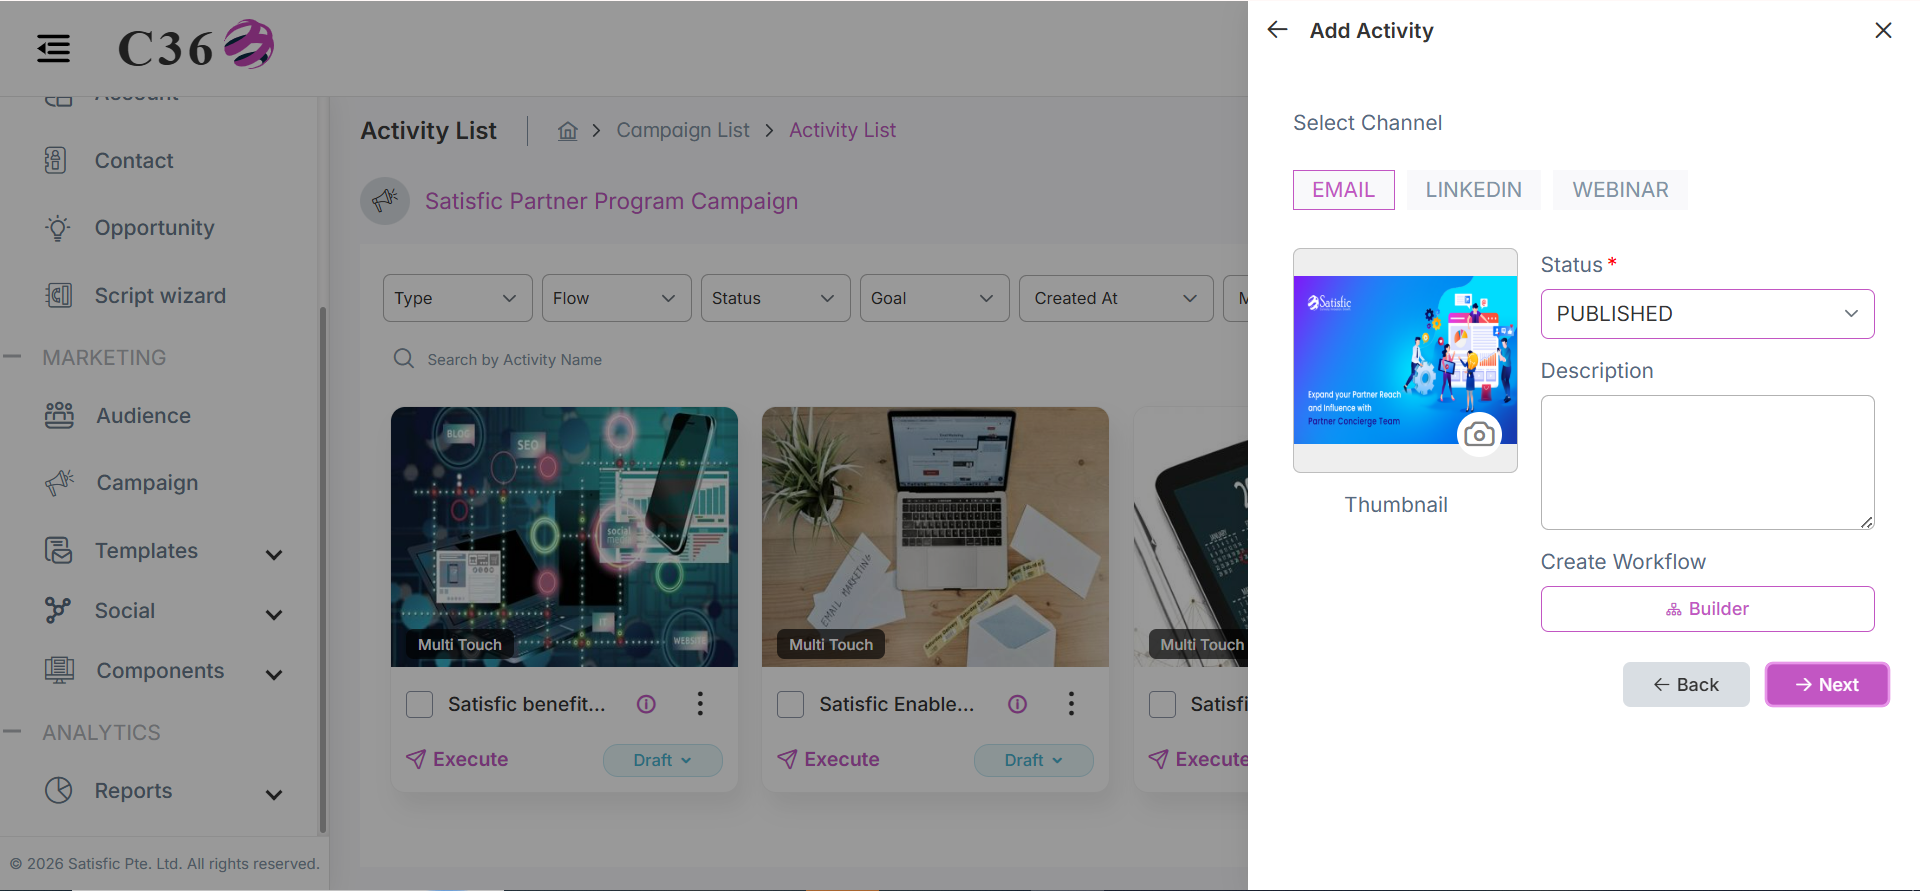
🔄 Multi Touch Activity
- Click on Add Activity.
- Give Activity name , choose Activity Goal, and select flow type as Multi Touch.
- Click on Next button.
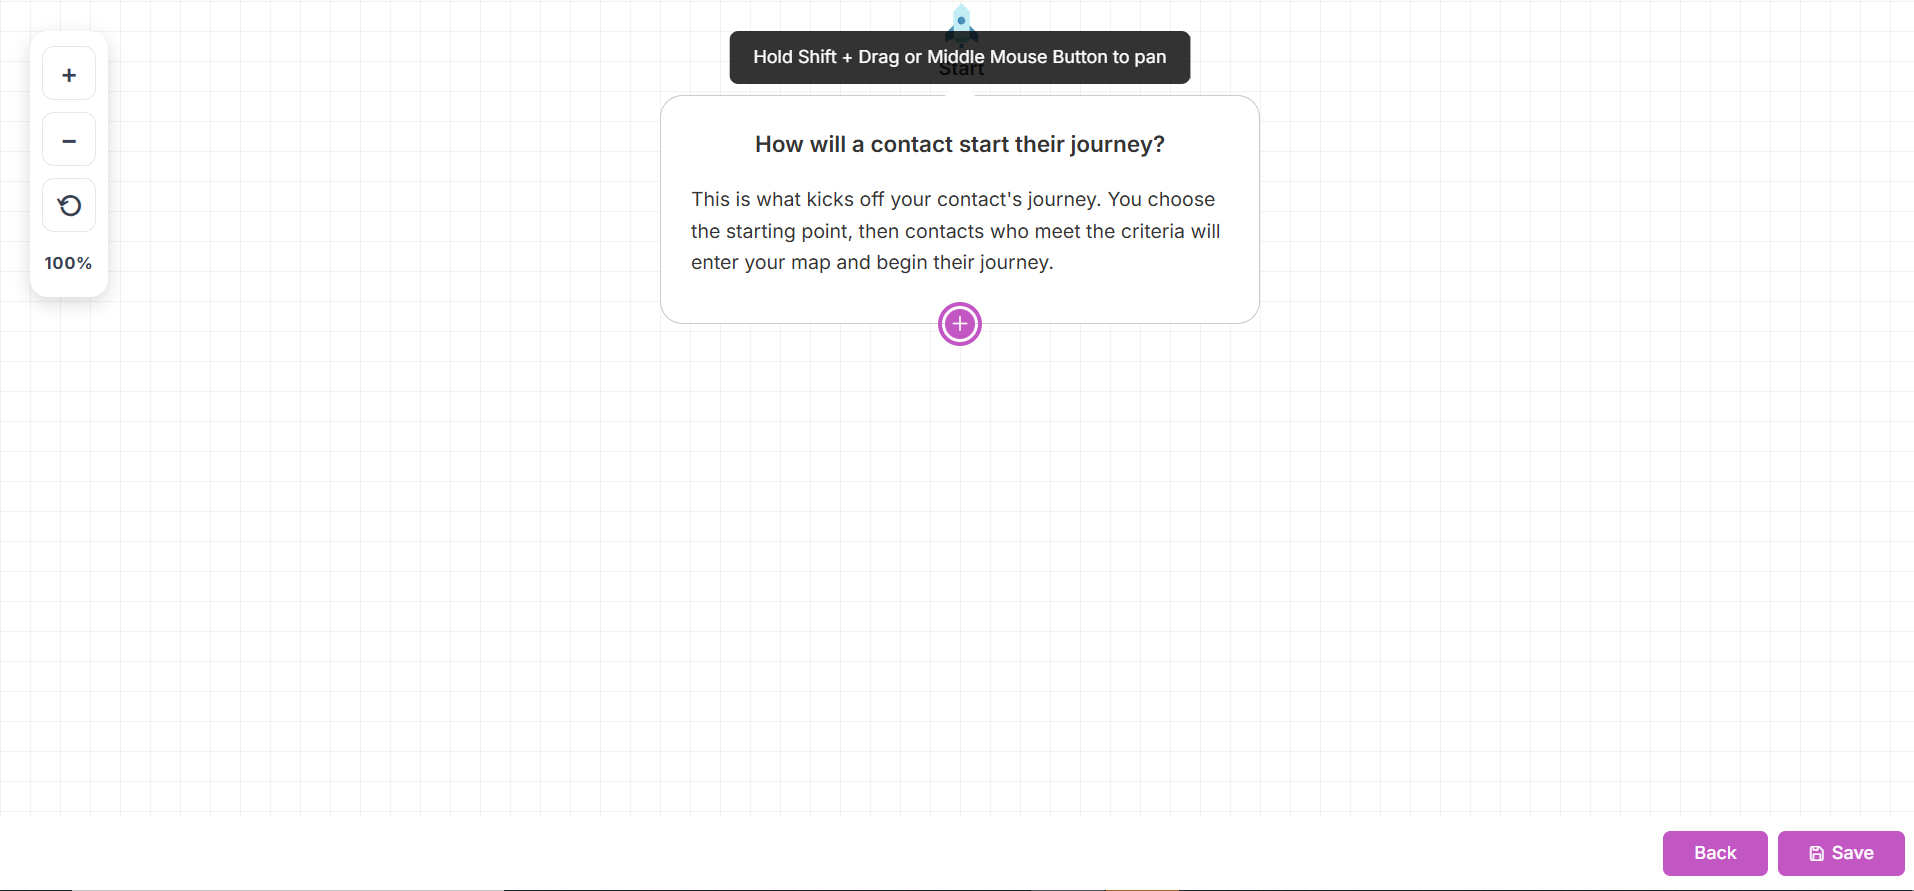
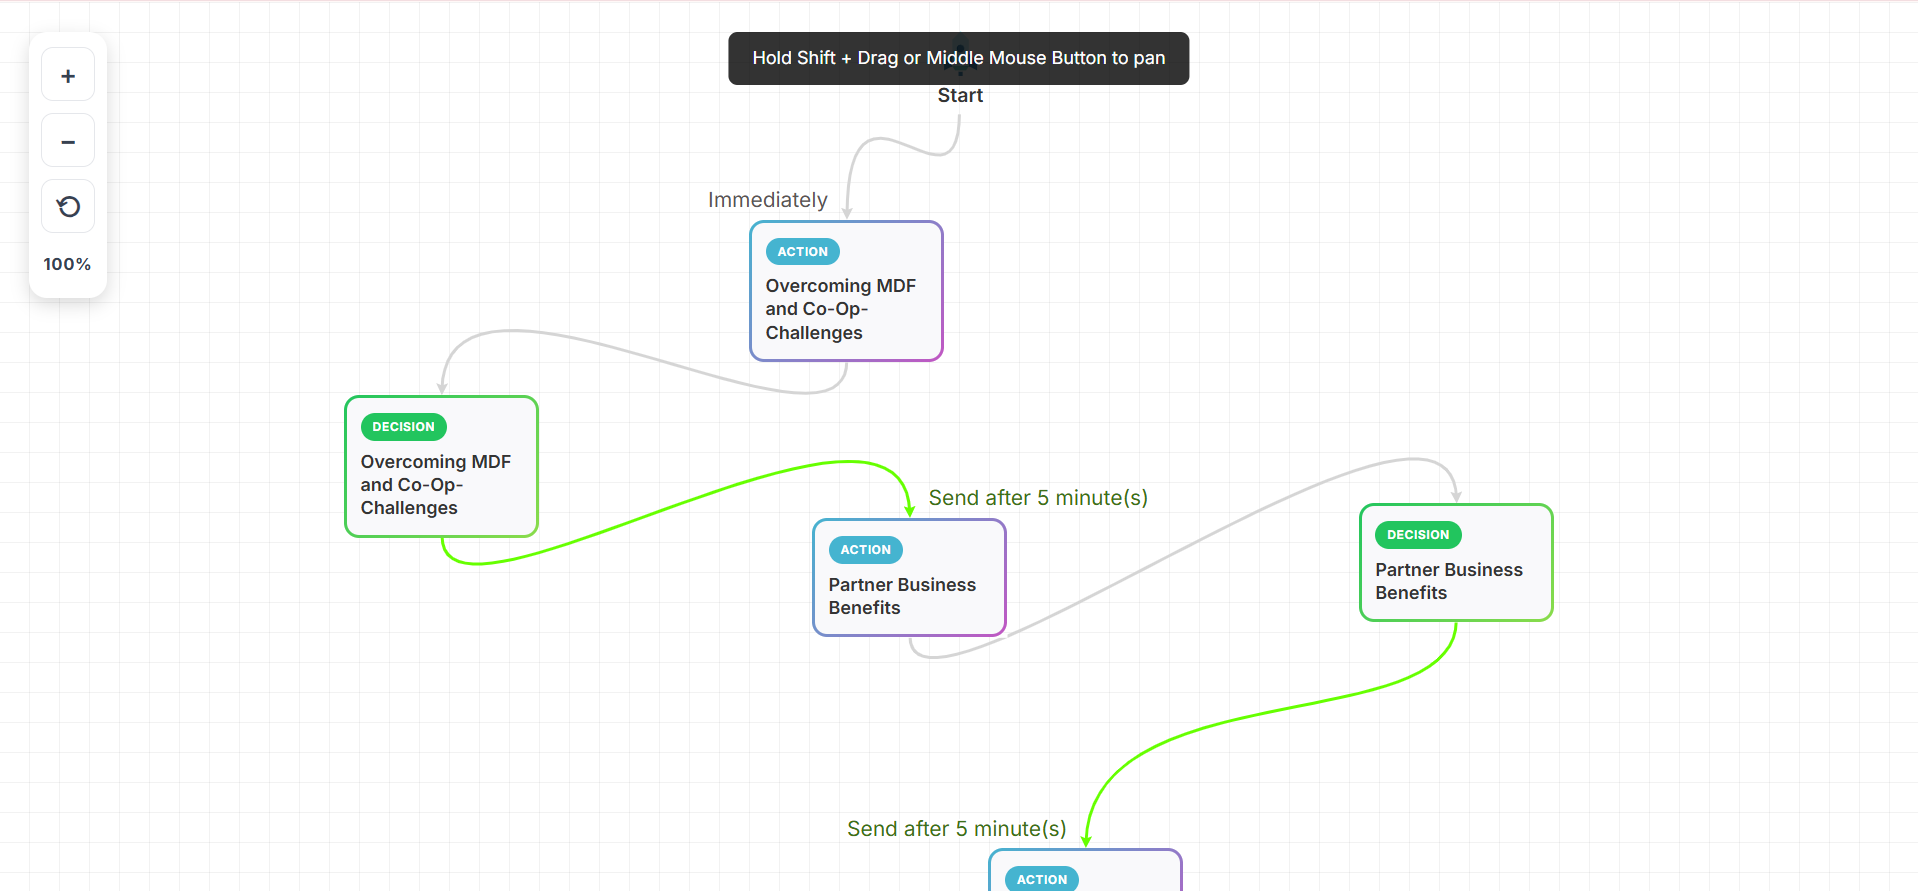
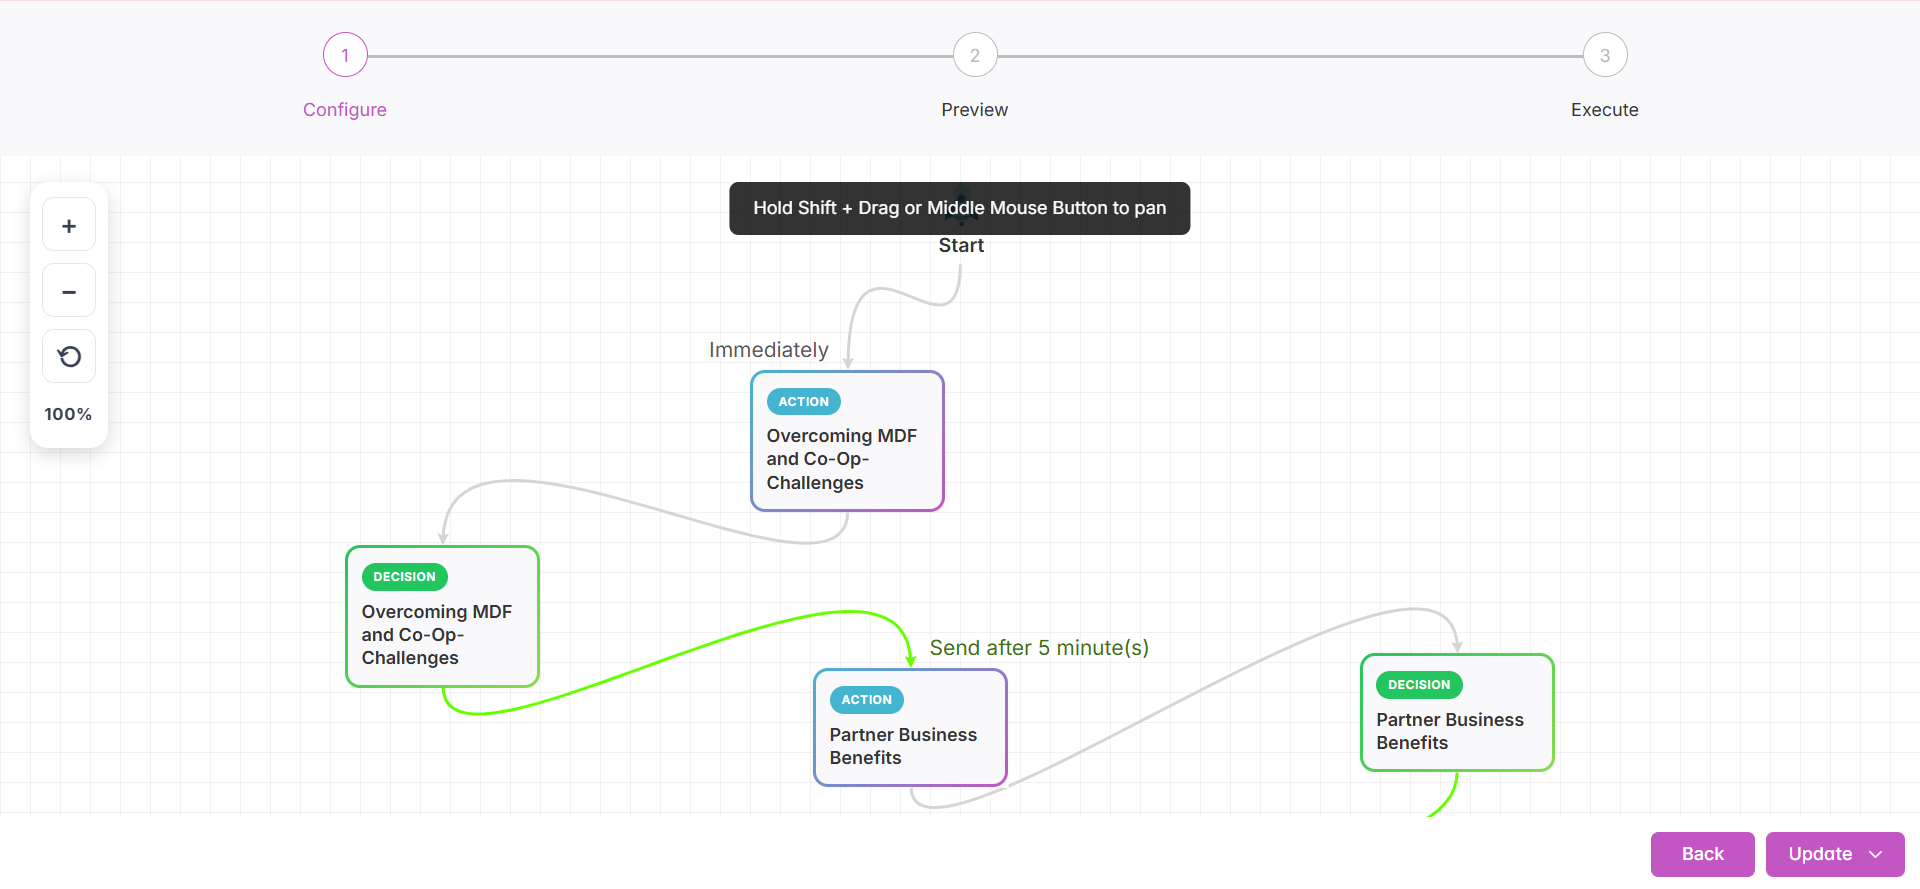
- Click Builder to open the workflow canvas.
- Or Click on next for preview your configuration and Save.
- Can zoom in and zoom out the canvas.
- Can reset the canvas to original size.
- Can drag or move the canvas by Holding the Shift + drag or middle mouse button to pan.
📝 Clone an Activity
- Click the Clone icon to duplicate an activity.
- The cloned version is automatically saved as Draft for editing.
👥 Assign Activities
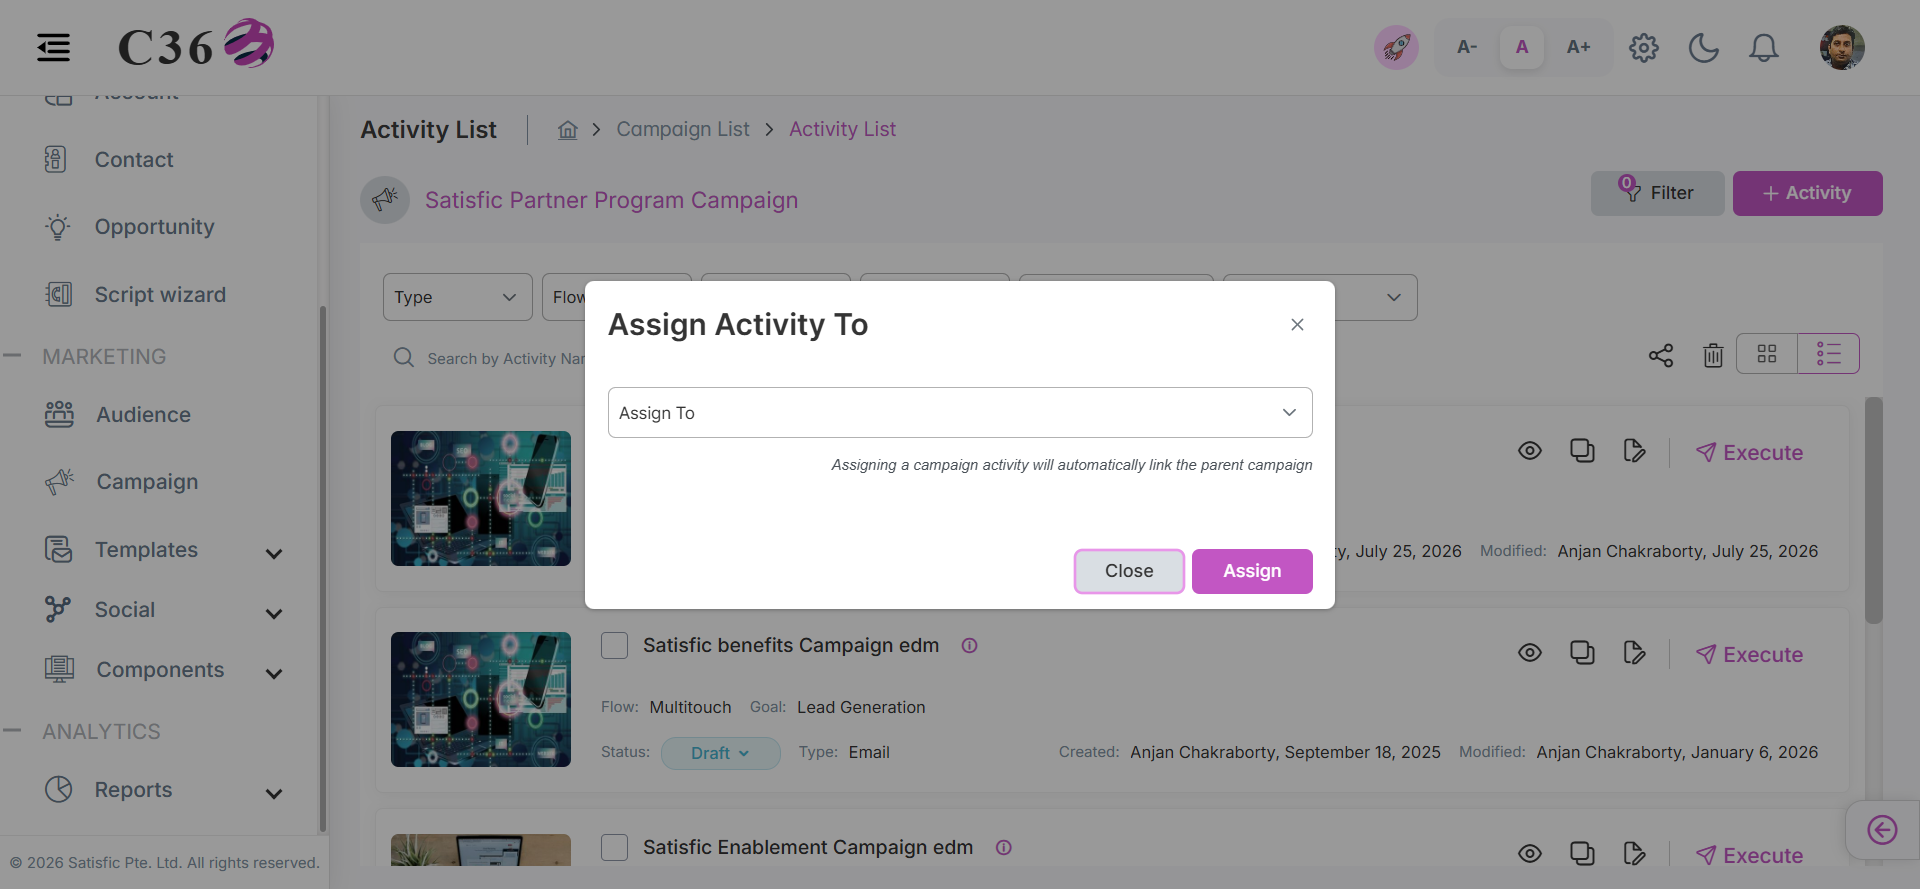
- Select one or more activities from the list.
- Click Assign To and choose a target group.
🗑️ Deleting Activity
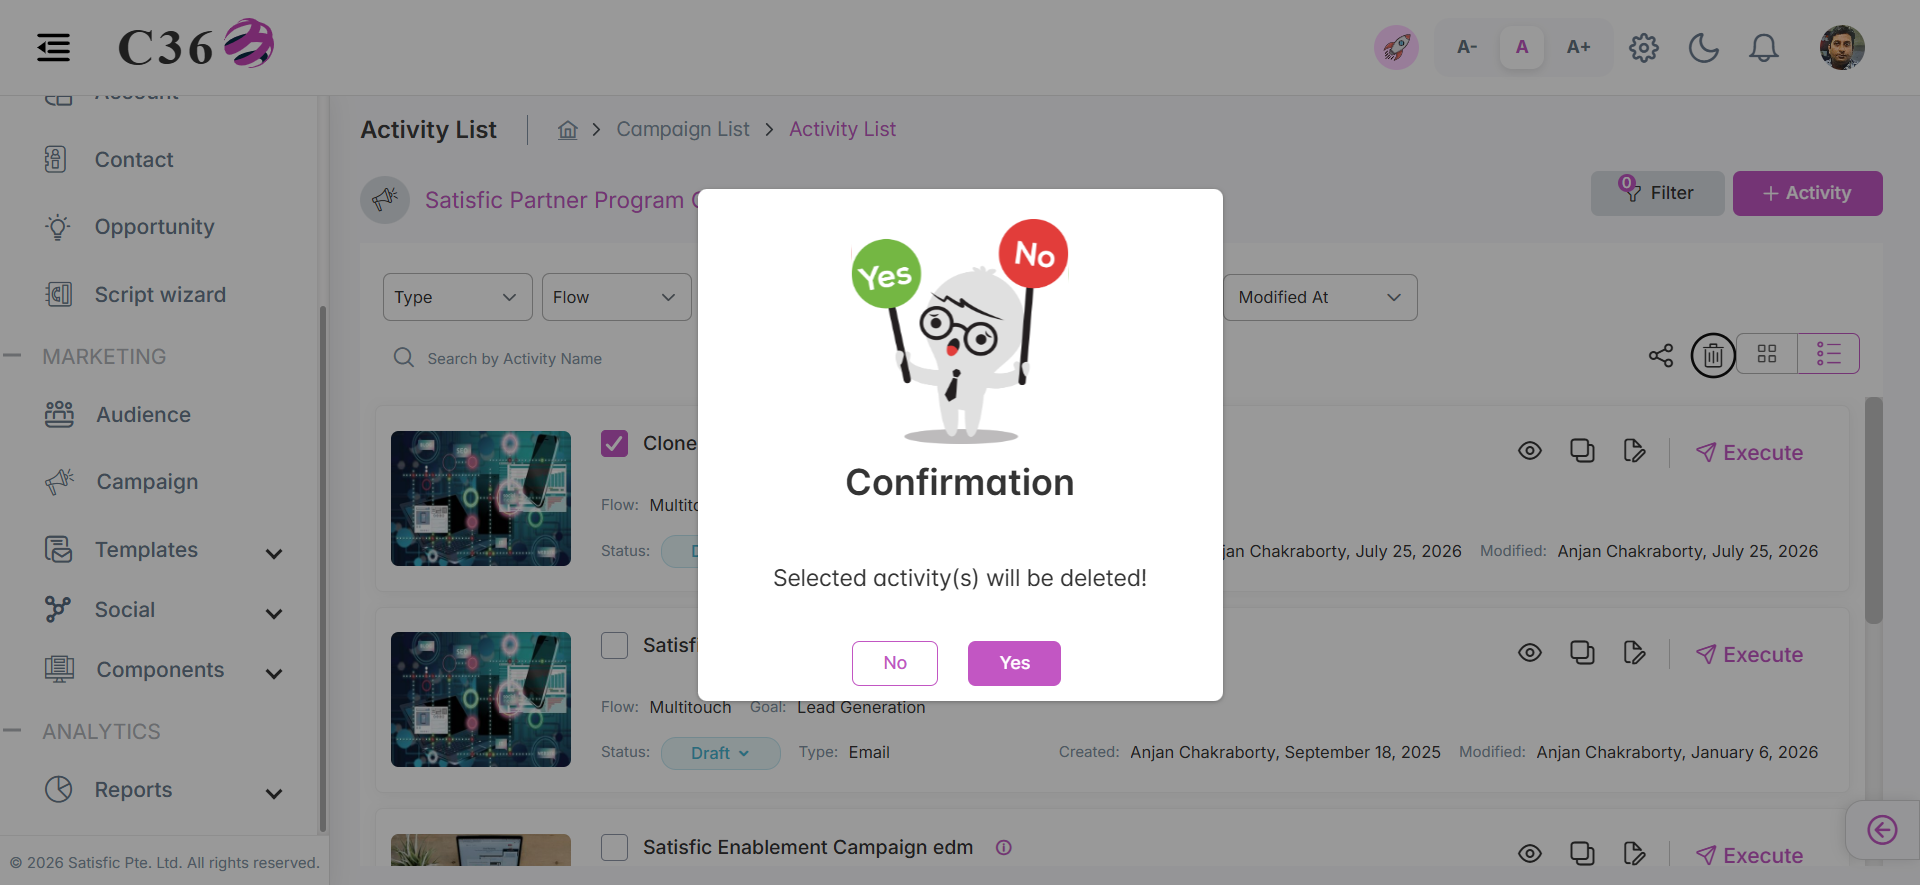
- Select the checkbox(es) for the Activity you want to delete.
- Click the Delete icon .
- Click on Yes from the confirmation pop-up if you want to delete.
🏗 Multi-Touch Campaign — Workflow Builder
The Workflow Builder allows you to design automated, multi-step campaigns that combine emails, lead updates, and conditional logic based on user behavior.
⚙️ Workflow Components
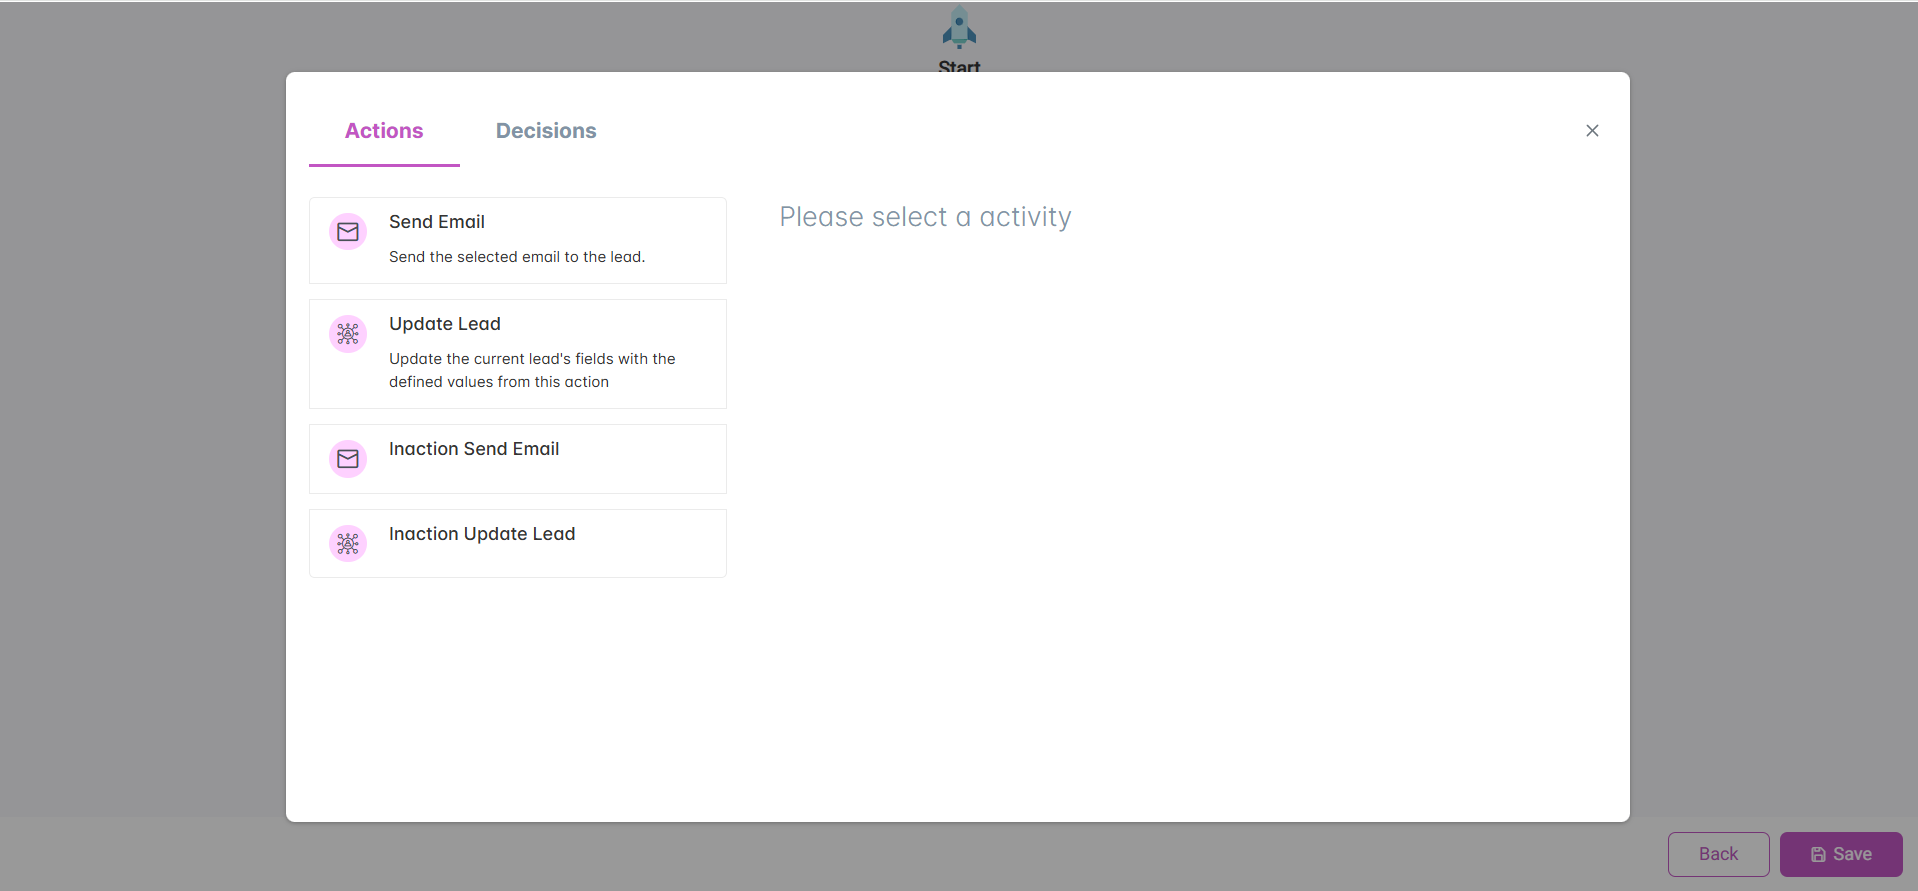
- Actions
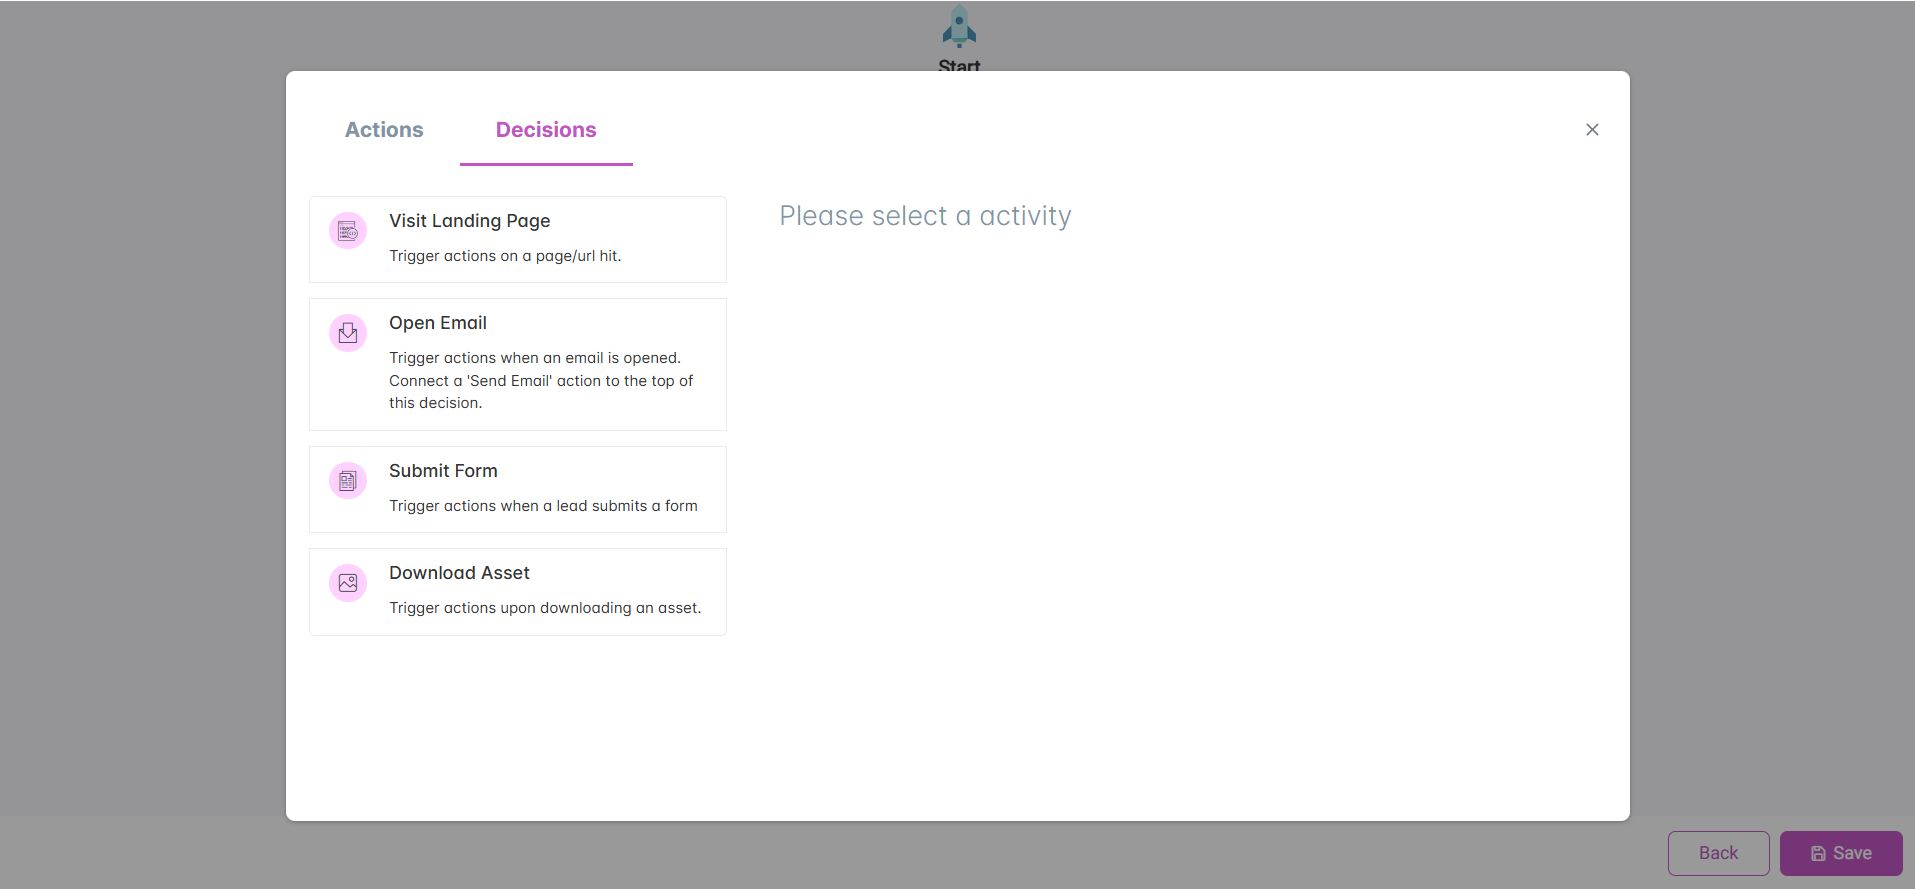
- Decisions
Actions define what happens at each step of the workflow:
- Send Email — deliver a selected email template to the target audience
- Inaction (No Action) - Send Email — follow up if the recipient does not engage
- Update Lead — modify lead attributes or status
- Inaction (No Action) - Update Lead — take an alternate step if no change occurs
Decisions (triggers) determine the path a user follows in the workflow, based on their behavior:
- Open Email
- Download Asset
- Submit Form
- Visit Landing Page
🛠 Building a Workflow
Follow these steps to create a simple multi-touch workflow:
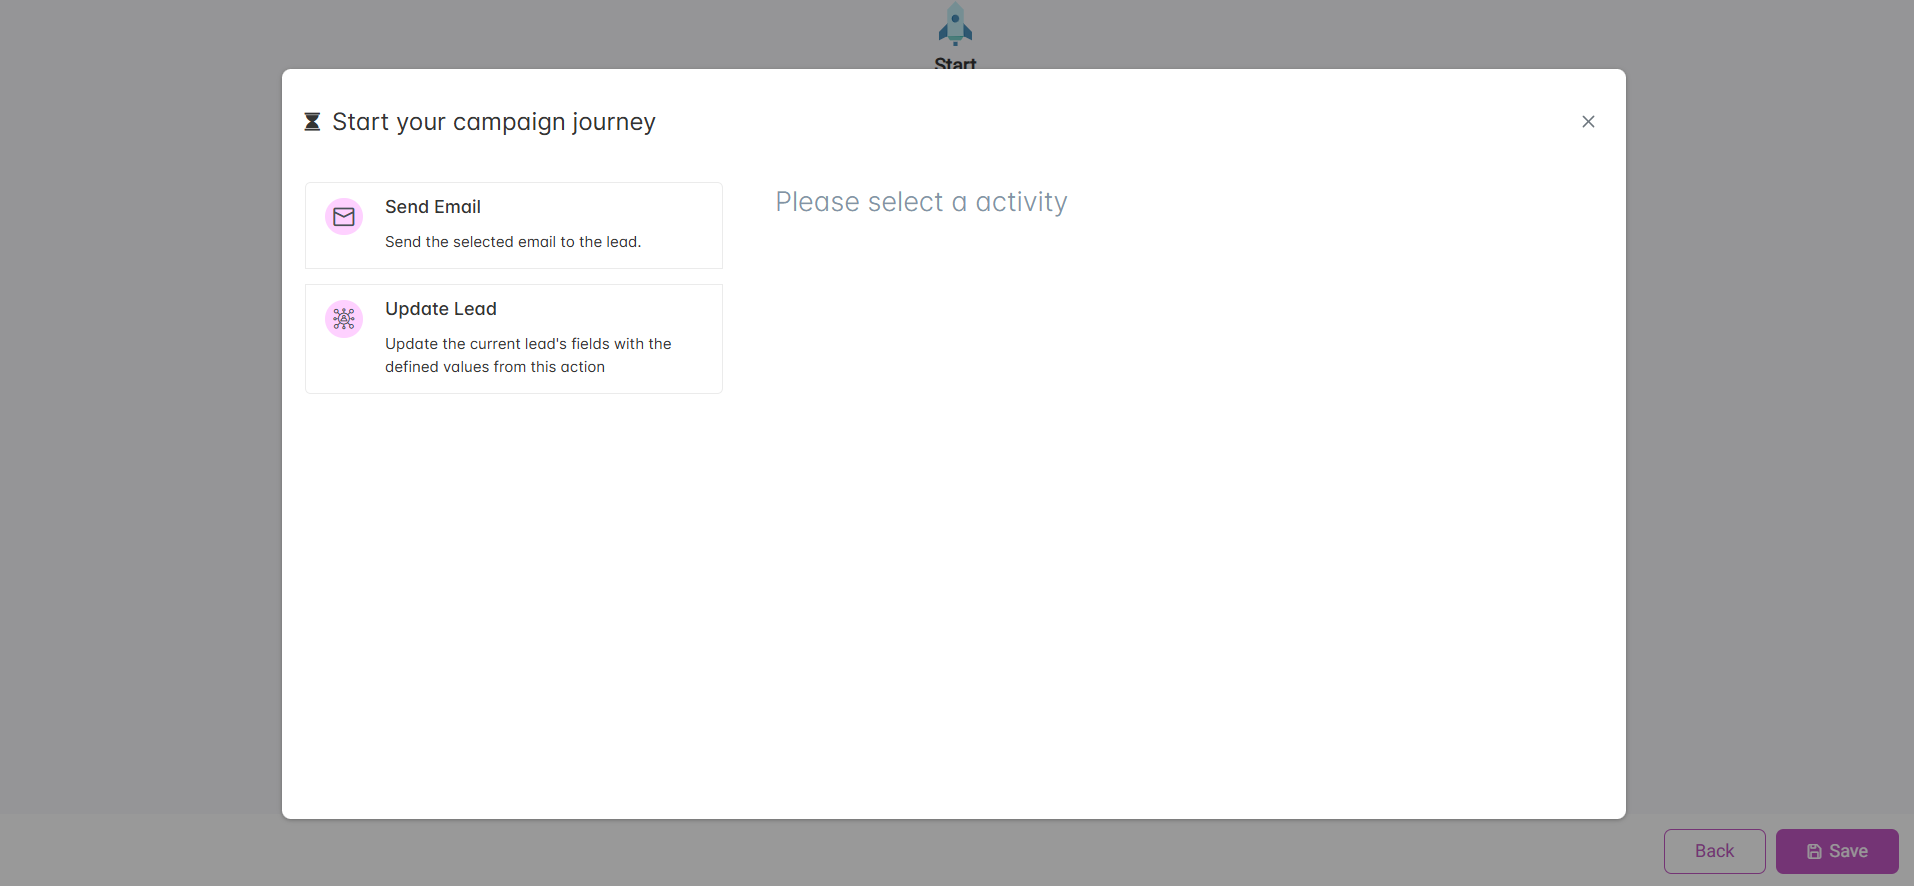
- Click Start — a modal displays available actions (e.g., Send Email, Update Lead).
- Select an action and configure it:
- Name
- Execution Timing (immediately, after a delay, or at a specific date/time)
- Subject
- Sender Name
- Email Template (choose from library or Add Email)
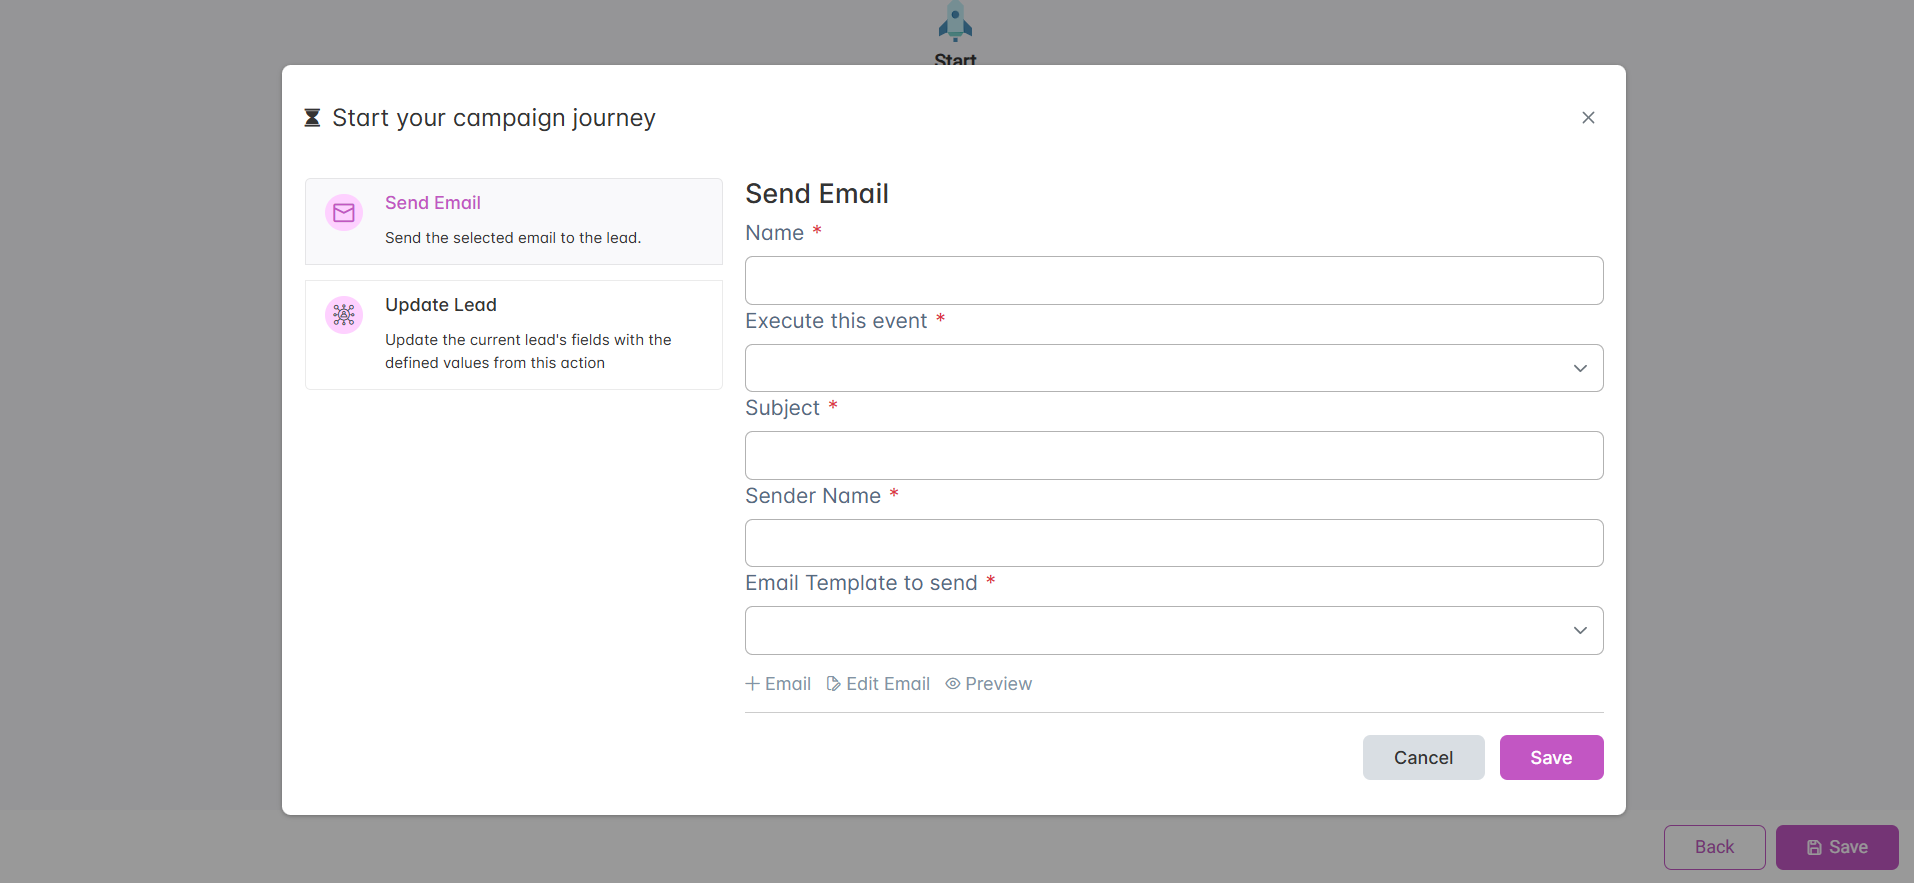
- Preview the configuration and click Save to add the block to the workflow canvas.
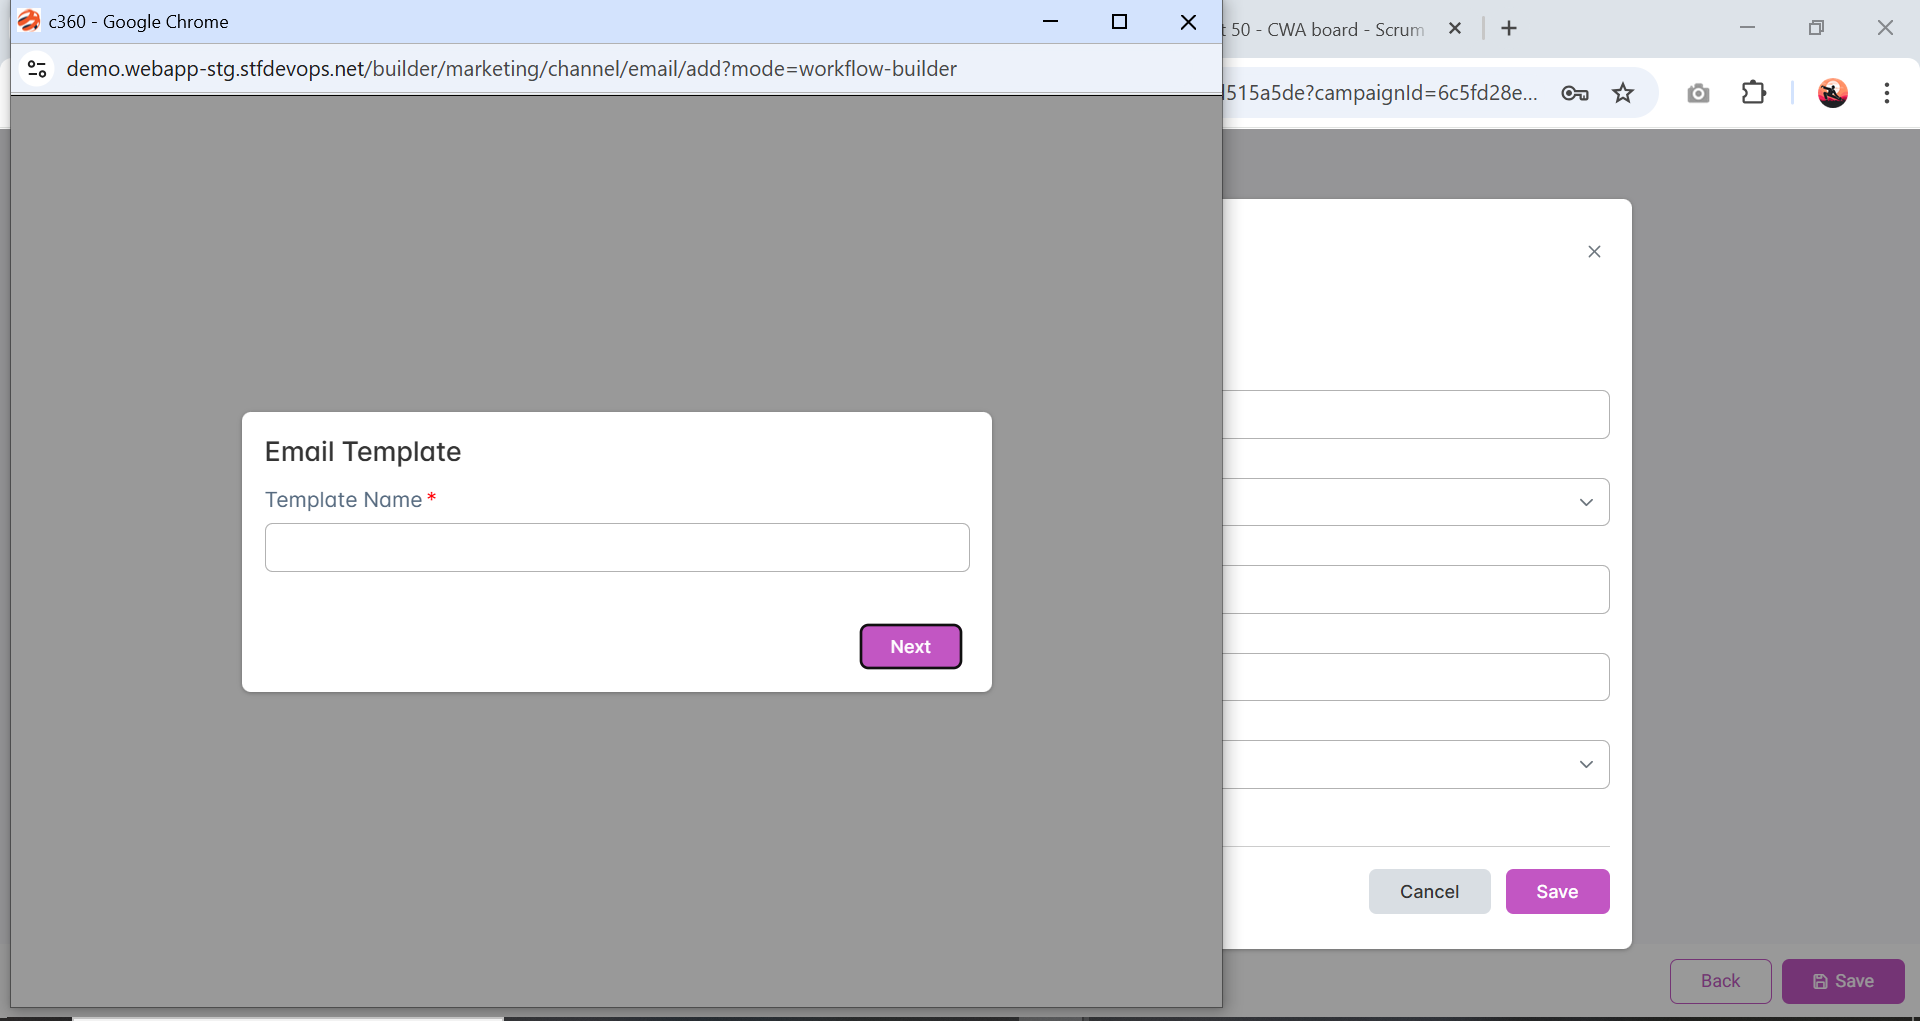
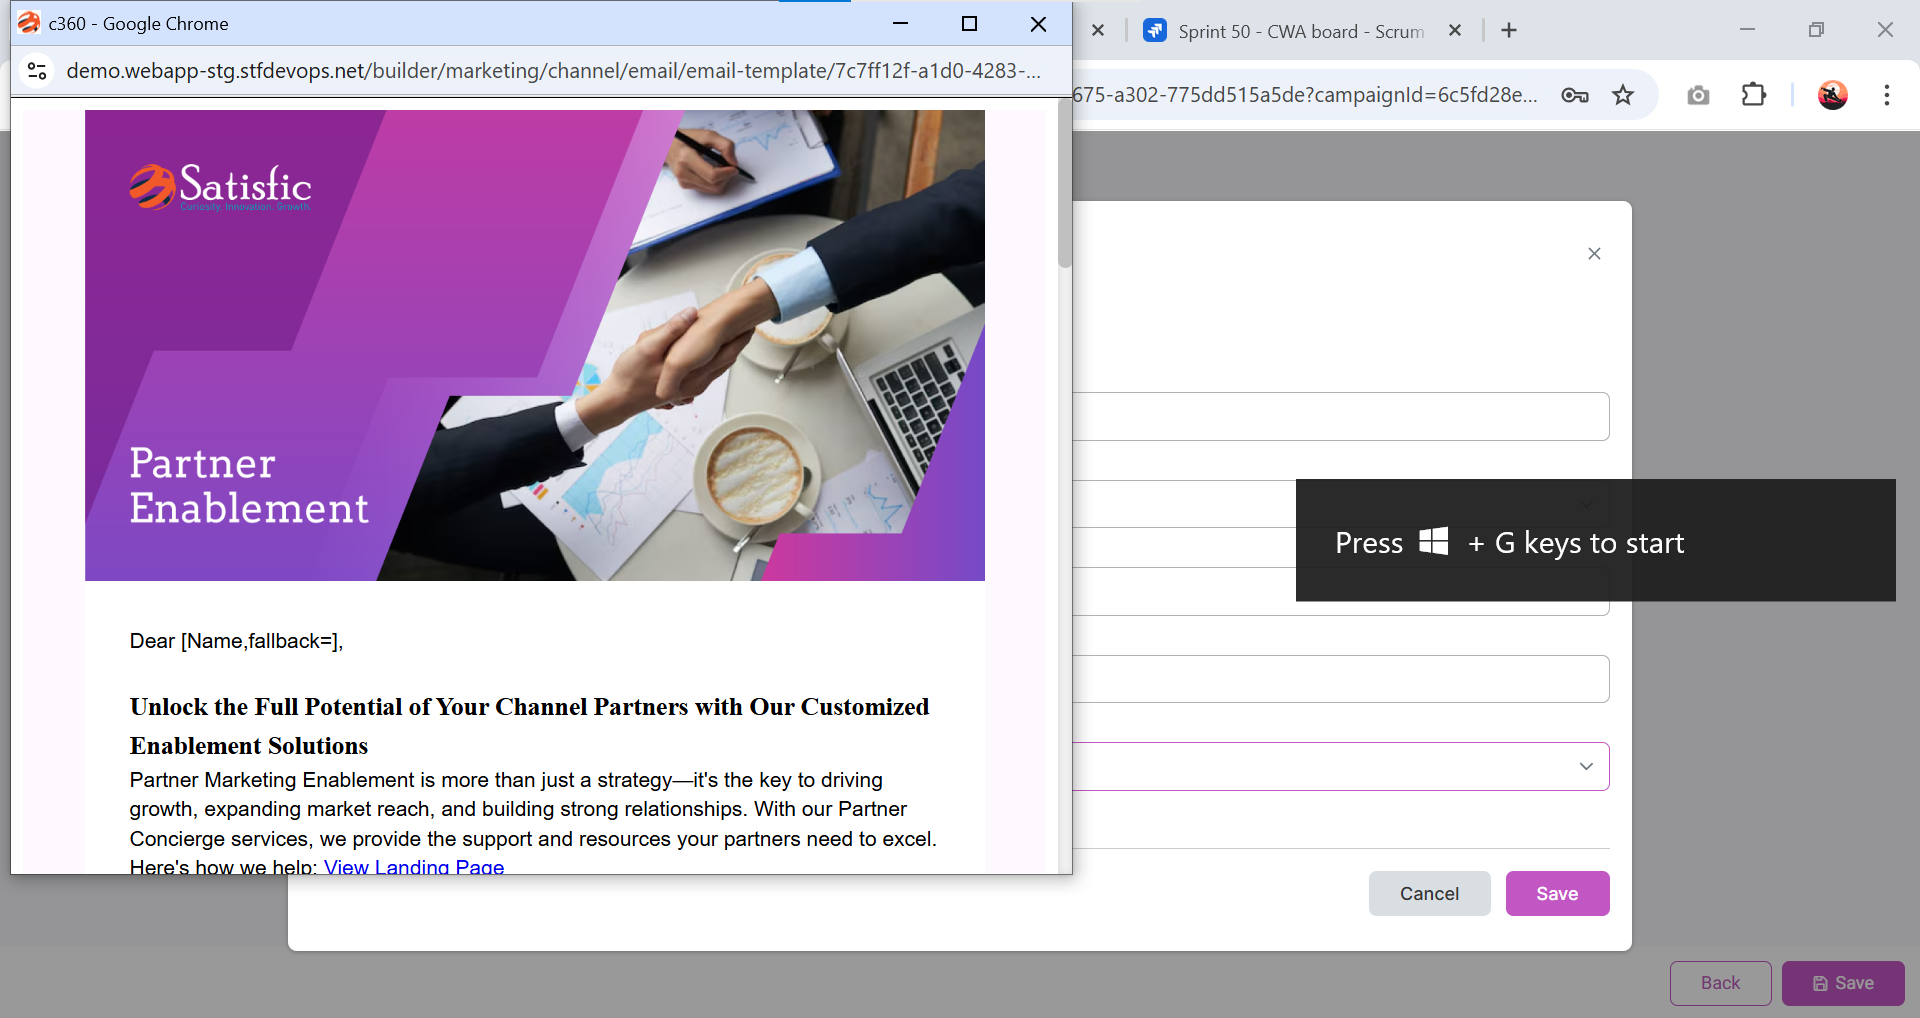
Previewing an email before saving
🔀 Managing Workflow Blocks
- Add multiple actions and decisions to build complex journeys
- Hover over a block to edit or remove it
- Branch workflows to handle multiple outcomes
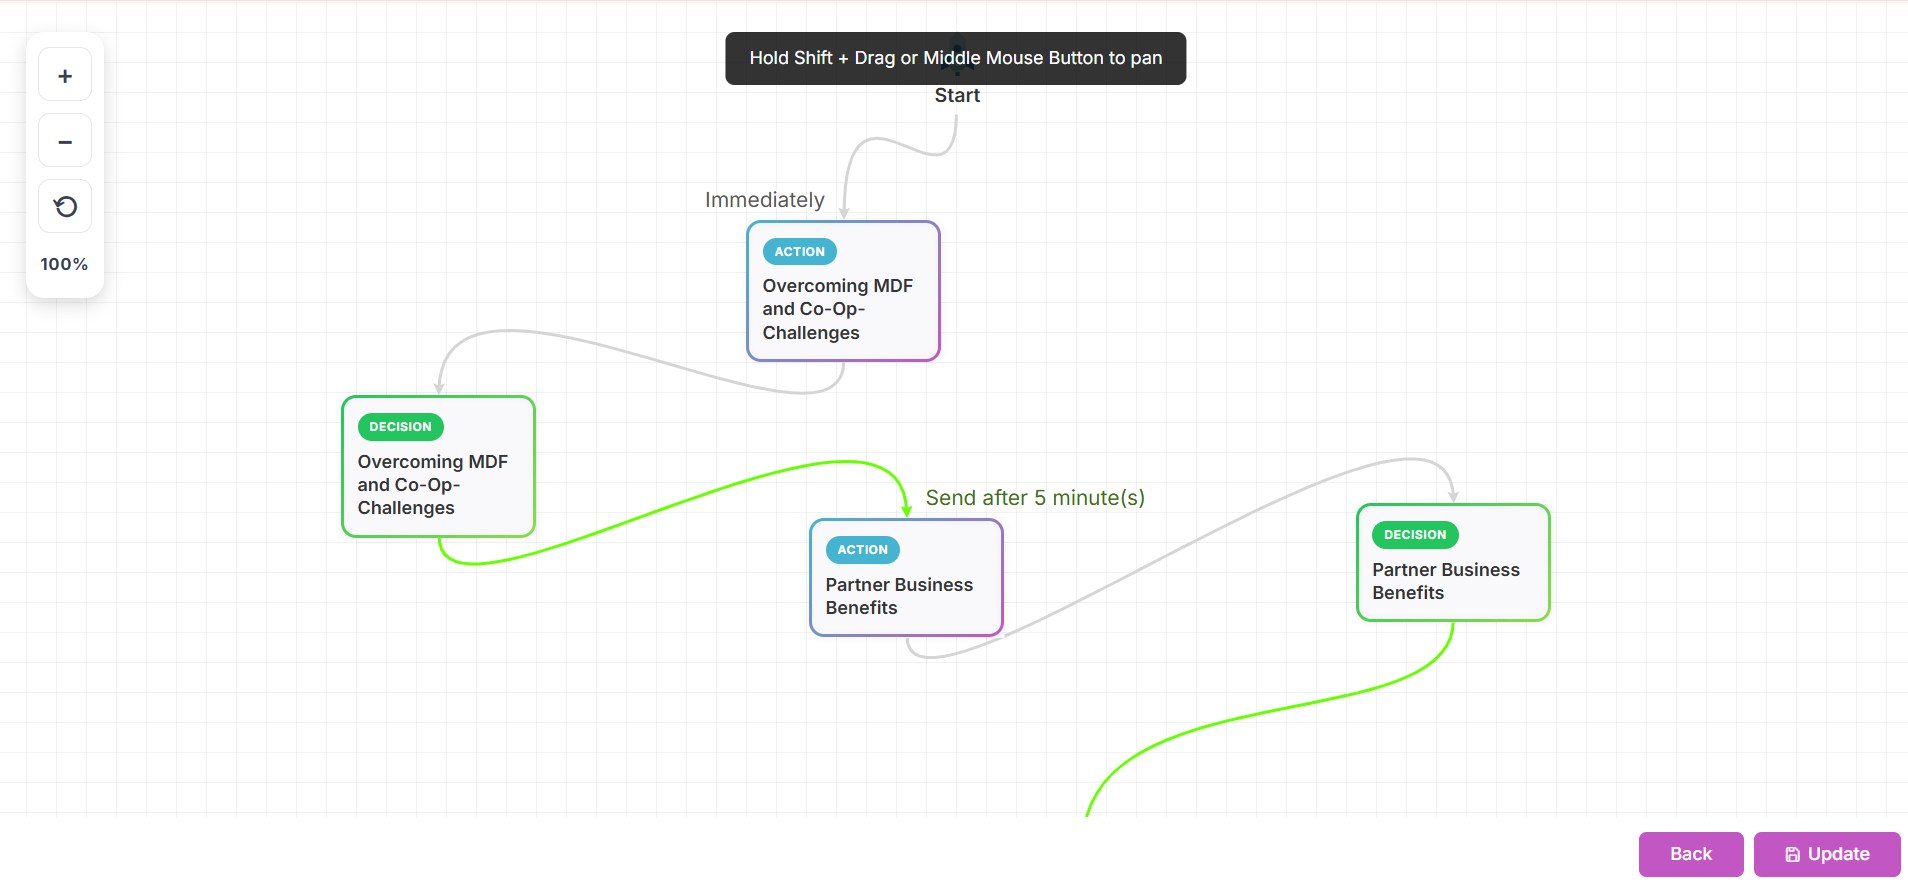
Workflows can branch based on conditions and user decisions.
Always use Preview to validate the workflow logic before executing it live.
👁 Campaign Preview
- Click the campaign name in the Campaign List to open its details.
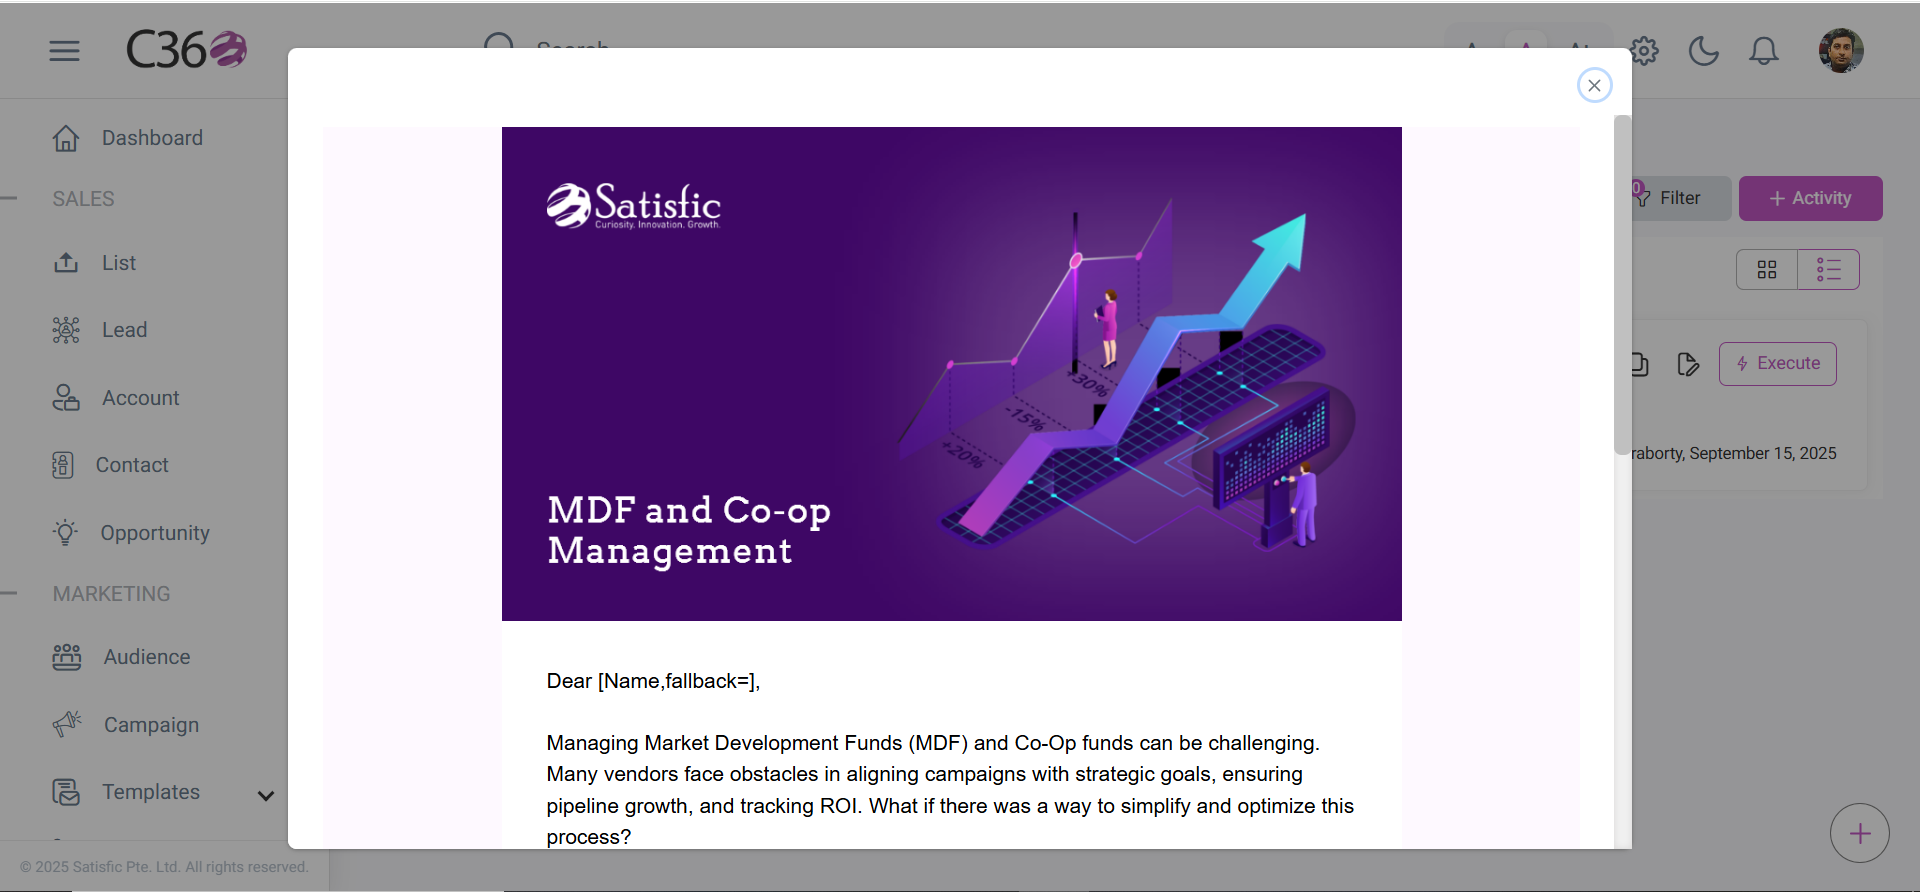
- Use the eye icon to preview campaign activities:
- Single Touch campaigns open in a modal window.
- Multi Touch campaigns open in a new browser tab.
🛠️ Before Executing a Campaign
Before executing a campaign, ensure you have the following prepared:
- Contact Segment / Lead List — the audience you want to target.
- Channels — such as email templates or webinar setup.
- Assets — supporting materials like landing pages, forms, or creatives.
📤 Executing Campaigns (Sending Emails)
You can execute both Single Touch and Multi Touch campaigns. The steps below walk you through configuration, testing, audience selection, and scheduling.
✉️ Execute a Single Touch Campaign
- Click Execute on the activity you want to send.
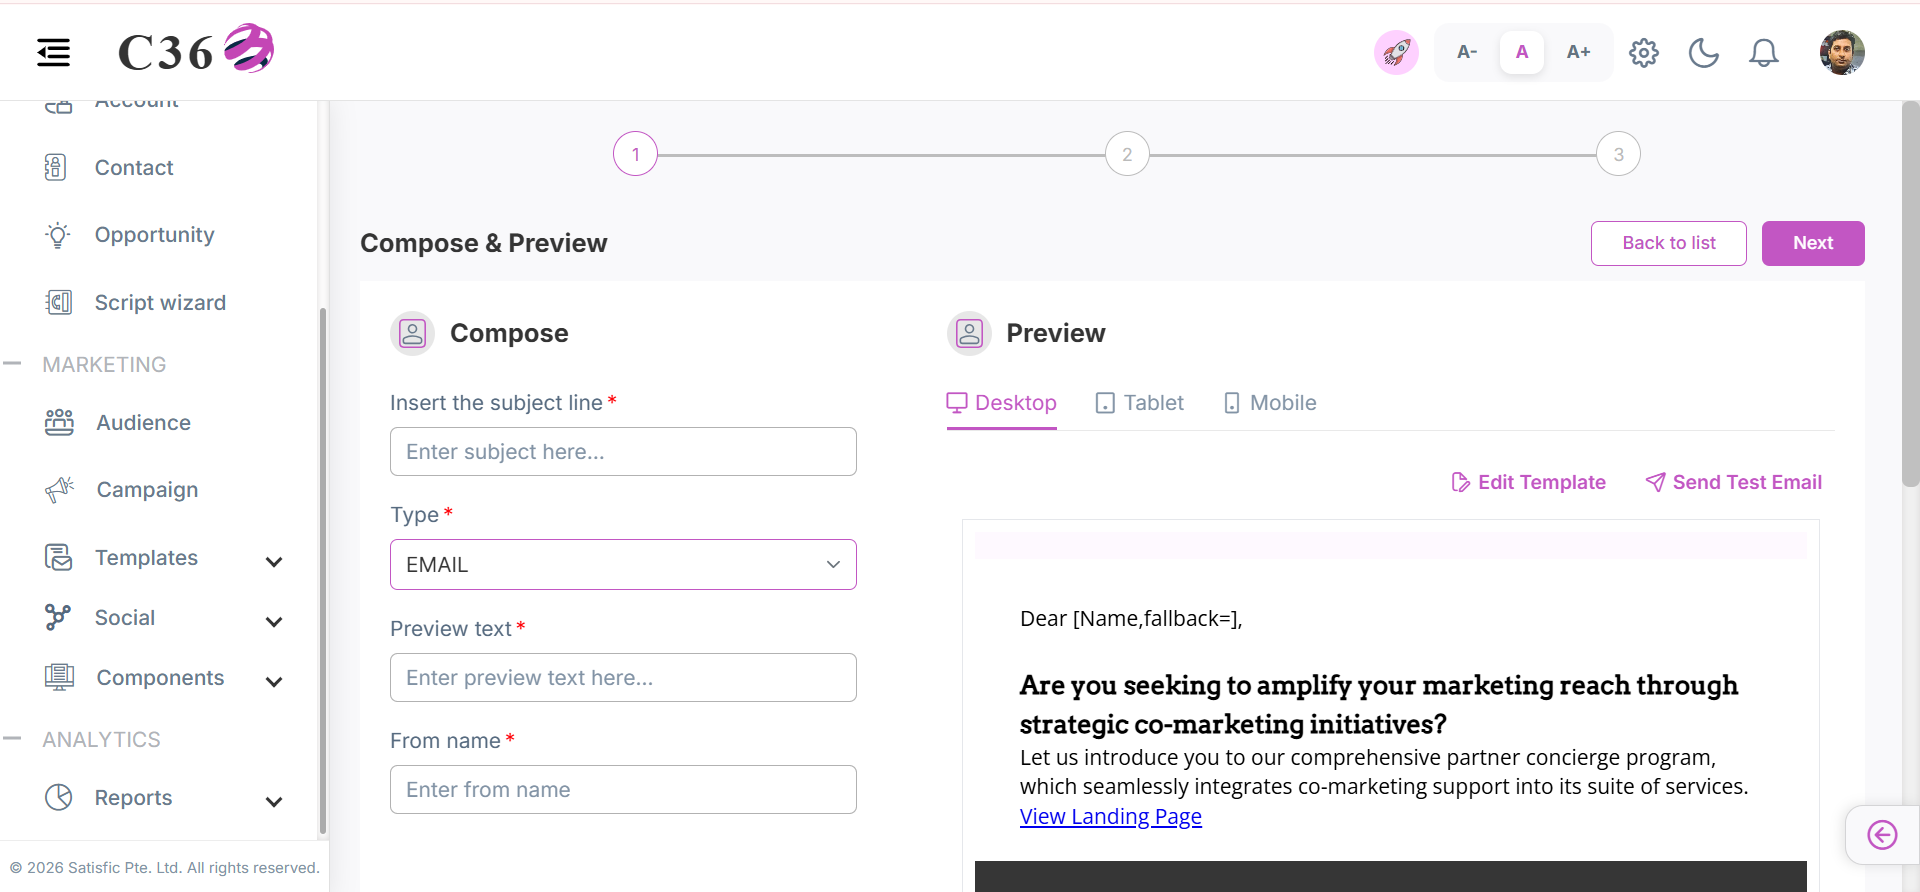
- Compose And Preview Email Setting:
- Subject line
- From name
- Type (Email / Webinar)
- Preview text
- Prveiw Mode (Desktop / Tablet / MObile)
- Edit Email Template
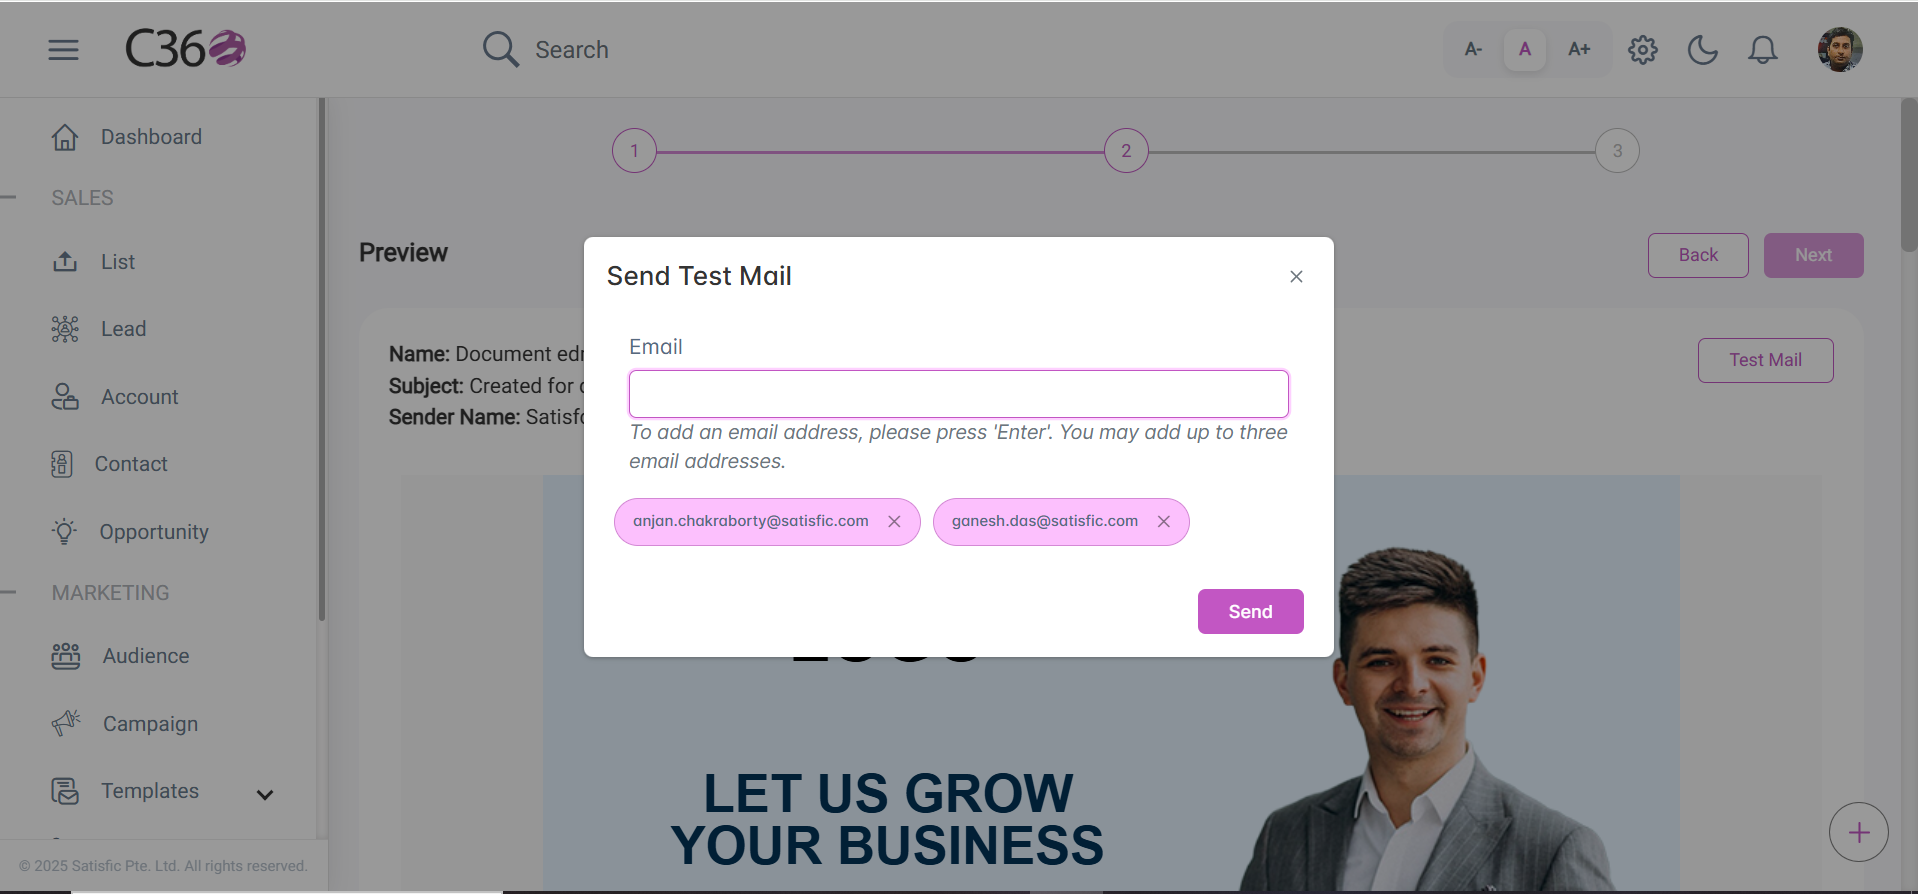
- Send a test email:
- Enter a test recipient address.
- Click Test Mail to verify how it appears.
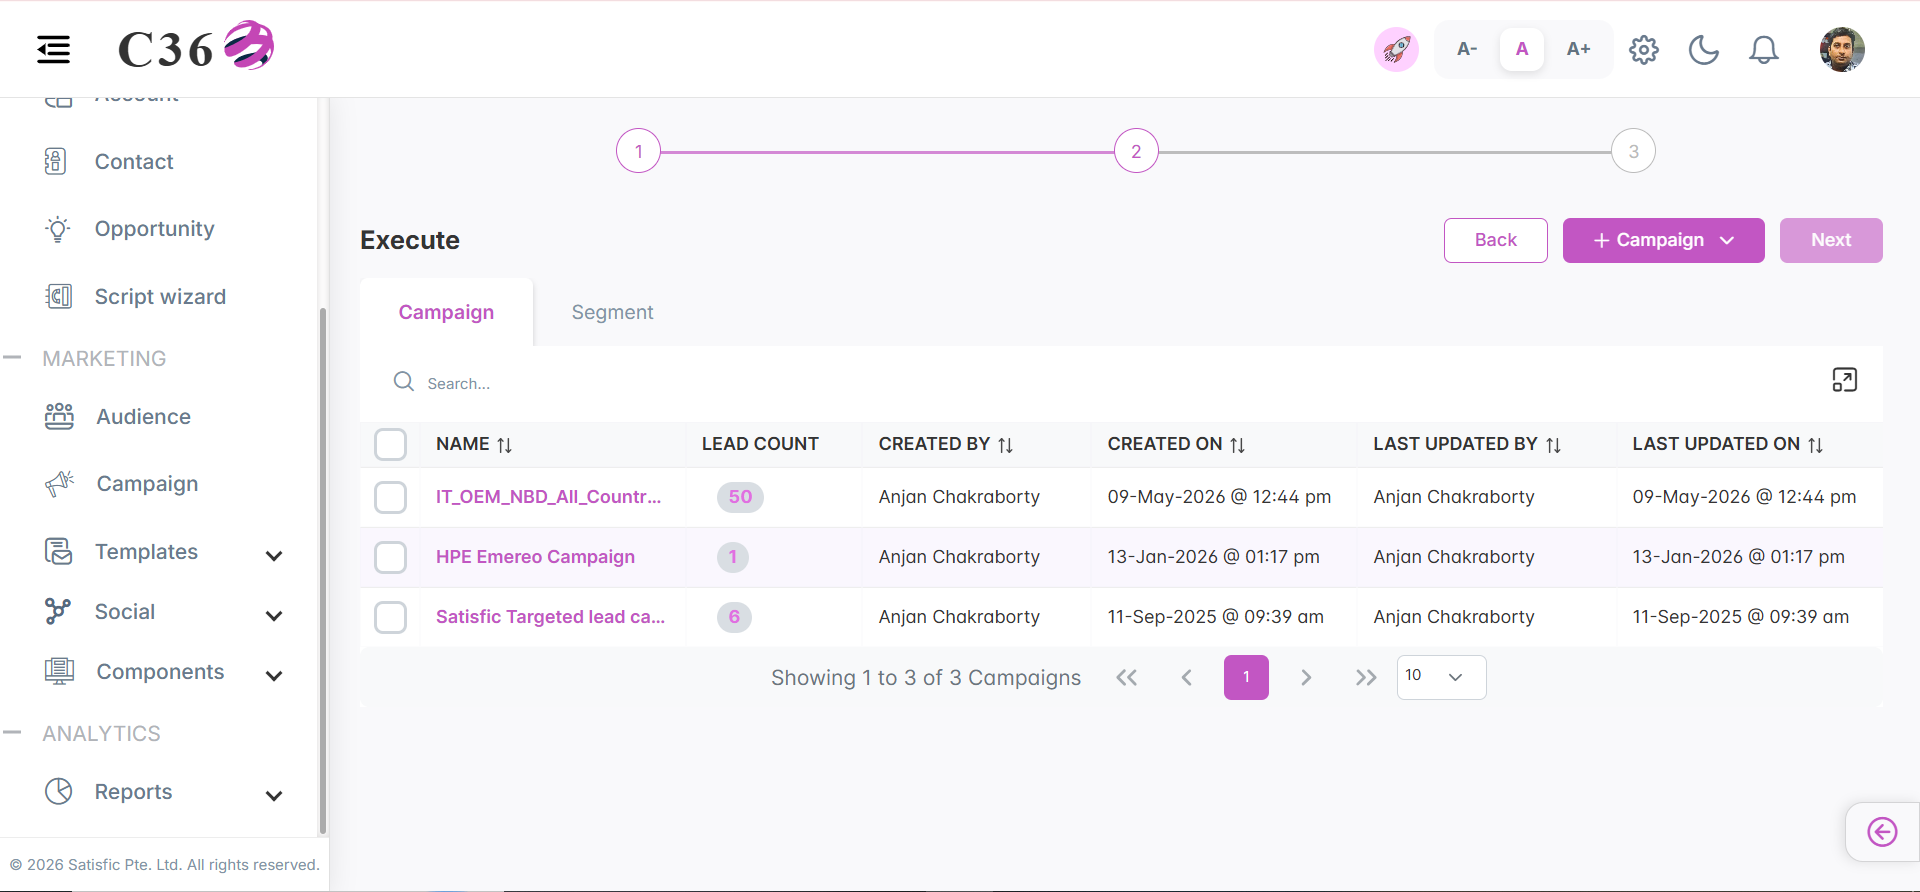
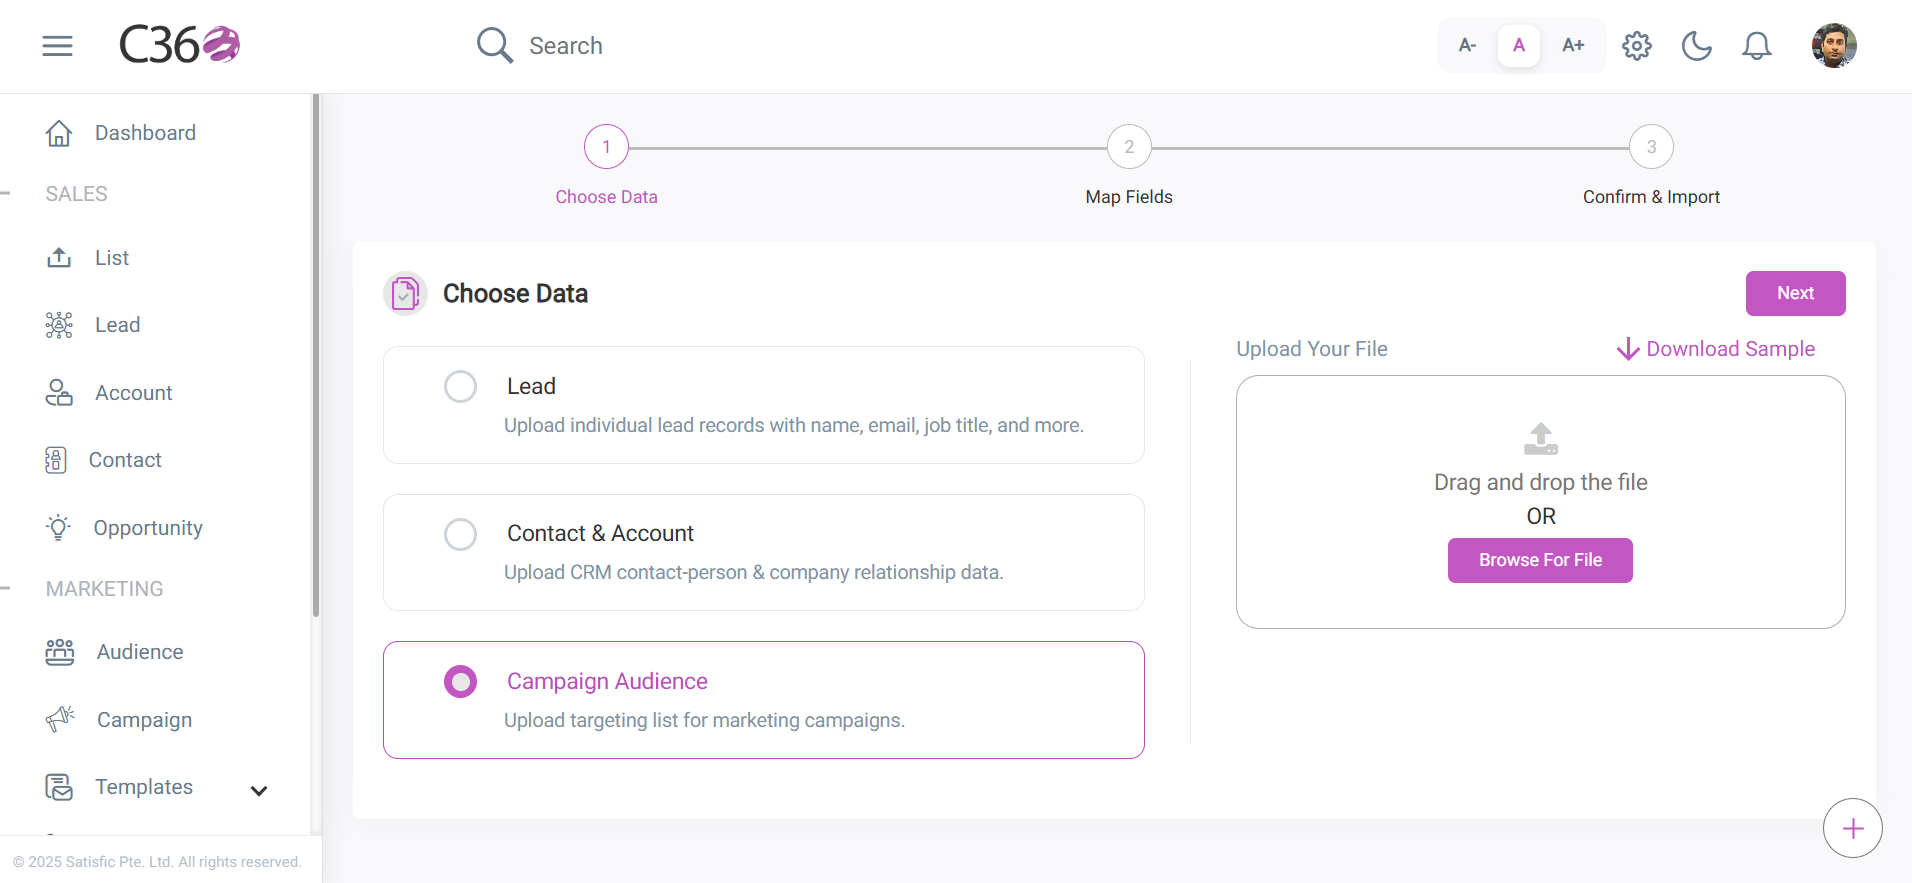
- Choose recipients:
- Send to the entire group or select specific leads.
- Add segments with Add Segment.
- Import leads using a CSV file if needed.
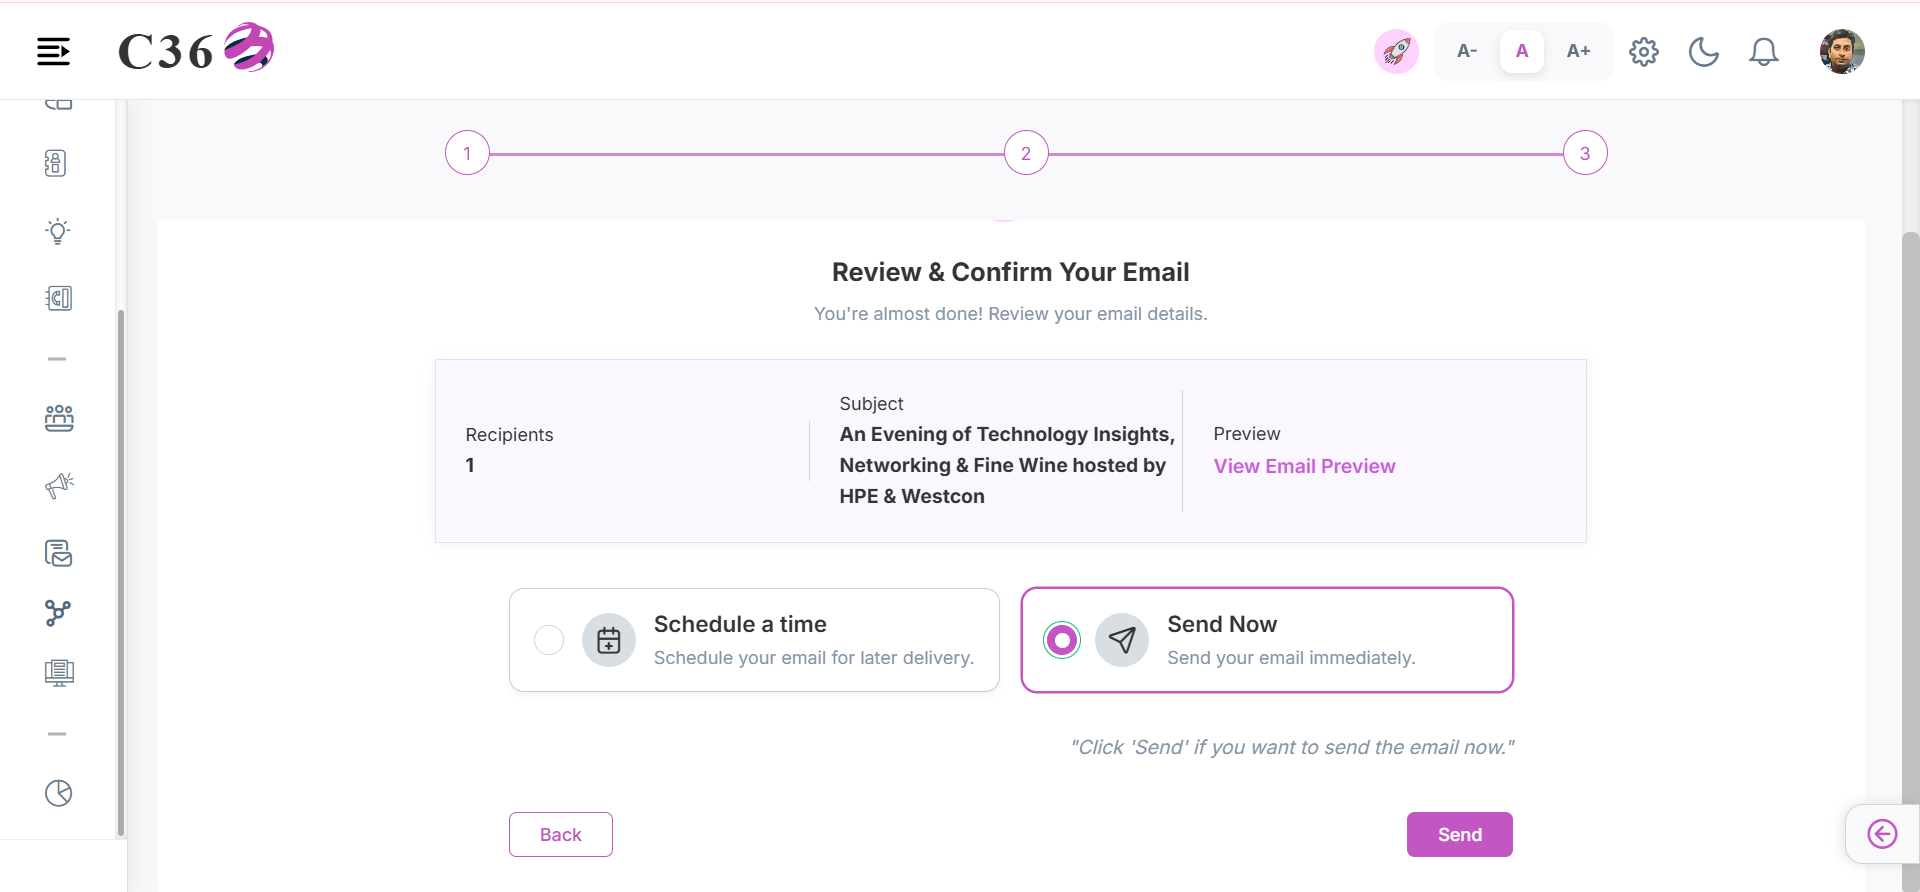
- Schedule a Time (optional):
- Set a date and time for sending the email.
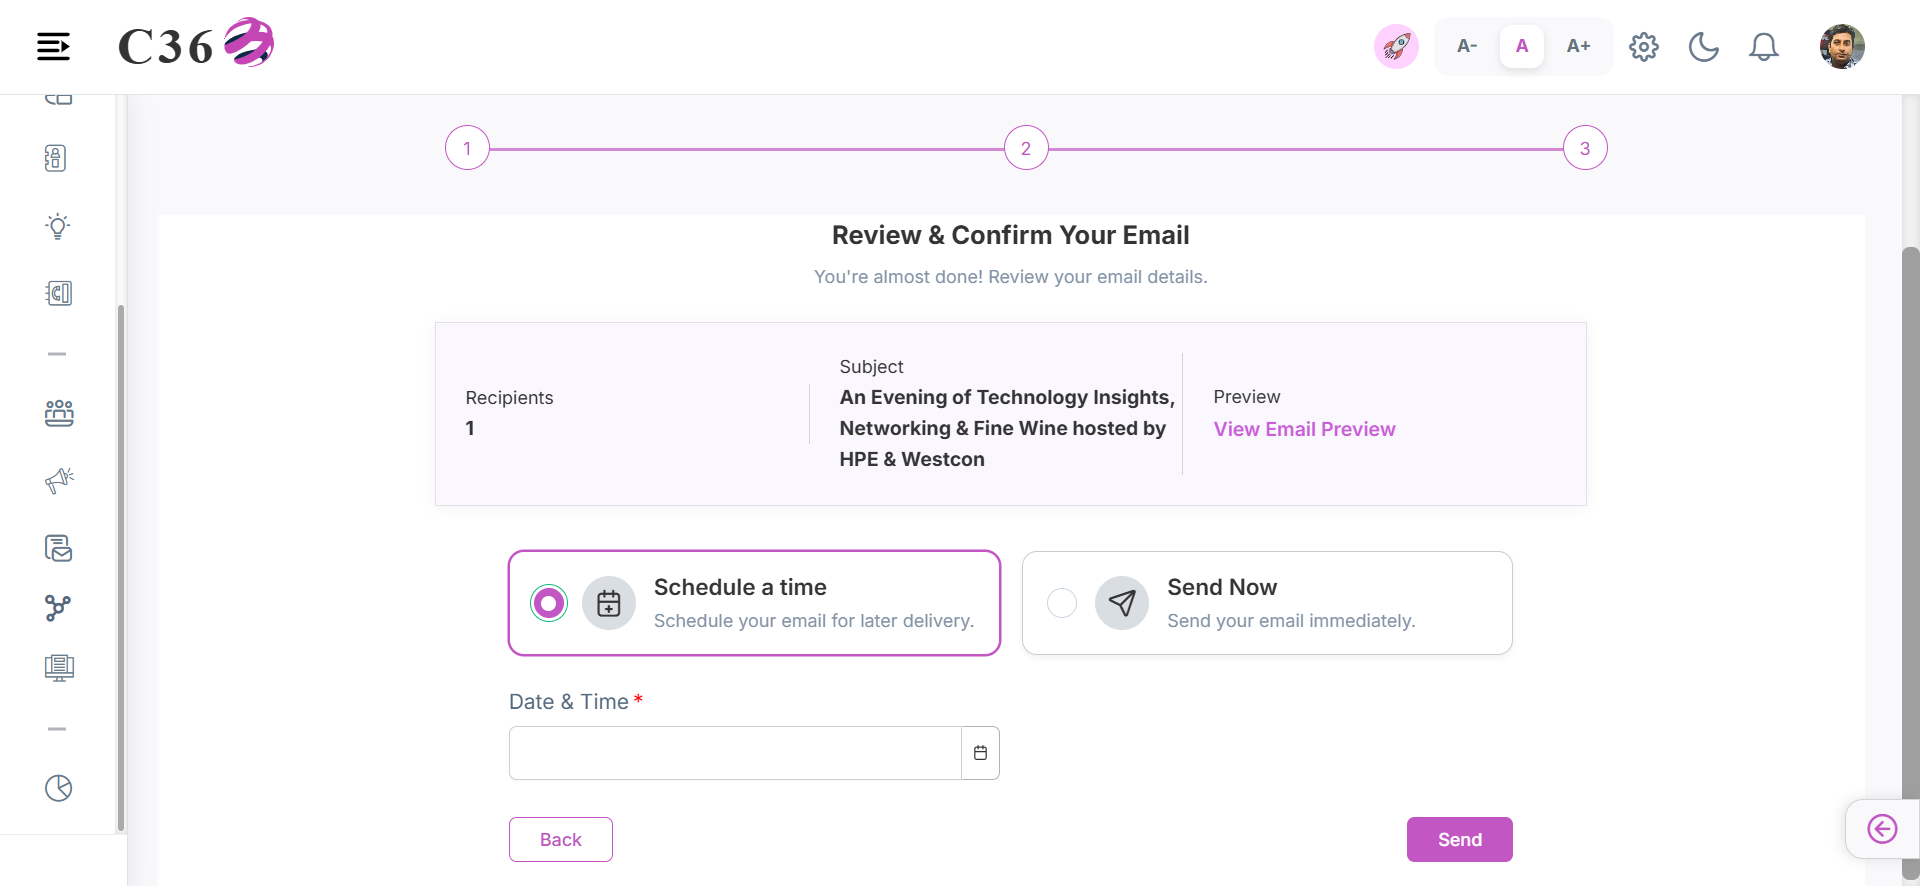
- Send Now
- Send the email immediately.
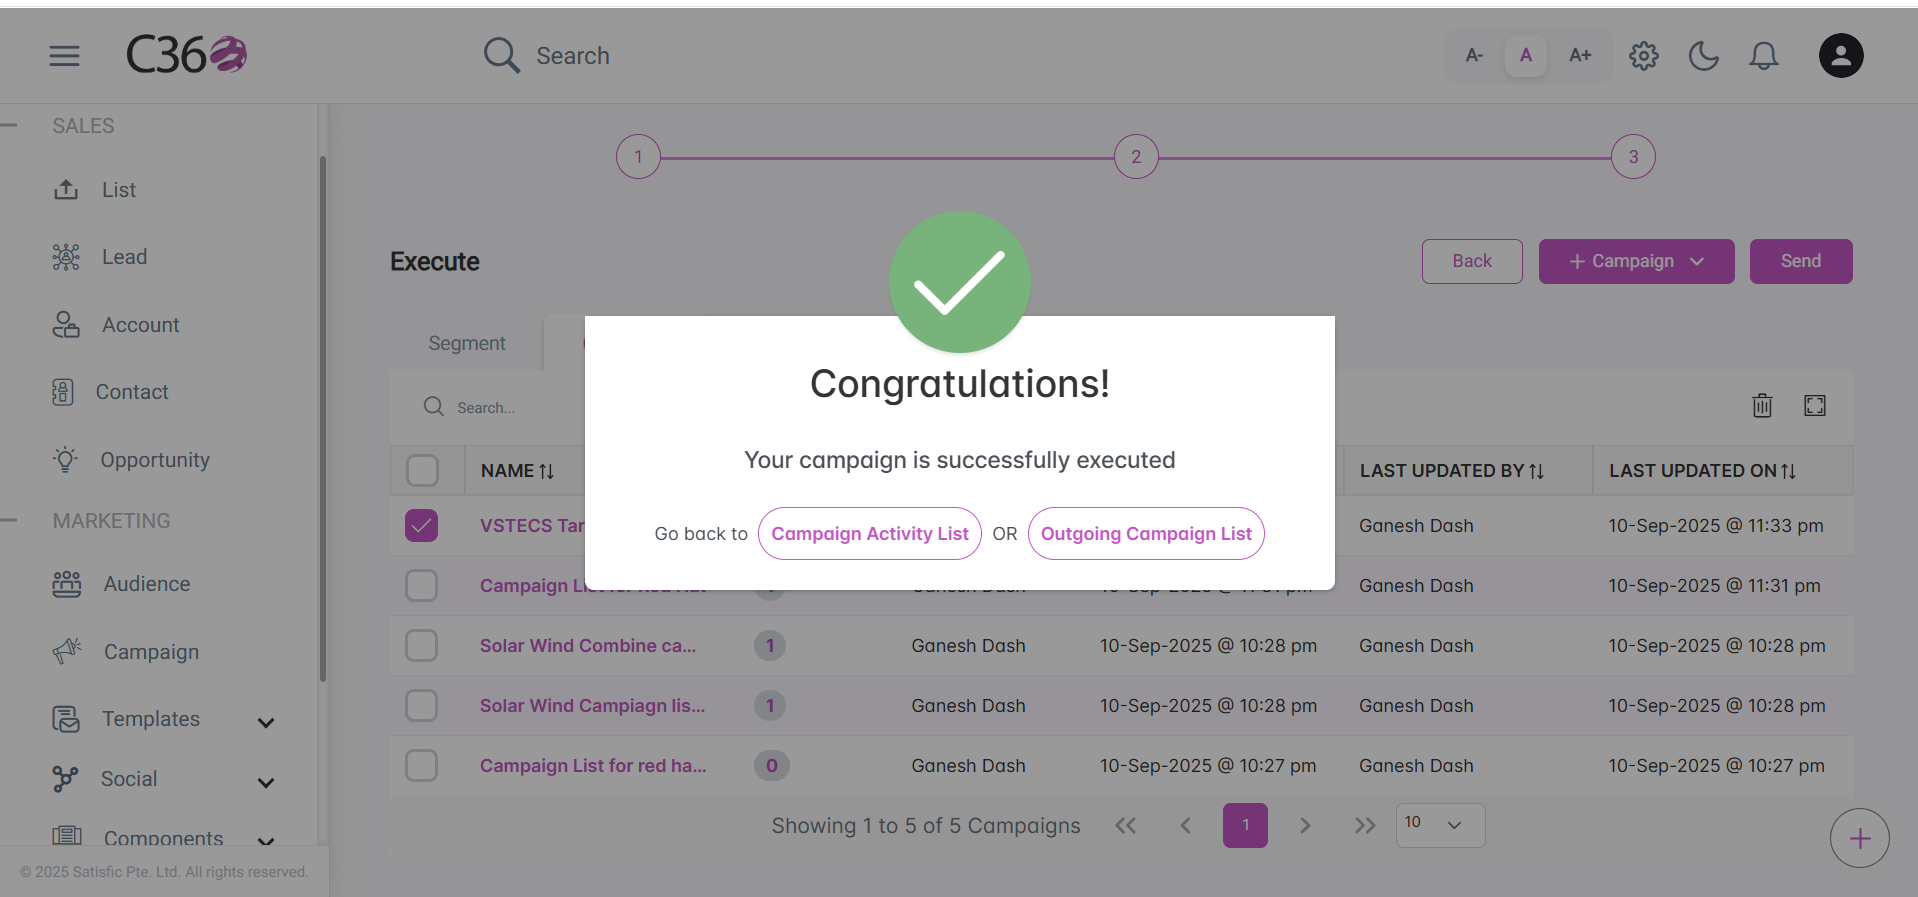
- Confirm send:
After sending, a confirmation modal appears with navigation options back to Campaign List or Outgoing Campaigns.
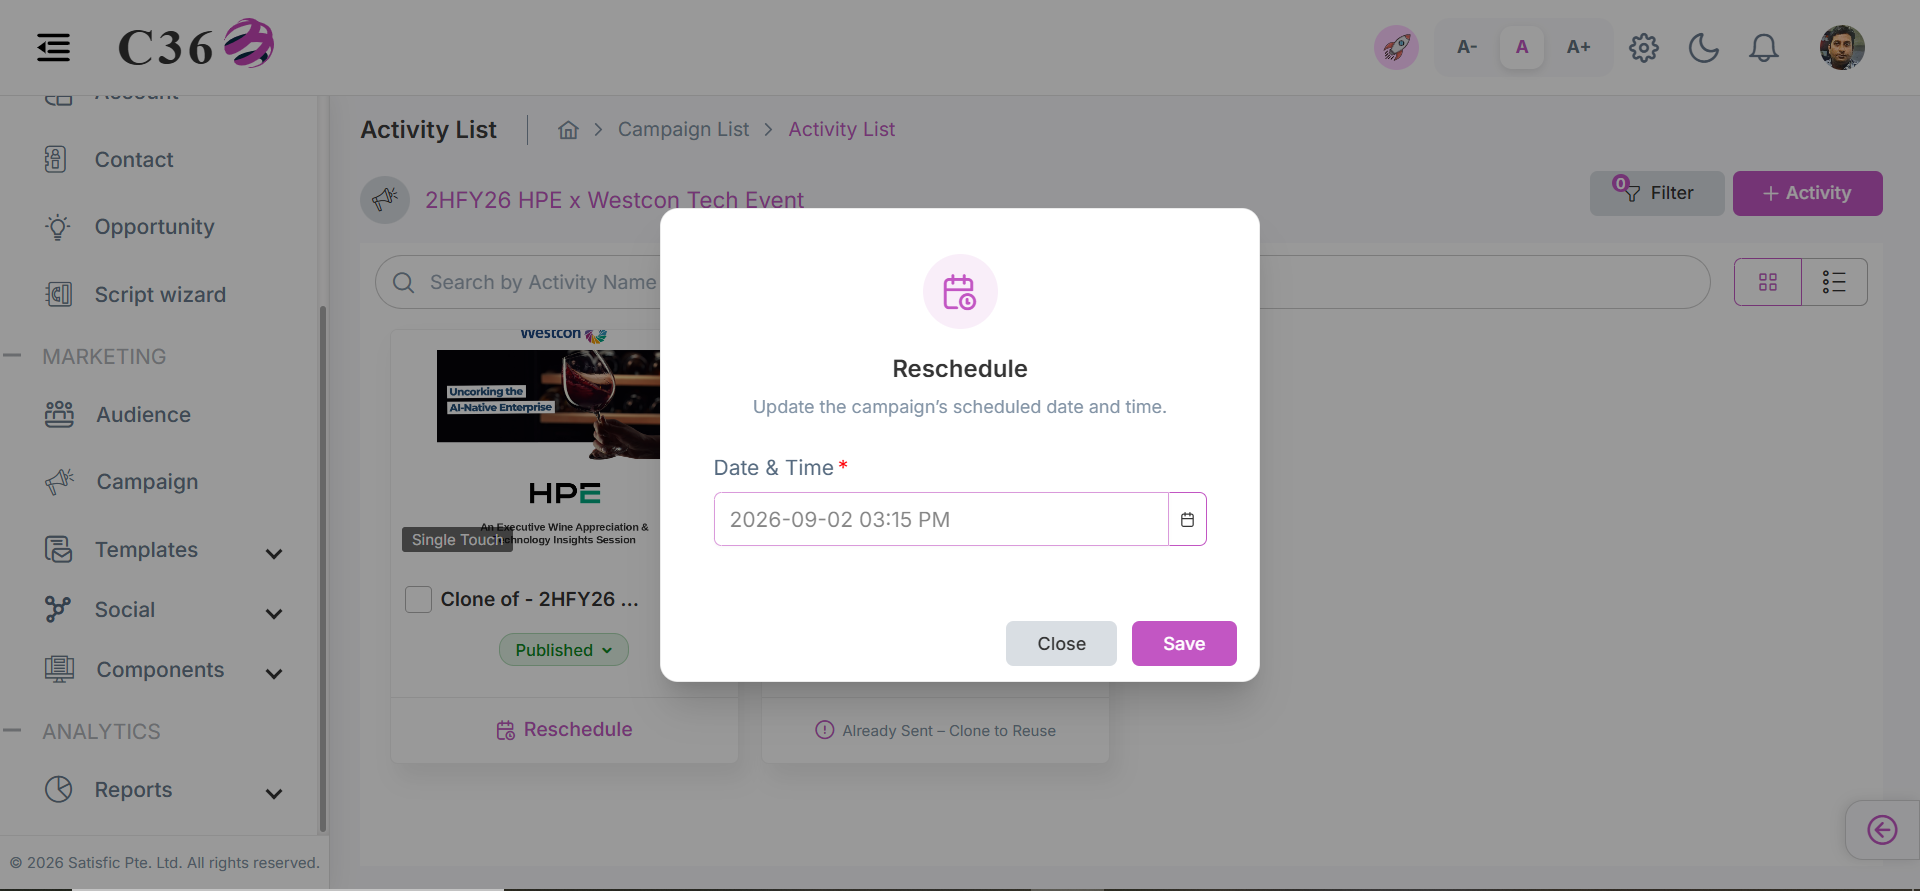
- Reschedule:
- You can reschedule the single touch activity after it has been scheduled.
- For rescheduling, go to activity list view and click on the Reschedule.
- Select the new date and time and click on Save.
🔀 Execute a Multi Touch Campaign
- Click Execute to open the Builder canvas.
-
Configure workflow blocks:
- Add or edit action blocks.
- Validate the workflow.
-
Use available options:
- Back — return to Campaign Preview
- Update & Close — save changes and exit
- Update & Next — proceed to Preview
-
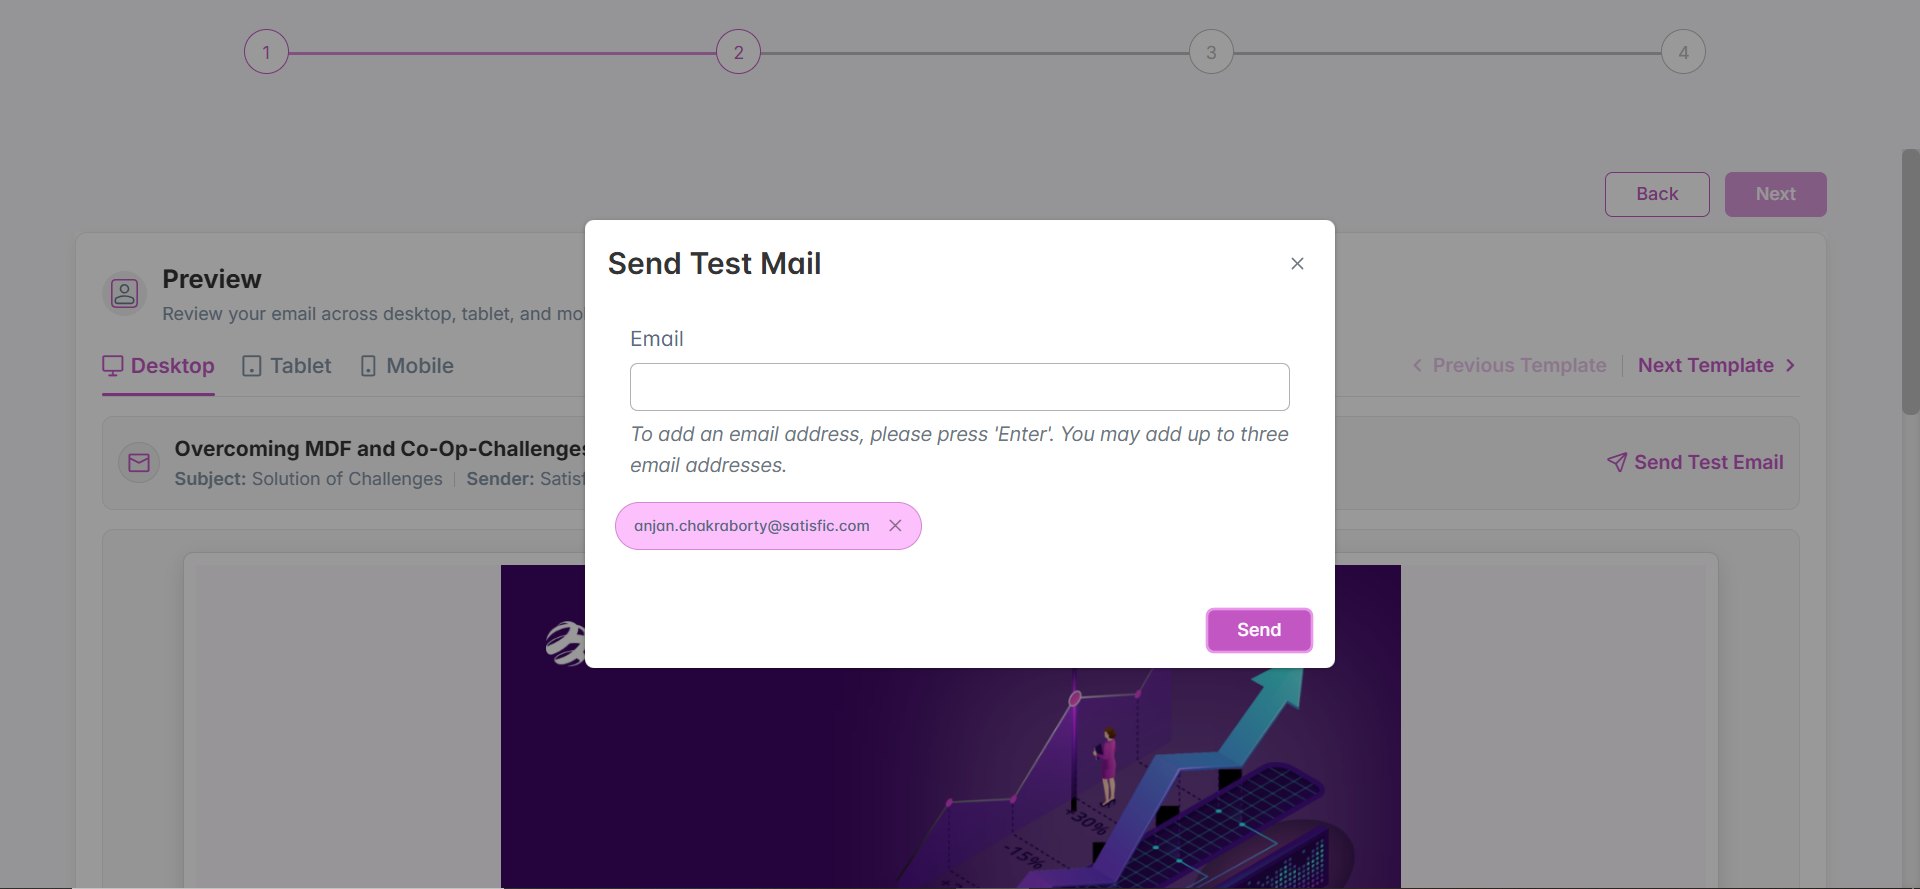
Test each email:
- Click on Next Template to test mails one by one.
- Enter a test recipient address.
- Send test mails to confirm content.
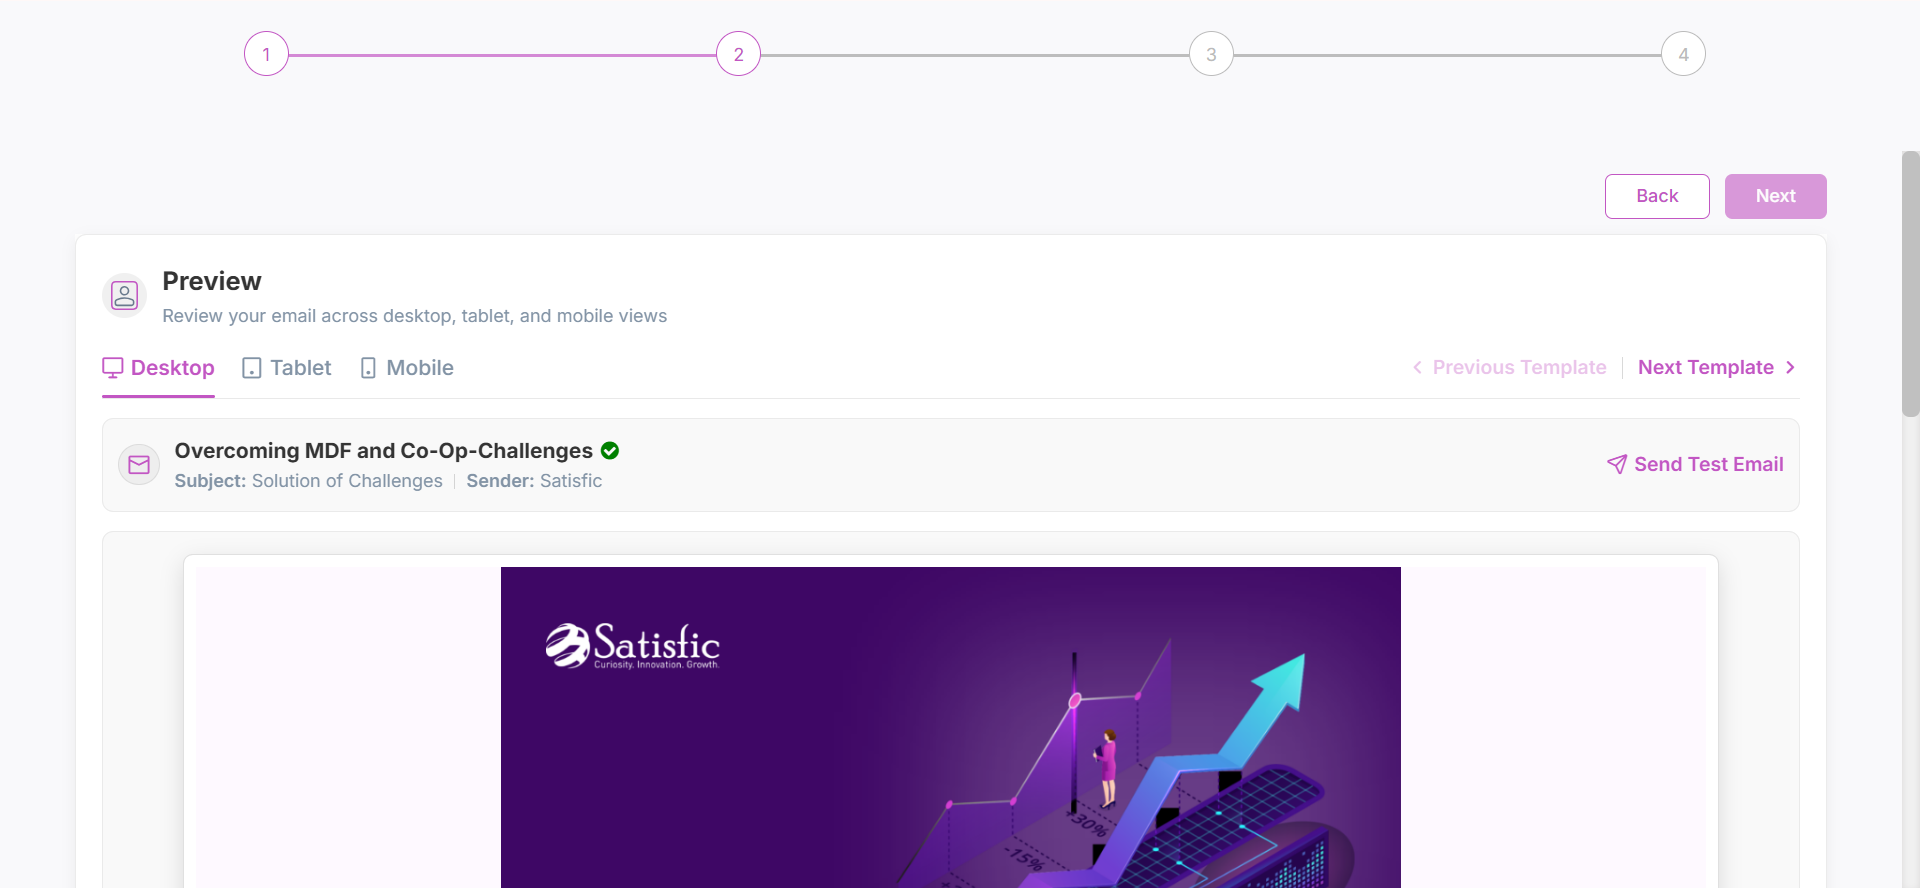
- Preview stage:
- A carousel displays all emails in the workflow.
- Emails that pass test verification are marked as verified.
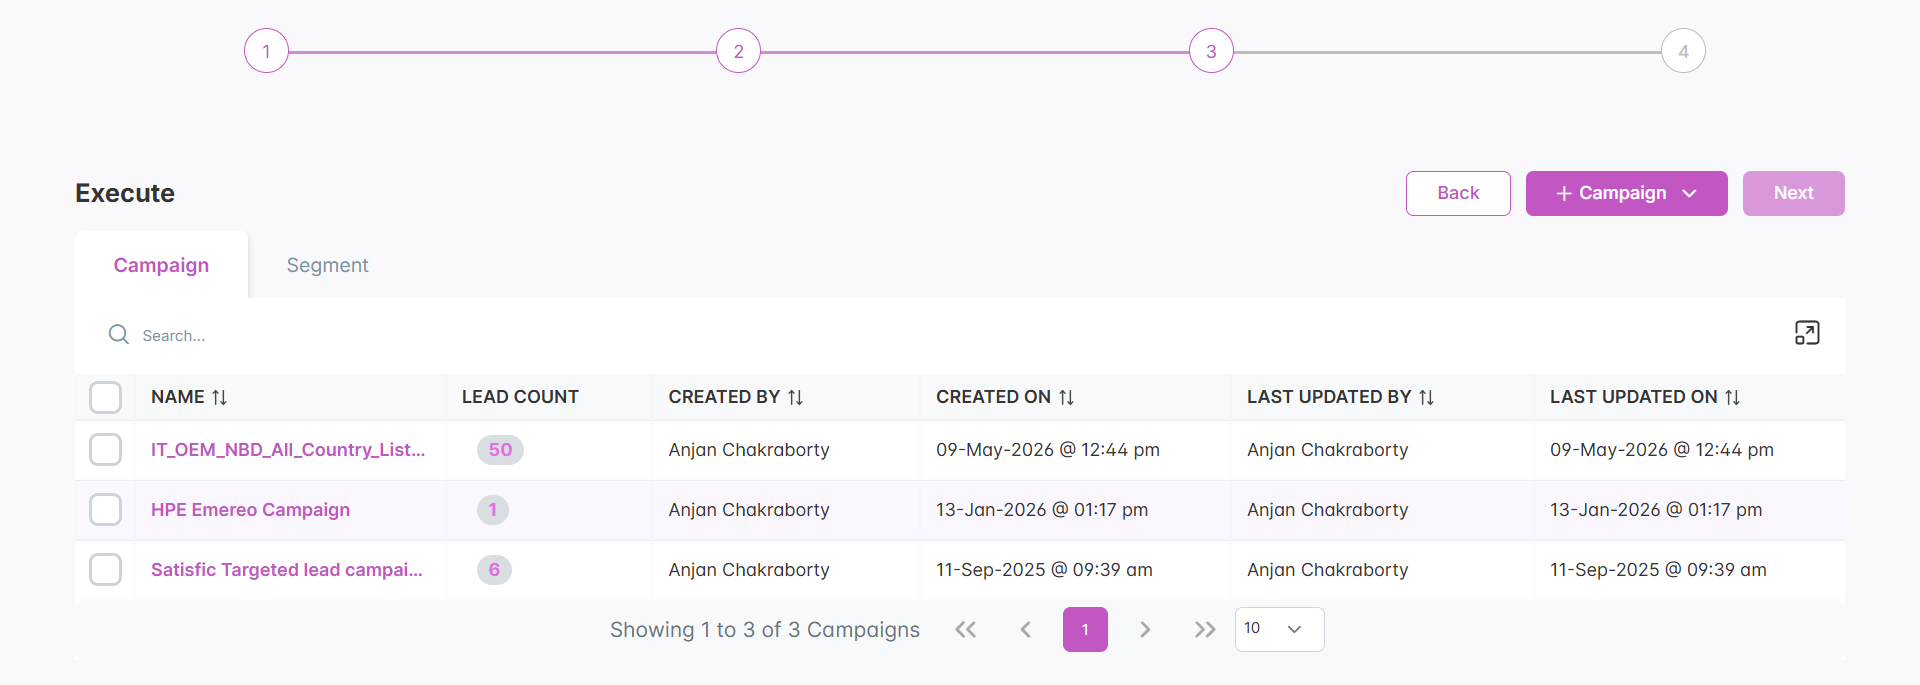
- Select recipients:
- Send to the entire group or select leads.
- Import CSV files if required.
- Confirm send:
After execution, a confirmation modal appears with navigation links.
📌 Quick Reference: Activity Management
- View — Activity tab inside Campaign
- Add — Click Add Activity
- Edit / Clone / Delete — Use the icons or top actions
- Preview — Eye icon
- Execute — Execute button per activity